background image


14 


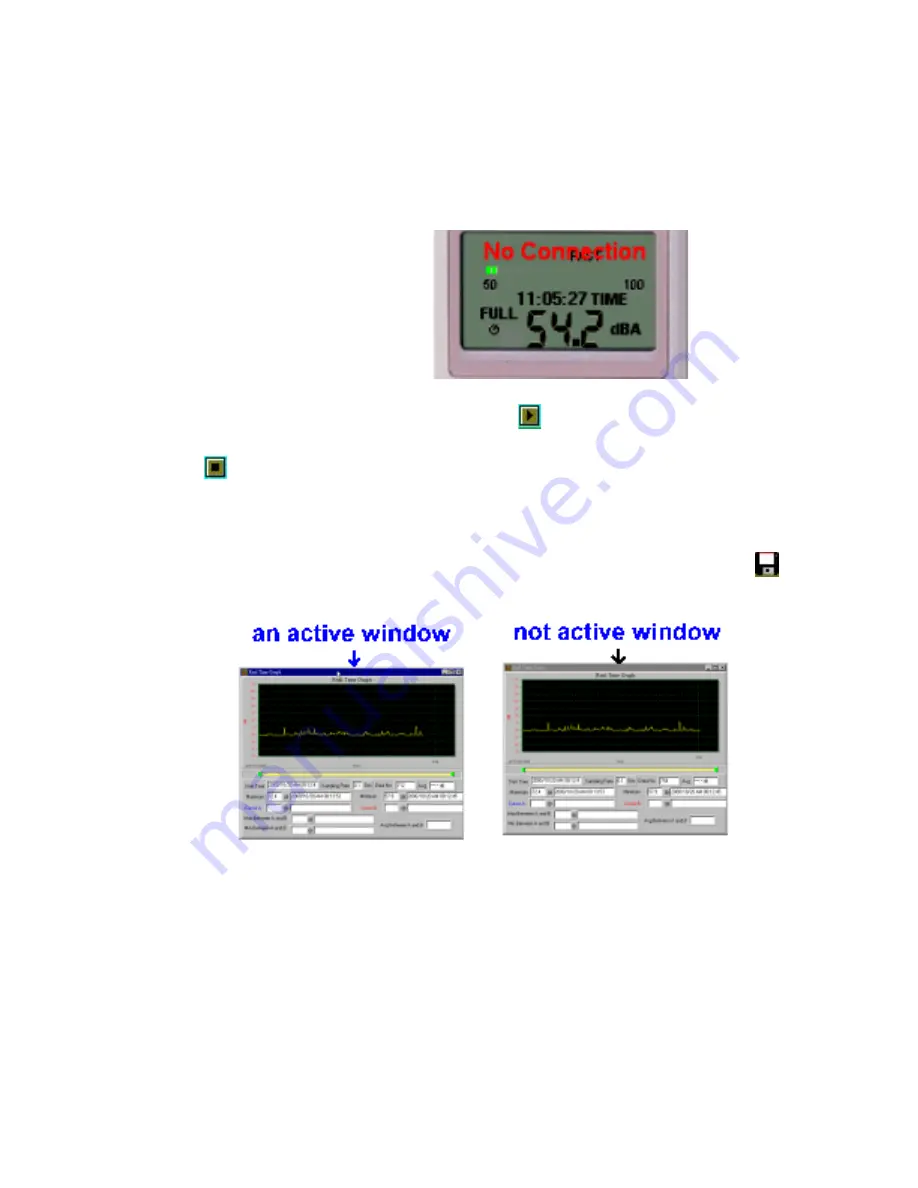
3.If the connection is successful the panel will display the same value as the 

Sound  Level  Meter. I f i t f ailed t o c onnect t he m eter w ith t he  PC, i t  will 

display "No Connection" on the panel window in TestLink AK –73X. 


4.When the connection is successful, click 

  to start recording real time data 

and there will be a waveform on the Real Time Graph Window. 

5.Click 

  to start recording. 

(2.) How to save the recorded real time data to a file?


1.Click on t he gr aph  window  you  want t o s ave  and t he gr aph  window  will 

become active, then choose File | Save from main menu or click 

  from 

the tool bar. 


2. There will be a save dialog window for you to choose the file name and file 

type to save. There are three types of file names you can choose, binary file 

(*.ghf), text file (*.txt) and EXCEL format file (*.csv). The *.ghf file use much 

fewer disk space to save the data than the other two file format, but it can 

only b e us ed  in T estLink A K-73X. T ext f ile c an be  opened b y T estLink 

AK-73X and an y ot her  word pr ocessor pr ogram l ike w ord, no tepad et c. 

EXCEL  format  file  can b e  opened  by  TestLink  AK-73X  and M icrosoft 

EXCEL. 


www.

GlobalTestSupply

.com

Find Quality Products Online at:

[email protected]

Summary of Contents for 732A

Page 1: ...Model 732A 735 Digital Sound Level Meter USER MANUAL www GlobalTestSupply com Find Quality Products Online at sales GlobalTestSupply com ...

Page 2: ...AND FUNCTIONS 5 V CLOCK INTV SETUP 6 DataLogger 6 Clock Setup 6 Recording Interval Setup 7 Auto Power Off 7 VI CALIBRATION PROCEDURES 7 VII MEASUREMENT PREPARATION 8 VIII OPERATING PRECAUTIONS 8 IX MEASUREMENT 9 X Setup TestLink AK 73X Sound Level Meter RS232 interface software 9 www GlobalTestSupply com Find Quality Products Online at sales GlobalTestSupply com ...

Page 3: ...struments Safety symbols Comply with EMC When servicing use only specified replacement parts II GENERAL DESCRIPTION Thank you for using our Data Logger Sound Level Meter To ensure that you can get the most from it we recommend that you read and follow the manual carefully before use This unit conforms to the IEC651 type2 ANSI S1 4 Type2 for Sound Level Meters This D ata Lo gger Sound Level Meter i...

Page 4: ...l 732A Alarm function OVER is when input is more than the upper limit of range UNDER is when input is less than the lower limit of range MAX MIN hold Holds readings the Maximum and Minimum Value AC output 1 Vrms at FS full scale Output impedance Approx 100Ω FS means the upper limit of each level range DC output 10mV dB output impedance approx 1KΩ Power supply One 9V battery 006P or IEC 6F22 or NED...

Page 5: ...ry Accessories 9V battery carrying case Screwdriver Instruction manual Windscreen 3 5 ψ plug software RS 232 cable optional model 732A IV NAME AND FUNCTIONS OPEN MANUAL FOR SAFETY NEDA 1604 6F22 006P PLEASE READ 9V BATTERY 2 1 3 4 5 7 6 9 RS 232 CAL OUTPUT DC 9V SETUP POWER UP OPTIONS 30 Lo Med Auto Hi 50 30 80 REC MAX MIN CLOCK 80 dB 100 dB 130 dB 130 dB LEVEL SLOW INTV FAST C A 8 www GlobalTestS...

Page 6: ...20dB Following items for model 735 AUTO A uto Level range selective REC Recording Datalogger FULL Memory full Auto Power OFF active 3 Power Backlight button The I key turns the sound level meter ON or OFF and backlight ON OFF Press it once to turn on the sound level meter Press it again for moment to turn ON or OFF backlight Press and hold this button 3 seconds to turn the unit OFF Note When the u...

Page 7: ... will be displayed press again and it will stop recording 6 Frequency Weighting select button A A Weighting Used for general sound level measurements C C Weighting Used for checking the low frequency content of noise If the C Weighted level is much higher than the A weighted level then there is a large amount of low frequency noise 7 Time weighting select button FAST for normal measurements SLOW f...

Page 8: ...but ton t he m eter w ill begin recording and pr essing the REC button aga in will s top recording If you want to clear the memory power off the meter t hen press and ho ld t he REC b utton and t hen press power button and hold it for at least 5 seconds then LCD will show CLR and SURE to clear the memory Clock Setup 1 pr ess an d hold the A C but ton a nd t hen power o n t he meter 2 press MAX MIN...

Page 9: ...ut ton t o cancel Auto Power Off When the meter is turned on the default auto power off is enabled The meter will po wer i tself of f a fter 30 minutes i f no k eys are pressed and n o R S232 communication is established To disable the auto power off feature press and hold the FAST SLOW button while using the on off button to turn the unit on Once this is done you will no longer see the symbol on ...

Page 10: ... into the DC 9V connector on the side panel VIII OPERATING PRECAUTIONS 1 Wind blowing across the microphone would bring additional noise When us ing the i nstrument i n t he pr esence of wind a lways us e t he windscreen to eliminate unwanted noise 2 Calibrate the instrument before operation if the instrument was not in use for a long period of time 3 Do not store or operate the instrument at high...

Page 11: ... period using any of the time weightings and ranges Press t he M AX MIN button 2 s econds t o c lear t he MAX MIN r eading MAX MIN symbol disappears 6 Turn OFF the instrument and remove battery when not in use X Setup TestLink AK 73X Sound Level Meter RS232 interface software included with model 735 The TestLink package contains 1 80mm CD 2 Custom designed RS232 cable for TestLink System Required ...

Page 12: ...tive window when the caption bar is highlighted data to the disk Print Print the data of the active window graph or list Printer Setup Select printer File Exit Terminates TestLink program View Control Panel By opening the Panel Window the user can control the meter via the button in this window View Real Time Graph Open Real Time G raph t o di splay a nd graph t he present data Real Time Data Run ...

Page 13: ... the graph click on t he graph to m ark a cross sign on t he graph When selected the mouse cursor will become an I sign when moving to the graph click on the graph to annotate Color graph Monochrome graph You can choose a rectangle area on the graph to zoom in for detail There are two vertical lines CURSOR A and CURSOR B in the graph There are www GlobalTestSupply com Find Quality Products Online ...

Page 14: ...etween cursor A and B and these data will update automatically when cursor A or B is moving You c an double c lick t he gr aph t o call t he opt ion di alog T he option d ialog allowed you to customize your graph style And you can right click the graph real time graph is not allowed to call out the popup menu You can Zoom this graph by using mouse To Zoom 1 Press the left mouse button and drag the...

Page 15: ... t ime r ecording rate and record numbers For examples It will transfer data to a graph and tabular on the right hand side every time after you load recorded data from the Sound Level Meter and you can click at any data set to change the set for graph On the right hand side is the waveform graph and statistic of the data set you choose Tutorial Quick Start to Use AK 73X TestLink 1 Recording real t...

Page 16: ...r aph window will become active then choose File Save from main menu or click from the tool bar 2 There will be a save dialog window for you to choose the file name and file type to save There are three types of file names you can choose binary file ghf text file txt and EXCEL format file csv The ghf file use much fewer disk space to save the data than the other two file format but it can only b e...

Page 17: ...ress the REC button of the meter to start recording data 3 After a while press REC button again to stop recording data 4 Connect the Sound Level Meter to PC 5 Start AK 73X program 6 Choose Data Logger from main menu or click from tool bar 7 In reference to Data Logger see DataLogger www GlobalTestSupply com Find Quality Products Online at sales GlobalTestSupply com ...

Page 18: ...estLink AK 73X Answer Uninstall TestLink AK 73X by launching the Add Remove Programs applet out of the Control Panel highlighting the AK 73X and c licking on t he Add Remove icon then it will r emove the AK 73X f older an d f iles f rom your computer 4 Why would loading data fail Answer This might be caused by the slow response from some of the notebook PC system 5 How to zoom in on the graph Answ...

Page 19: ...anty registration within fifteen 15 days of purchase Exclusions This warranty does not apply in the event of misuse or abuse of the product or as a result of unauthorized alterations or repairs The warranty is void if the serial number is altered defaced or removed B K Precision Corp shall not be liable for any consequential damages including without limitation damages resulting from loss of use S...

Page 20: ...e using with the device Customers not on open account must include payment in the form of a money order or credit card Return all merchandise to B K Precision Corp with pre paid shipping The flat rate repair charge for Non Warranty Service does not include return shipping Return shipping to locations in North American is included for Warranty Service For overnight shipments and non North American ...

Reviews: