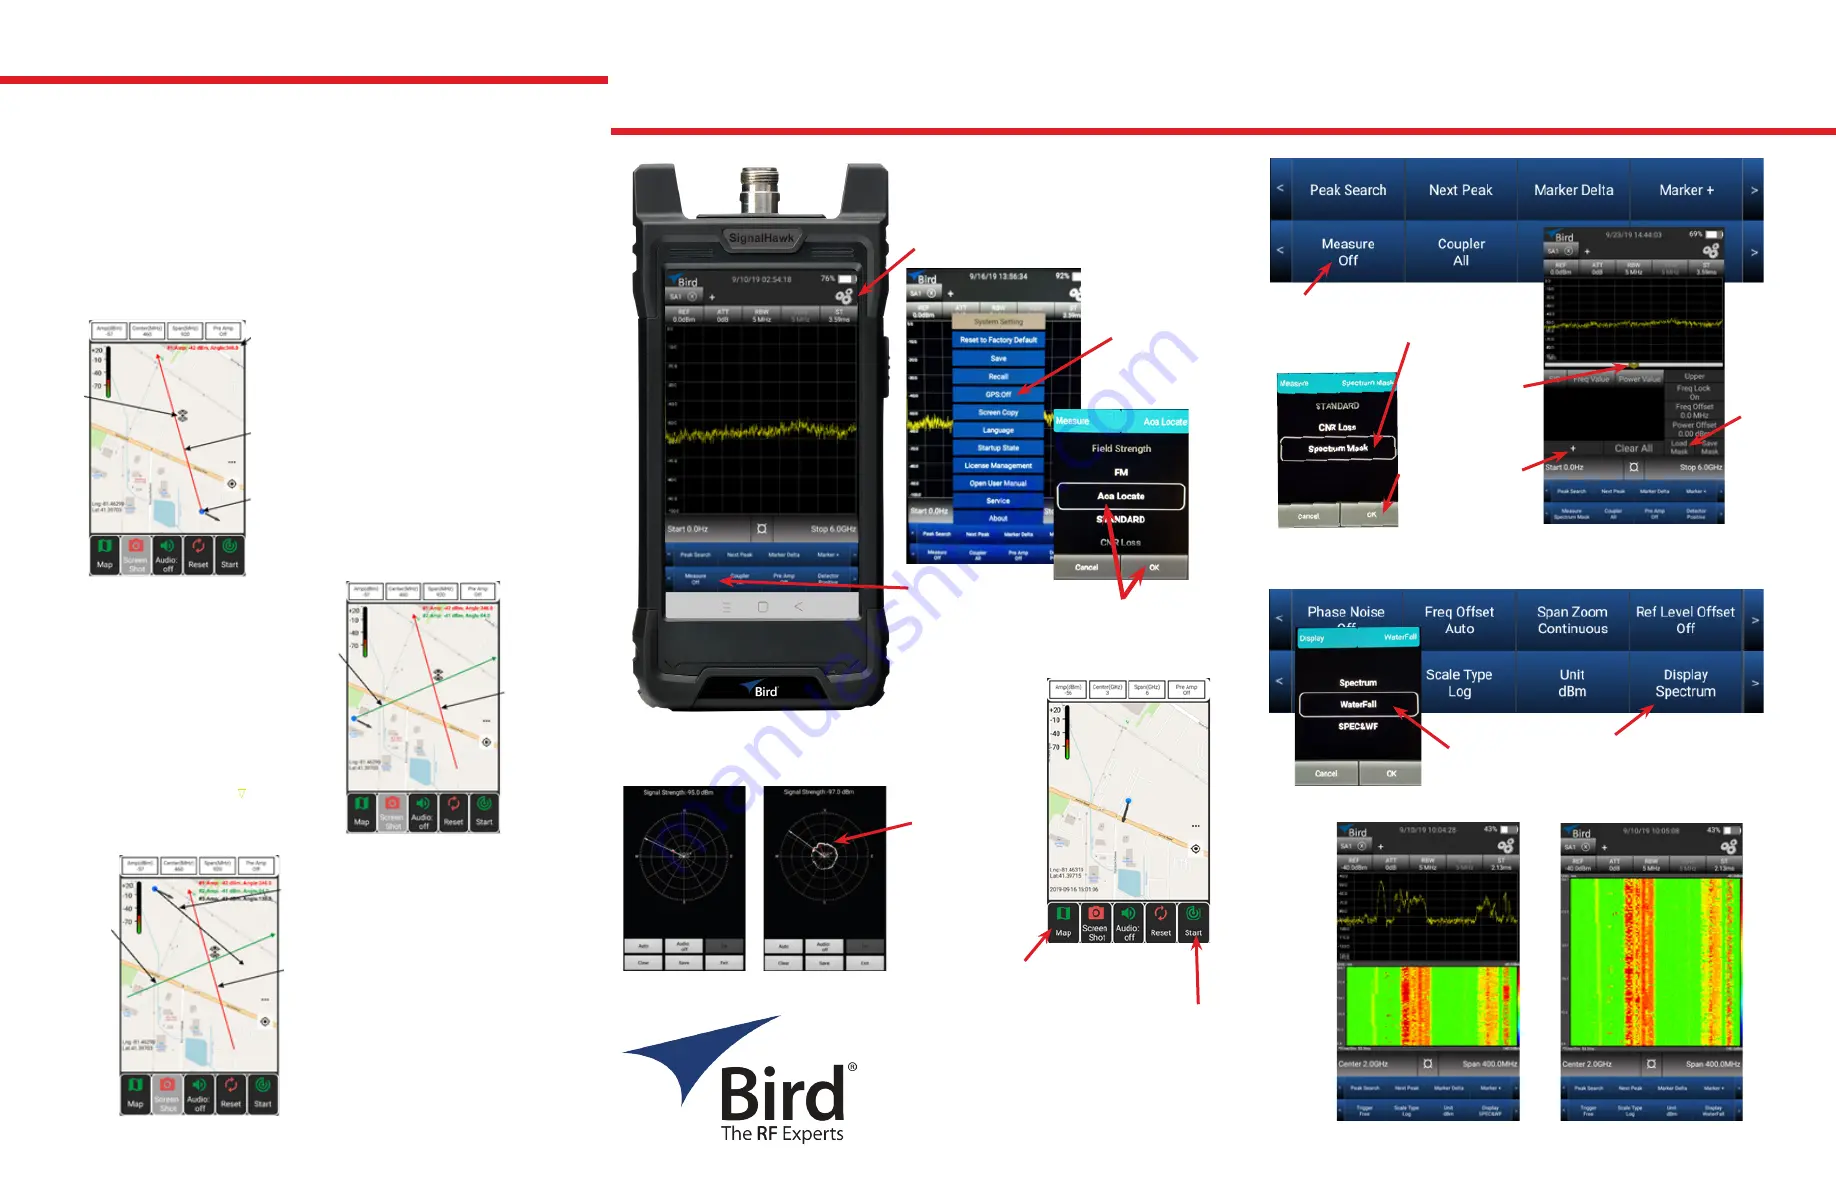
SH-60S-AOA extends the capability of the SH-60S-TC by adding the ability to triangulate the location
of an interferer on a map for signals between 9 kHz & 6 GHz.
SH-60S-AOA, RF Spectrum Analyzer
SH-60S-AOA Triangulation
For more info:
t: 440.248.1200
www.birdrf.com
quick-start-guide-signalhawk-AoA-08302022
Triangulation is one technique you may use to determine the location of an of an RF
emitter. The principle is to take three or more measurements from different locations,
with each measurement location being 80 to 100 degrees in azimuth away from the
location of the previous measurement. See below for an example of the triangulation
technique.
Due to reflections of the emitter’s RF signal (multi-path) and the gain and directivity of
the antenna used with the SignalHawk, the exact location of the emitter may not be
pinpointed with the first three measurements. However, the measurements will form a
triangle in the area of the emitter. Making additional measurements in the vicinity of the
triangle formed by the initial measurements, will help refine the location.
k
Tap the System Settings icon.
l
Tap the GPS
button to turn
GPS on.
m
Tap Measure
n
Select AoA Locate
o
Press OK
AoA Locate (Angle of Arrival)
j
Turn on SignalHawk’s WiFi and
connect to a WiFi network.
Start of measurement
Slowly rotate 360°
Tap SAVE
p
Tap MAP to download
an offline map.
q
Tap to START measurement.
r
Connect a handheld directional antenna, tuned to the
frequency of the interfering signal to the SignalHawk.
Red line indicates
direction of
strongest signal.
Repeat until 3 or more
measurements have
been completed & form
a triangle shape near the
assumed position of the
emitter.
Spectrum Mask
Waterfall/spectrogram Display
j
Tap on Measure
k
Scroll to Spectrum Mask
l
Press OK
Tap here to collapse
or expand screen.
Tap here to create
your own mask. Press
Save Mask when done.
Clear All to erase mask
settings.
Tap Load
Mask to use
a previously
saved mask.
j
Tap on DISPLAY
k
Select Waterfall or SPEC&WF, press OK
l
Selecting Spectrum returns to spectrum
analyzer display
SPEC&WF
Waterfall
First
Measurement
Second Measurement
Second
Measurement
SignalHawk
Location
First
Measurement
Third
Measurement
Third Measurement
Second
Measurement
Emitter
Location
First
Measurement
First Measurement
Measured Signal
St Azimuth


