background image

Pre-programmed convenience configurations

F

B = with direction

recognition

D = medium
F1 = medium
F2 = active
F3 = off
F4 = standard
F5 = low
F6 = off

B = with direction

recognition

D = medium
F1 = short
F2 = active
F3 = off
F4 = standard
F5 = medium
F6 = off

B = without direction

recognition

D = high
F1 = medium
F2 = active
F3 = high
F4 = standard
F5 = off
F6 = off

B: direction recognition
D: field size
F1: additional output holding time
F2: output signal

oder

or

Address 1

Address 2

Address 3

Address 4

1

2

3

4

1

2

o

n

1

2

Changing the sensor

address 

Interrupt the connection

until button G flashes –

then press the new sensor

address [from 1 to 4]

C1

Standard operation

C2

Sidewalk setting - cross

traffic avoidance

C

3

High-risk facilities

RE

GLO

bea

m

For safety reasons the connection is

automatically interrupted after 30 min. 

To restore the connection, see next.

1

2

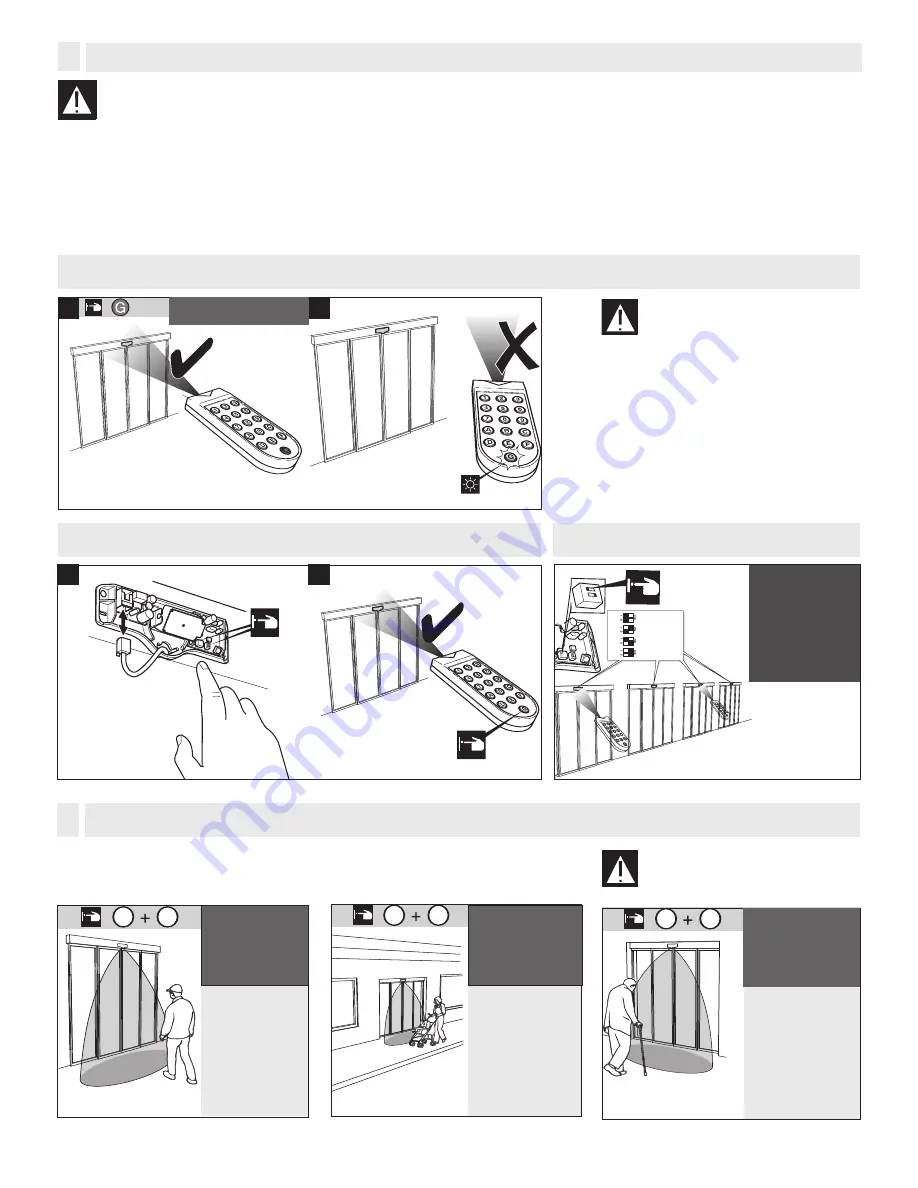
Sensor address lights up (1 to 4)

4

Establish connection between the RC Duo remote and the sensor

Restore communication with the RC Duo [if it turned off after 30 minutes]

power off and on

OR

press a push

button

direct remote
control towards
the sensors

Multiple sensors set-up: assign a unique address to each

F3: slow motion detection (SMD)
F4: mounting height
F5: cross  traffic optimization
F6: interference suppression

If the convenience configuration does not fit
your application, use custom settings.

The RC Duo is bi-directional. 
Flashing keys on the RC Duo indicate that the settings
have not been saved yet.
Static lit keys on the RC Duo indicate that the settings
have been saved.

Settings with RC Duo [Bi-directional remote control]

E

We recommend first programming the sensor with a
convenience configuration and then fine tune settings
if needed.

Summary of Contents for Reflex ES

Page 1: ...nsure that moving door parts will not catch any wires and cause damage to equipment Ensure compliance with all applicable safety standards i e ANSI A156 10 upon completion of installation Safety instructions Microwave motion detector for automatic pedestrian doors with direction recognition Questions Call us at 800 252 1272 8am 5pm central standard time 1 2 3 4 5 1 2 5 4 3 Installation flash press...

Page 2: ...ectionrecognitionon 5 Directionrecognitionoff standard 6 Directionrecognitionoff high 1 x 1 9 F E E F x 1 6 x 1 x 1 1 x 1 x 1 3 Sensitivity adjustment completion Function adjustment completion Manual Set up w o RC Duo remote control B 3 4 4 2 convenience function check convenience function setting x 1 x 1 x 1 9 2 sec Stufe Step 1 2 3 4 5 6 7 8 9 sensitivity level check Connections RJ12 Plug in scr...

Page 3: ... sec Testing of the settings Measure by walking according to ANSI 156 10 D The use of the clip requires the amplification F41 Use the clip for wide fields according to the table on the left At mounting heights above 10 wide fields are set using the frontal inclination angle section C1 and the sensitivity section H Other field adjustments normal and wide detection field After removing or putting th...

Page 4: ...ection is automatically interrupted after 30 min To restore the connection see next 1 2 Sensor address lights up 1 to 4 4 Establish connection between the RC Duo remote and the sensor Restore communication with the RC Duo if it turned off after 30 minutes power off and on OR press a push button direct remote control towards the sensors Multiple sensors set up assign a unique address to each F3 slo...

Page 5: ...ield with clip min 1 64 0 5 m max 8 20 2 5 m min 1 64 0 5 m max 8 20 2 5 m min 3 28 1 0 m max 13 12 4 0m min 1 64 0 5 m max 6 56 2 0 m Adjusting the width of SMD area 7 1 9 Hold time setting B 2 B 1 E 2 B 1 E 2 B 2 B 1 E 1 B 1 E 1 Direction recognition G B with direction recognition D medium F1 short F2 active F3 off F4 standard F5 low F6 off B with direction recognition D high F1 medium F2 active...

Page 6: ... bircherreglomat com DO NOT LEAVE ANY PROBLEMS UNRESOLVED NEVER SACRIFICE SAFETY FOR ANY REASON Technical data M 6 A 1 ca 15 min A 2 Manual door opening closing through the sensor remote K Interferences avoidance vibration wind rain L on off F 5 1 9 F 6 1 F 6 2 on off suggested module position 30 3 m 9 84 F 4 1 3 m 9 84 on 2 1 2 2 active passive Relay switches on upon detection Relay switches off ...

Page 7: ...adiate radio frequency energy and if not installed and used in accordance with the instructions may cause harmful interference to radio communications However there is no guarantee that interference will not occur in a paticular installation If this equipment does cause harmful interference to radio or television reception which can be determined by turning the equipment off and on the user is enc...

Reviews: