


Chapter 2: Hardware Installation | 9
TB250-BTC PRO / TB250-BTC+
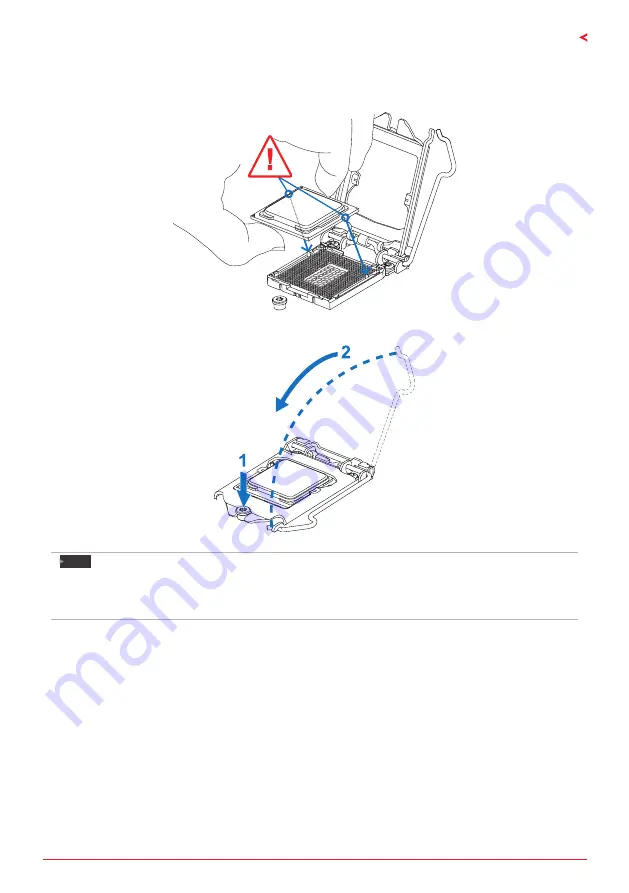
Step 4: Hold processor with your thumb and index fingers, oriented as shown. Align the
notches with the socket. Lower the processor straight down without tilting or sliding the
processor in the socket.
Step 5: Hold the CPU down firmly, and then lower the lever to locked position to complete the
installation.
Note
»
Ensure that you install the correct CPU designed for LGA1151 socket.
»
The CPU fits only in one correct orientation. Do not force the CPU into the socket to prevent
damaging the CPU.
Summary of Contents for TB250-BTC PRO
Page 6: ...6 Chapter 1 Introduction 1 5 Motherboard Layout TB250 BTC PRO Note represents the 1st pin...
Page 7: ...Chapter 1 Introduction 7 TB250 BTC PRO TB250 BTC TB250 BTC Note represents the 1st pin...
Page 35: ...FCC FCC 15 Class B BIOSTAR BIOSTAR BIOSTAR CE 2004 108 CE 2006 95 CE 1999 05 CE...
Page 37: ...3 TB250 BTC PRO TB250 BTC 1 1 0 45 1 2 Serial ATA x2 ATX I O x1 x1 x1...
Page 40: ...6 1 5 TB250 BTC PRO 1...
Page 41: ...7 TB250 BTC PRO TB250 BTC TB250 BTC 1...
Page 42: ...8 2 1 CPU 1 CPU CPU 2 3...
Page 43: ...9 TB250 BTC PRO TB250 BTC 4 CPU CPU 5 CPU LGA1151 CPU CPU CPU CPU...
Page 44: ...10 2 2 1 CPU CPU CPU 2 2 CPU CPU CPU CPU...
Page 56: ...22 UEFI BIOS 7 DEL BIOS Save Exit Restore Defaults Save Changes and Reset BIOS BIOS BIOS Save...
Page 58: ...24 UEFI BIOS eHot Line eHot Line Send Send Do Not Send Save As...


