8 |
Chapter 2: Hardware installation
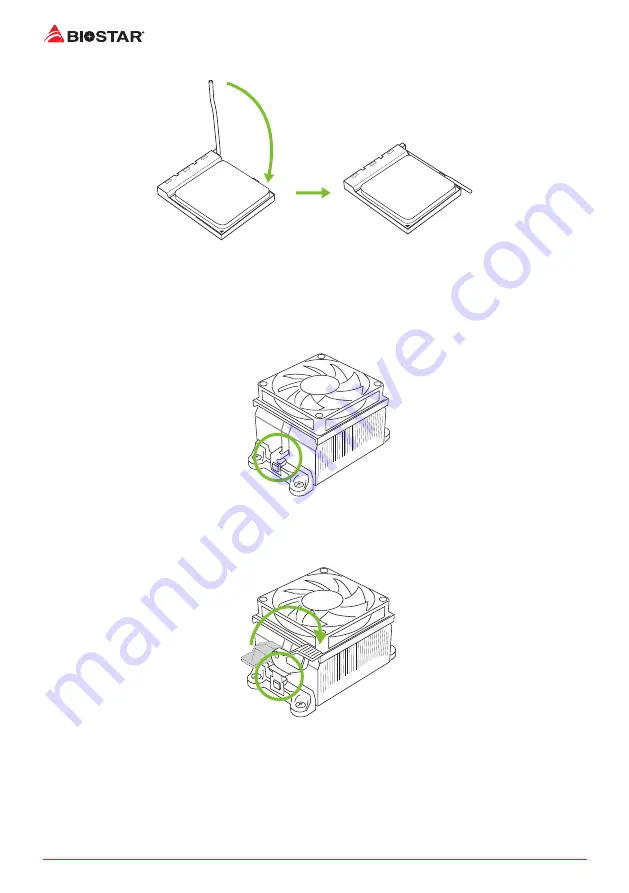
Step 4: Hold the CPU down firmly, and then close the lever to locked the position
2.2 Install a Heatsink
<TypeA>
Step 1: Place the heatsink and fan assembly onto the retention frame. Match the heatsink clip
with the socket mounting-lug. Hook the spring clip to the mounting-lug.
Step 2: On the other side, push the retention clip straight down to lock into the plastic lug on
the retention frame, and then press down the locker until it stops.
Summary of Contents for Racing X370GT7
Page 6: ...6 Chapter 1 Introduction 1 5 Motherboard Layout Note represents the 1st pin...
Page 42: ...42 APPENDIX I Specifications in Other Languages this page intentionally left blank...
Page 43: ...FCC FCC 15 Class B BIOSTAR BIOSTAR BIOSTAR CE 2004 108 CE 2006 95 CE 1999 05 CE...
Page 45: ...3 X370GT7 1 1 0 45 1 2 Serial ATA x4 ATX I O x1 x1 x1...
Page 48: ...6 1 5 1...
Page 49: ...7 X370GT7 2 1 CPU 1 CPU 2 90 3 CPU CPU 4 CPU...
Page 50: ...8 2 2 A 1 2...
Page 51: ...9 X370GT7 B 1 2 CPU CPU CPU CPU...
Page 67: ...UEFI BIOS 25 X370GT7 eHot Line eHot Line Send Send Do Not Send Save As...
Page 69: ...UEFI BIOS 27 X370GT7 RACING GT Utility RACING GT 1 2 3 4...
Page 70: ...28 UEFI BIOS 1 2 3 Windows 7 32 64bit 10 64bit 1 2 DVD RACING GT 3 RACING AC 97 1 2 3 LO HI...
Page 72: ...30 UEFI BIOS 1 CPU 2 3 CPU 4 CPU 5 6 7...
Page 77: ...35 X370GT7 RAID 1 2 RAID 1 RAID1 RAID 2 2 RAID 1 100 2 RAID 10 RAID 0 RAID 1 4 6 8 RAID RAID1...


