background image


25 

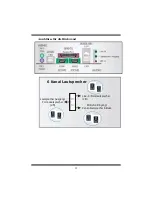
Anschlüsse für die Rückwand


6 Kanal Lautsprecher


Lautsprecher Ausgang/

Fornt-Lautsprecher

(L/R)


Mikrofon Eingang/ 

Zentrallautsprecher & Bass


Line-In/ R  cklautsprecher

ü

(L/R)


Summary of Contents for P4 TSE-D2

Page 1: ...ference will not occur in a particular installation The vendor makes no representations or warranties with respect to the contents here of and specially disclaims any implied warranties of merchantabi...

Page 2: ...nnectors Slots 7 DEUTSCH 14 Die Spezifikationen von P4TSE D2 14 Verpackungsinhalt 16 Einstellung der Jumper 16 Installation der CPU 16 DDR DIMM Modules DDRA1 DDRB1 17 Installation von DDR Modul 18 Jum...

Page 3: ...1 Layout of P4TSE D2 NOTE represents the first pin...

Page 4: ...der JGAME1 E ATX Power Connector JATXPWR2 T Front Panel Connector JPANEL1 F ATX Power Connector JATXPWR1 U Serial ATA Connector SATA1 2 G Front Audio Header JAUDIO1 V Case Open Connector JCL1 H Accele...

Page 5: ...single channel mode and 6 4GB s DDR 400 in dual channel mode Supports 128 Mb 256 Mb 512 Mb DDR technologies Supports only x8 x16 DDR devices Does not support registered DIMMs and ECC Supports four ban...

Page 6: ...Audio ports in vertical position 1 RJ 45 LAN jack optional PS 2 mouse and PS 2 keyboard 4 USB2 0 ports b FrontSide 1 floppy port supports 2 FDDs with 360K 720K 1 2M 1 44M and 2 88Mbytes 4 USB2 0 port...

Page 7: ...e pins the jumper is open The illustration shows a 3 pin jumper whose pin1and 2 are close when jumper cap is placed on these 2 pins Jumper open Jumper close Pin1 2 close CPU Installation Step1 Pull th...

Page 8: ...l Guidelines Matched DIMM configuration in each channel Same Density 128MB 256MB 512MB 1GB etc Same DRAM technology 128M bit 256M bit or 512M bit Same DRAM bus width x8 or x16 Both either single sided...

Page 9: ...break on the slot 2 Insert the DIMM vertically and firmly into the slot until the retaining chip snap back in place and the DIMM is properly seated Jumpers Headers Connectors Slots Floppy Disk Connect...

Page 10: ...nd performance especially with 3D graphics Communication Network Riser Slot CNR1 The CNR specification is an open Industry Standard Architecture and it defines a hardware scalable riser card interface...

Page 11: ...TXPWR1 10 12V 20 5V SPK PWR_LED HLED SLP RST 2 24 IR 1 23 IR ON OFF Pin Assignment Function Pin Assignment Function 1 5V 2 Sleep Control 3 NA 4 Ground Sleep Button 5 NA 6 NA NA 7 Speaker Speaker Conne...

Page 12: ...n system via keyboard and mouse JKBV1 jumper cap should be placed on pin 2 3 Power Source Selection for USB JUSBV1 JUSBV2 JUSBV3_4 JUSBV1 JUSBV2 JUSBV3_4 Assignment Description 1 3 Pin 1 2 close 5V JU...

Page 13: ...ower line 2 Set the jumper to Pin 2 3 Close 3 Wait for five seconds 4 Set the jumper to Pin 1 2 Close 5 Power on the AC 6 Reset your desired password or clear the CMOS data Game Header JGAME1 1 2 16 1...

Page 14: ...Power 5 Right Line Out Speaker Out Right 6 Right Line Out Speaker Out Right 7 Reserved 8 Key 9 Left Line Out Speaker Out Left 10 Left Line Out Speaker Out Left 11 Right Line In Rear Speaker Right 12 R...

Page 15: ...SB 6 USB 7 Ground 8 Ground 2 1 10 9 JUSB2 3 9 KEY 10 NC Back Panel Connectors 6 Channel Speakers Speaker Out Line In Rear Speaker Mic In Center Bass PS 2 Keyboard PS 2 Mouse Parallel Port JPRNT1 JCOM1...

Page 16: ...3 2GB s DDR400 f r Einzeln Kanal Modus Unterst tzung f r 128 MB 256 Mb und 512 Mb DDR Technologie Unterst tzung f r x8 x16 DDR Ger te Registrierte DIMMs und doppelseitig X 16 DIMMs werden nicht unter...

Page 17: ...auf der vertikalen Postion i 1 RJ 45 LAN Buchse optional PS 2 Maus und PS 2 Tastatur 4 USB2 0 Ports b Vorderseite 1 Floppy Port mit Unterst tzung f r 2 Diskettenlaufwerke 360KB 720KB 1 2MB 1 44MB und...

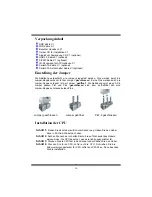
Page 18: ...mper ge ffnet Die Abbiildung zeigt einen 3 Pin Jumper dessen Pin1 und Pin2 geschlossen sind bzw es befindet sich eine Jumper Kappe auf diesen beiden Pins Jumper geschlossen Jumper ge ffnet Pin1 2 gesc...

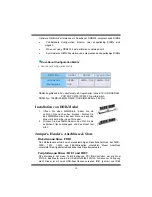
Page 19: ...s DDRA1 DDRB1 Dual Kanal Richtlinie Entsprechende DIMM Konfiguration f r pro Kanal Gleiches Dichte 128MB 256MB 512MB 1GB etc Gleiche DRAM Technologie 128M bit 256M bit oder 512M bit Gleiche DRAM Bus W...

Page 20: ...von DDR Modul 1 ffnen Sie einen DIMM Slots indem Sie die seitlich Chips nach au en dr cken Richten Sie das DIMM Modul so ber dem Slot aus dass das Modul mit der Kerbe in den Slot passt 2 Dr cken Sie...

Page 21: ...r PCI Slots aber es ist auch mit einem Accelerated Graphics Port ausgestattet AGP Karten verwenden die AGP Technologie um die Wirksamkeit und Leistung von Videosignalen zu verbessern besonders wenn e...

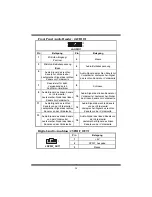
Page 22: ...10 12V 20 5V SPK PWR_LED HLED SLP RST 2 24 IR 1 23 IR ON OFF Pin Belegung Funktion Pin Belegung Funktion 1 5V 2 Schlaf Kontroll 3 Kein 4 Masse Schlaf Knopf 5 Kein 6 Kein Kein 7 Lautsprecher Lautsprec...

Page 23: ...JKBV1 Pin Belegung Beschreibung 1 3 Pin 1 2 geschlossen 5V 5V f r Tastatur und Maus 1 3 Pin 2 3 geschlossen 5V reservierte Spannung Durch 5V reservierte Spannung f r PS 2 Maus und PS 2 Tastatur zum E...

Page 24: ...ung f r JUSB2 3 zum Erwecken Anmerkung Um die Funktion Erwecken durch USB Ger te zu aktivieren m ssen Pins 2 3 von JUSBV1 JUSBV2 JUSBV3_4 durch die Jumperkappe verdeckt werden Jumper zum L schen des C...

Page 25: ...ordierung Y 10 Masse 11 Joystick B Knopf 2 12 Joystick A Koordierung Y 13 MIDI Eingabe 14 Joystick A Knopf 2 15 Kein 16 5V CD ROM Audio In Header JCDIN1 JCDIN2 Pin Belegung 1 Linkkanal Eingabe 2 Masse...

Page 26: ...Lautsprecher Signal des linken Kanals zur Vorderseite 10 Audio Signal des linken Kanals zur Vorderseite Lautsprecher Signal des linken Kanals zur Vorderseite 11 Audio Signal des rechten Kanals von de...

Page 27: ...25 Anschl sse f r die R ckwand 6 Kanal Lautsprecher Lautsprecher Ausgang Fornt Lautsprecher L R Mikrofon Eingang Zentrallautsprecher Bass Line In R cklautsprecher L R...

Page 28: ...lso in the About panel you can get detail descriptions about BIOS model and chipsets In addition the frequency status of CPU memory AGP and PCI along with the CPU speed are synchronically shown on our...

Page 29: ...on and follow the default procedure to install 2 When you see the following dialog in setup procedure it means setup is completed If the Launch the WarpSpeeder Tray Utility checkbox is checked the Tra...

Page 30: ...he screen printed in this user manual will change according to your motherboard on hand WarpSpeeder includes 1 tray icon and 5 panels 1 Tray Icon Whenever the Tray Icon utility is launched it will dis...

Page 31: ...ted 2 Main Panel If you click the tray icon WarpSpeeder utility will be invoked Please refer do the following figure the utility s first window you will see is Main Panel Main Panel contains features...

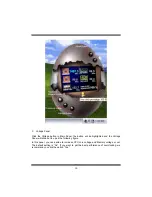
Page 32: ...hlighted and the Voltage Panel will slide out to up as the following figure In this panel you can decide to increase CPU core voltage and Memory voltage or not The default setting is No If you want to...

Page 33: ...31 4 Overclock Panel Click the Overclock button in Main Panel the button will be highlighted and the Overclock Panel will slide out to left as the following figure...

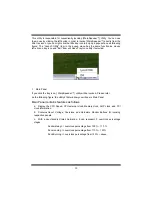
Page 34: ...otentially dangerous especially when the overclocking percentage is over 110 We strongly recommend you verify every speed you overclock by click the Verify button Or you can just click Auto overclock...

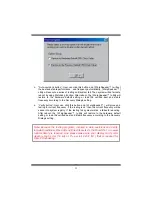
Page 35: ...on and WarpSpeeder will proceed a testing for current frequency If the testing is ok then the current frequency will be saved into system registry If the testing fail system will do a fail safe reboot...

Page 36: ...nformation of your system The information will be refreshed every 1 second 6 About Panel Click the About button in Main Panel the button will be highlighted and the About Panel will slide out to up as...

Page 37: ...ontrolled by several separate chipset WarpSpeeder divide these features to separate panels If one chipset is not on board the correlative button in Main panel will be disabled but will not interfere o...

Page 38: ...tored in USB mass storage devices like flash disks and USB floppy disks Hardware Requirements The supported hardware list of StudioFun updates regularly So please check the hwreq txt located in the ro...

Page 39: ...r board Make sure both ends are securely plugged in check the drive type in the standard CMOS setup Backing up the hard drive is extremely important All hard disks are capable of breaking down at any...

Page 40: ...m igen CMOS Einrichtung Ein Backup der Festplatte ist sehr wichtig Alle Festplatten k nnen irgendwann besch digt werden M GLICHE URSACHE L SUNG Das System wird nur von der CD ROM hochgefahren Die Fest...

Page 41: ...39 08 13 2003...

Reviews: