Chapter 3: UEFI BIOS & Software
| 19
H110MDE
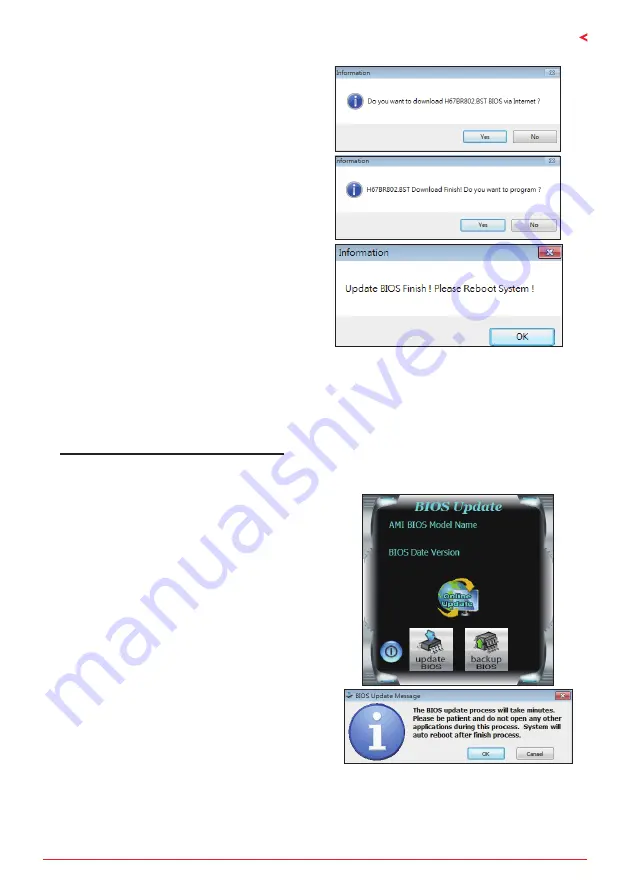
5. If there is a new BIOS version, the utility will
ask you to download it. Click “Yes” to proceed.
6. After the download is completed, you will be
asked to program (update) the BIOS or not. Click
“Yes” to proceed.
7. After the updating process is finished, you
will be asked you to reboot the system. Click
“OK” to reboot.
8. While the system boots up and the full screen logo shows up, press <DEL> key to enter BIOS
setup.
After entering the BIOS setup, please go to the <Save & Exit>, using the <Restore Defaults>
function to load Optimized Defaults, and select <Save Changes> and <Reset> to restart the
computer. Then, the BIOS Update is completed.
BIOS Update Utility (through a BIOS file)
1. Installing BIOS Update Utility from the DVD Driver.
2. Download the proper BIOS from http://www.biostar.com.tw/
3. Launch BIOS Update Utility and click the “Update
BIOS” button on the main screen.
4. A warning message will show up to request your
agreement to start the BIOS update. Click “OK” to
start the update procedure.
Summary of Contents for H110MDE
Page 6: ...6 Chapter 1 Introduction 1 5 Motherboard Layout Note represents the 1st pin...
Page 33: ...FCC FCC 15 Class B BIOSTAR BIOSTAR BIOSTAR CE 2004 108 CE 2006 95 CE 1999 05 CE...
Page 35: ...3 H110MDE 1 1 0 45 1 2 Serial ATA x4 ATX I O x1 x1 x1...
Page 38: ...6 1 5 1...
Page 39: ...7 H110MDE 2 1 CPU 1 CPU CPU 2 3...
Page 40: ...8 4 CPU CPU 5 CPU LGA1151 CPU CPU CPU CPU...
Page 41: ...9 H110MDE 2 2 1 CPU CPU CPU 2 2 CPU CPU CPU CPU...
Page 52: ...20 UEFI BIOS 7 DEL BIOS Save Exit Restore Defaults Save Changes and Reset BIOS BIOS BIOS Save...
Page 54: ...22 UEFI BIOS eHot Line eHot Line Send Send Do Not Send Save As...


