12 | Chapter 2: Hardware installation
Chapter 2: Hardware installation
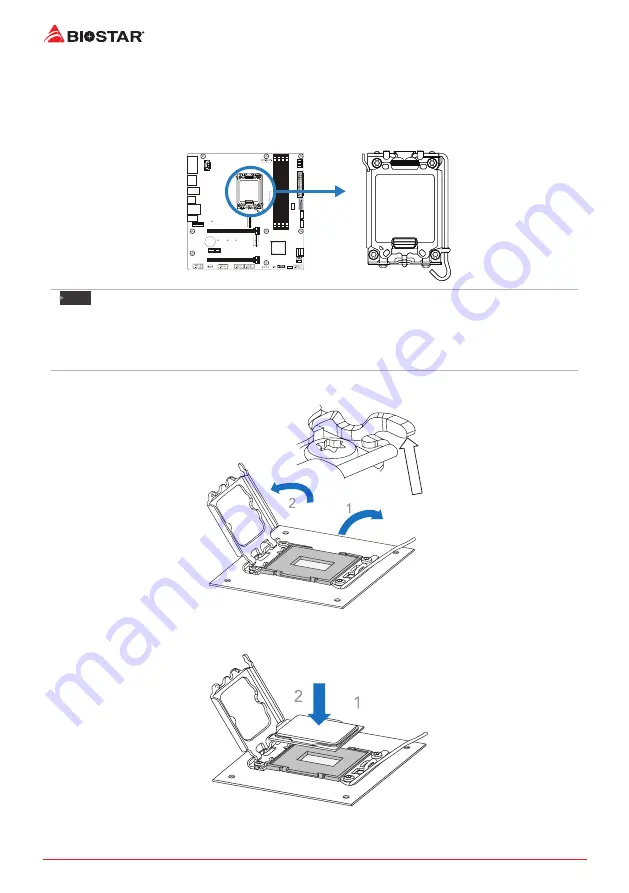
2.1 Install Central Processing Unit (CPU)
Step 1: Locate the CPU socket on the motherboard
Note
»
»
Remove pin cap before installation, and make good preservation for future use. When the CPU is
removed, cover the pin cap on the empty socket to ensure pin legs won’t be damaged.
»
»
The motherboard might equip with two different types of pin cap. Please refer below instruction to
remove the pin cap.
Step 2: Open ILM Lever and then load plate using finger tab.
Step 3: Align and seat processor package on socket.
Summary of Contents for B760MH-E PRO
Page 6: ...6 Chapter 1 Introduction 1 4 Rear Panel Connectors B760MZ E PRO B760MX E PRO ...
Page 8: ...8 Chapter 1 Introduction 1 5 Motherboard Layout B760MZ E PRO Note represents the 1st pin ...
Page 10: ...10 Chapter 1 Introduction B760MH E PRO Note represents the 1st pin ...
Page 54: ...6 Глава 1 Введение 1 4 Разъемы задней панели B760MZ E PRO B760MX E PRO ...
Page 58: ...10 Глава 1 Введение B760MH E PRO представляет собой 1 й контакт ...
Page 96: ...10 챕터 1 들어가는 글 B760MX E PRO 는 첫번째 핀을 표시합니다 ...
Page 98: ...12 챕터 1 들어가는 글 B760MP E PRO 는 첫번째 핀을 표시합니다 ...
Page 126: ...40 챕터 4 유용한 도움말 ...
Page 135: ...第一章 主板介绍 9 B760MZ E PRO B760MX E PRO B760MH E PRO B760MP E PRO 1 5 主板結構圖 B760MZ E PRO 標示為針腳1 ...
Page 136: ...10 第一章 主板介绍 B760MX E PRO 標示為針腳1 ...
Page 137: ...第一章 主板介绍 11 B760MZ E PRO B760MX E PRO B760MH E PRO B760MP E PRO B760MH E PRO 標示為針腳1 ...
Page 138: ...12 第一章 主板介绍 B760MP E PRO 標示為針腳1 ...
Page 166: ......


