


Rev 1.1
Step 4
Installation Guide
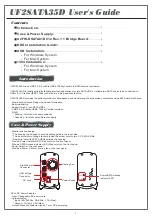
Install the 2 nd SATA HDD into the upper
deck of the inner rails.
Step 7
Step 6
Step 5
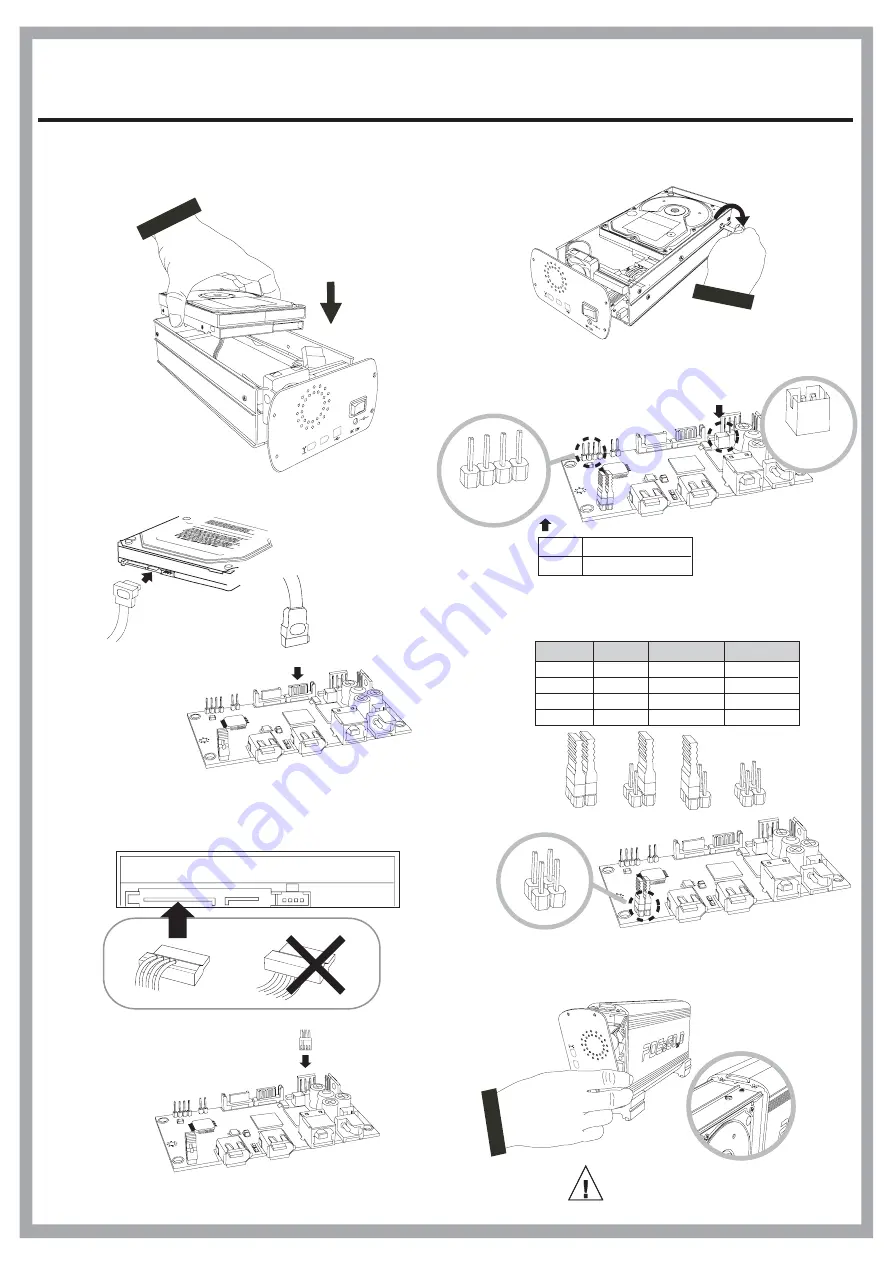
Push the rails with HDDs back into the housing
gently. Tighten the four screws at the back
with the provided T-shape screwdriver.
Make sure the rails is aligned
to the track and pushed all the
way in.
CAUTION
Secure the SATA HDD to the rails from both
sides with the provided T-shape screwdriver.
Attach the SATA signal cable on 2nd HDD .
SATA
Se
rial
ATA
Attach the SATA power cable on 2nd HDD.
INTERFACE CONNECTOR
SATA
RAID Setting
Striping : for disks with same capacity.
Spanning : for disks with different capacity.
JP2
Striping
Mirroring
JBOD
Spanning
Step 4-4
Step 4-3
Step 4-1
Step 4-2
1
2
3
4
CON2
Attach the Cooling Fan power cable .
Attach the SATA Access and Power LED cable.
Cooling Fan
CN2
Pin 1-2 Power LED
Pin 3-4 SATA Access LED
1-3
2-4
Function
Short
Short
Short
Short
Open
Open
Open
Open
JBOD
Spanning
Striping
Mirroring
Remark
Not available
default
4
Big Drive
UF2SATA35D
J2
1
(+)
2
(-)
3
(+)
4
(-)
Rev 1.1
Pin1(-) Pin2(+)
J6


