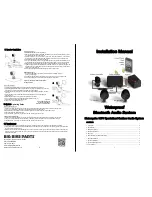
Waterproof
Bluetooth Audio System
Installation Manual
1
4
Motorcycle / ATV Specialized Outdoor Audio System
Handlebar Installation:
1. Select mounting clamp
F
from the package.
2. Peel one side of twin adhesive stickers
G
and adhere it to the surface of the speaker mount and
then peel off the other side of the stickers.
3. Place the speaker in the correct position so the screw hole of the speaker is in line with the
mounting hole of the clamp and secure the installation with a screw
L
(4×15 mm) and nut
P
.
4. Clamp the speaker mount around the handlebar.
5. For one-inch handlebar, fold the C-ring gasket
K
(see parts list) around the handlebar; for 7/8
inch handlebar, place an additional C-ring gasket
J
inside C-ring
K
to achieve a tight mounting.
6. Slide the C-ring into the speaker mount. This will absorb shockwaves from the motorcycle.
7. Tighten the clamp around the handlebar with a screw
M
(4×25 mm), nut
P
and a nylon spacer
R
in between. The nylon spacer
R
is designed to absorb vibration and shockwaves. It reduces the
chance of the clamp breaking.
8. Adjust the projecting angle of the speaker and tighten any loose screws.
8. Speaker Installation
Bluetooth Operating Guide:
1. Switch on the power by operating the volume control. Adjust the control knob so the indicator is at the 10 o’clock position.
2. Turn on your smart phone or other device and enter Bluetooth device search window.
3. “Bluetooth Audio” should appear in the list of Bluetooth devices. If it does not appear, repeat steps 1 and 2.
4. Select and connect to “Bluetooth Audio”.
5. The audio system is now ready to play any music from your smart phone or device.
3.5mm Audio Operating Guide
1. Switch on the power by operating the volume control. Adjust the control knob so the indicator is at the 10 o’clock position.
2. Turn on your smart phone and connect the phone to the audio system via your own audio cable with 3.5mm input wire.
3. The audio system is now ready to play any music from your smart phone or device.
1. If a password window pops up while attempting to connect to “Bluetooth Audio”, enter the following four digit password: “8888”.
2. Turning off the audio system will disconnect the Bluetooth device automatically. The procedures in the operating guide must be applied each
time when reconnecting to the device.
3. Bluetooth function is automatically disabled when 3.5mm audio connection is used to prevent false multiple connections. To switch back to
Bluetooth connection option, simply remove the 3.5mm input wire and your audio device should automatically reconnect to the Waterproof
Bluetooth Audio System.
10. Troubleshoot
2300 Pioneer Ave.Rice Lake, WI 54868
Phone: 888-BIG-BIKE
Fax: 715-234-6872
Email: [email protected]
Website: www.bigbikeparts.com
Mirror Side Installation:
1. Select mounting bracket
H
and
I
from the package and disassemble the side mirror.
2. Select the appropriate mounting style of the bracket. To position the speakers at a higher level
see diagram A; to position the speakers at a lower level see diagram B.
3. Hold the speaker in position and secure the mounting to the holder with a screw
L
(4×15 mm)
and nut
P
.
4. Screw the holder to the stainless steel bracket with a
N
(4x8mm) Truss Head screw and
adjust the angle.
5. Reassemble the side mirror on the stainless steel bracket as shown.
6. Secure a tight mount to prevent detachment of the bracket or the mirror.
7. Adjust the final projecting angle of the speaker.
8. Check for any loose screws and nuts.
Standard Flat Surface:
1. Mount plastic bracket
E
on the chosen flat surface with the screws
Q
(4×12
mm)
provided in the package.
2. Hold the speaker in position and secure the mount with a screw
L
(4×15 mm) and nut
P
.
3. Adjust the projecting angle of the speaker and tighten any loose screws.
Visit us today
Figure 4. Overall demonstration of loudspeaker
assembly process.
Figure 5.
Overall demonstration of
loudspeaker assembly
process on a mirror mount.
9. System
Operating Guide
CONTENTS
1. Introduction ............................................................................................................................................. 2
2. Applications ............................................................................................................................................. 2
3. Safety Precautions .................................................................................................................................. 2
4. System Specification ............................................................................................................................... 2
5. Parts List ................................................................................................................................................. 3
6. Select the Best Location for Mounting .................................................................................................... 3
7. Amplifier Installation ................................................................................................................................ 3
8. Speaker Installation ................................................................................................................................. 4
9. System Operating Guide ......................................................................................................................... 4
10. Troubleshoot ......................................................................................................................................... 4
A
B


