background image

3

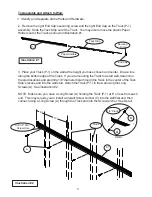
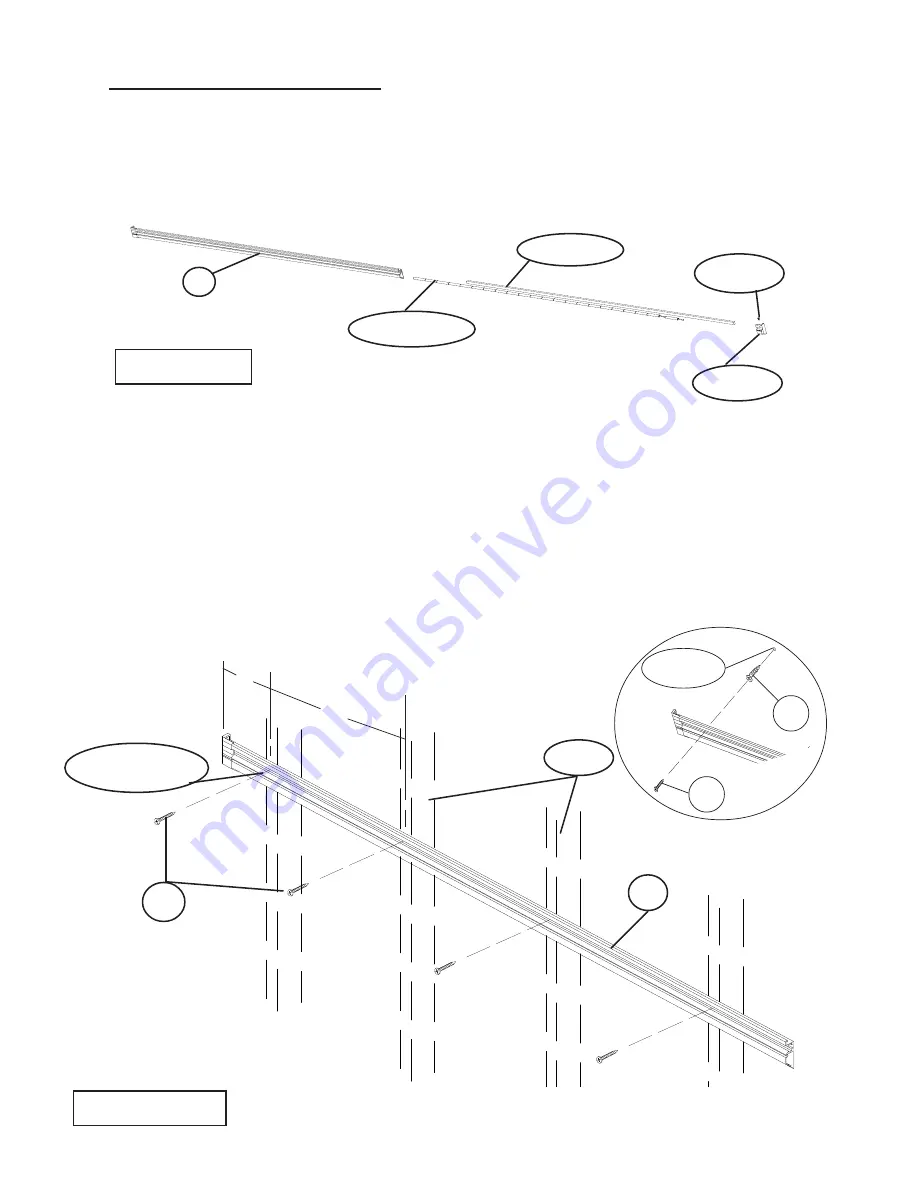
To Assemble and Attach to Wall:

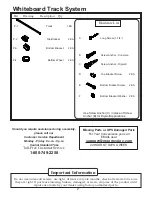
     Identify and Separate all the Parts and Hardware.

2.  Remove the right End Cap’s securing screw and the right End Cap on the Track (P-1)
assembly.  Slide the Tack Strip out of the Track.  You may also remove the plastic Paper
Holders out of the Track as shown in illustration #1.

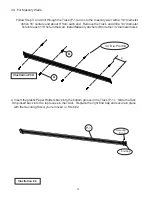
3.  Place your Track (P-1) on the wall at the height you have chosen and center.  Draw a line
along the bottom edge of the Track.  If you are mounting the Track to a stud wall, determine
the stud locations and predrill a 1/8” diameter hole through the Track in the center of the Tack
Strip’s recess and into the wall stud.  Attach the Track (P-1) to the wall using the Long
Screws (A).  See illustration #2.

NOTE:  Make sure you  have a Long Screw (A) holding the Track (P-1) at 6” or less from each
end.  This may require you to install a drywall Screw  Anchor (C) into the wall first and  then
connect using a Long Screw (A) through the Track and into the Screw Anchor.  See Detail

1.

Illustration # 2

Illustration # 1

P-1

Tack Strip

Paper Holders

End Cap

Securing

Screw

P-1

A

Drill 1/8” Dia.

Screw Hole

Studs

6”

16”

C

A

1/4” Predrill

Detail

Summary of Contents for MOORECO 62853

Page 1: ...Best Rite Whiteboard Track System 8 Track and 1 Sliding Whiteboard Panel and 4 x 8 Sharewall Instruction Manual ...

Page 2: ...5678901234567890123456789012123456789012 1234567890123456789012345678901212345678901234567890123456789012123456789012 1234567890123456789012345678901212345678901234567890123456789012123456789012 1234567890123456789012345678901212345678901234567890123456789012123456789012 1234567890123456789012345678901212345678901234567890123456789012123456789012 123456789012345678901234567890121234567890123456789...

Page 3: ...ht At least every six months check all screws to be sure they are tight If parts are missing broken damaged or worn stop use of the product until repairs are made by your dealer using factory authorized parts Important Information Hardware List Use Screw Anchor C in place of Screw Anchor B for Drywall Applications A Long Screw 1 1 4 B Screw Anchor Concrete C Screw Anchor Drywall D Top Bracket Scre...

Page 4: ...e Track to a stud wall determine the stud locations and predrill a 1 8 diameter hole through the Track in the center of the Tack Strip s recess and into the wall stud Attach the Track P 1 to the wall using the Long Screws A See illustration 2 NOTE Make sure you have a Long Screw A holding the Track P 1 at 6 or less from each end This may require you to install a drywall Screw Anchor C into the wal...

Page 5: ...ecuring Screw you removed in Step 2 B 3A For Masonry Walls A 1 4 Dia Predrill Follow Step 3 and drill through the Track P 1 and into the masonry wall with a 1 8 diameter drill on 16 centers and about 6 from each end Remove the Track and drill a 1 4 diameter hole into each 1 8 hole in the wall Install MasonryAnchors B into the 1 4 diameter holes Illustration 3A Illustration 4 End Cap P 1 Securing S...

Page 6: ...w D into each Top Bracket P 2 and finger tighten to secure in place Hanging a board on the Intuition Track System Illustration 6 P 2 P 2 D D 6 Assemble the Bottom Bracket P 3 to the Bottom Wheel P 4 using a Bottom Bracket Screw E and Bottom Bracket Washer F as shown in illustration 6 Repeat this step for the second Bottom Bracket assembly Leave the Bottom Bracket Screws loose P 3 P 4 E F Illustrat...

Page 7: ...stration 7 Finger tighten each Bottom Bracket Screw E to secure Bottom Bracket assemblies in place 8 Hook your board s Top Brackets over the top of the Track P 1 Your board should now be able to slide right or left on the Intuition Track System See illustration 8 WTS_09 26 14 Illustration 8 WWW MYBINDING COM ...

Reviews: