11
EN
BEFORE FIRST USE
•
Remove any fi lm and other packaging residue
from the inside and outside of the oven.
•
Remove and wash all accessories.
•
Run the oven for 30 min. at 250°C without
placing any food inside (during this operation
it is normal for manufacturing residue to
produce some smoke and odours).
•
Let the oven cool down.
•
Open the door and air the oven out for 15
minutes.
•
Clean the inside of the oven.
RACK POSITIONING
Racks and trays must be inserted into the side
guides until they come to a complete stop to
prevent contact with the oven door.
When removing accessories beyond halfway they
are blocked to facilitate removing dishes.
The oven has fi ve cooking levels indicated on the
right-hand side of the front of the oven.
COOLING
The oven is equipped with a cooling system which
operates during cooking.
Air fl ow between the control panel and door allows
the controls to be kept at a usable temperature.
The cooling system turns on and off automatically
(it is normal for this to continue running after the
oven is switched off ).
PRE-HEATING
Most recipes will require the dish to be placed in
the oven when it has already reached the specifi ed
cooking temperature.
The pre-heating time will depend on the
temperature set and the number of accessories
present in the oven.
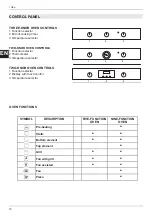
COOKING MODES
1. Insert the rack at the required level
2. Select the oven function by rotating the knob
3. Set the temperature by turning the knob
clockwise
4. Where applicable, set manual or timed cooking
using the TIMER knob or with the DISPLAY
WITH TOUCH CONTROL.
The indicator light on the control panel turns off
when the set temperature is reached.
The oven is equipped with various heating
elements which create the various cooking modes
when activated individually or in combination.
Warning: all cooking operations must take
place with the door closed.
Pre-heating
Use this function to bring the oven to the required
temperature in a short period of time.
This function is designed only for heating the
oven, and not for cooking food.
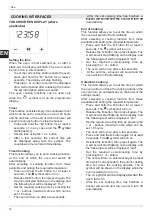
Static
Heat from above and below.
Cooking on a single level: ideal for roasts, bread
and cakes.
•
Roasts: level 2 or 3
•
Cakes: level 2 or 3 to ensure correct cooking
of the bottom without burning the top
Bottom element
Heat from below.
Cooking on a single level, ideal for slow cooking
and for heating plates.
At high temperatures, use this function for baked
goods which you do not wish to brown.
•
Level 2 or 3
Top element
Heat from above.
Cooking on a single level, ideal for reheating
dishes or when you wish to brown the top of
dishes.
•
Level 3 or 4
Grill
Heat from the grill (broiler) element. Max
temperture 200°C.
Cooking on a single level, ideal for grilling
sausages, chops, bacon, fi sh or toast
Browning or gratinating food at the end of cooking
•
Level 4 or 5
/ Use
USE
1
2
3
4
5
Summary of Contents for F605LAGEKX
Page 3: ...3 IT ...
Page 21: ...EN INSTALLATION AND USER MANUAL BUILT IN ELECTRIC OVENS 3100398 ...
Page 23: ...3 EN ...
Page 41: ...FR INSTRUCTIONS D INSTALLATION ET D UTILISATION FOURS ENCASTRABLES ÉLECTRIQUES 3100398 ...
Page 43: ...3 FR ...
Page 61: ...ES INSTRUCCIONES DE INSTALACIÓN Y USO HORNOS ELÉCTRICOS EMPOTRABLES 3100398 ...
Page 63: ...3 ES ...


