background image


44 

6003983_a 

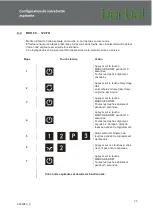
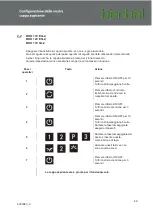
3.5 

BEL 90 ML,


BEH 60 … 90 GL


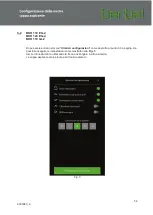
Une fois dans le menu « 

Autres configurations

 », comme décrit sous 3.0 à la page 9, les 

réglages peuvent être réalisés conformément la 

Fig. 6

Quitter ensuite le menu en appuyant sur la flèche dans le coin en haut à gauche.  
Votre hotte aspirante est désormais fonctionnelle. 


Fig. 6 


Summary of Contents for BEH 60 FLU

Page 1: ...Konfiguration Ihrer Dunstabzugshaube ...

Page 2: ...WH 60 120 EL 13 3 5 BEL 90 ML BEH 60 90 GL 14 3 6 BWH 90 GL BTH 100 ML BIH 90 120 BL BIH 110 EG BIH 100 GL 15 1 0 Vorwort Die folgende Anleitung ermöglicht Ihnen die erstmalige Konfiguration der spezifischen Eigenschaften Ihrer berbel Dunstabzugshaube Es steht Ihnen frei ob Sie die beigelegte berbel Fernbedienung oder die berbel Control App auf Ihrem Smartphone verwenden möchten Beide Wege werden ...

Page 3: ...ssen nur bei der erstmaligen Inbetriebnahme vorgenommen werden Arbeitsschritt Tastfeld Aktion 1 Drücken Sie die EIN AUS Taste für 10 Sekunden Alle Tasten blinken daraufhin 5 mal auf 2 Drücken Sie die Umluft Taste Das Symbol leuchtet nun mit voller Leuchtkraft 3 Drücken Sie die EIN AUS Taste Alle Tasten leuchten für 3 Sekunden auf 4 Drücken Sie die EIN AUS Taste für 10 Sekunden Alle Tasten blinken ...

Page 4: ...Sie die EIN AUS Taste für 10 Sekunden Alle Tasten blinken daraufhin 5 mal auf 2 Drücken Sie die Umluft Taste Das Symbol leuchtet nun mit voller Leuchtkraft 3 Drücken Sie die EIN AUS Taste Alle Tasten leuchten für 3 Sekunden auf 4 Drücken Sie die EIN AUS Taste für 10 Sekunden Alle Tasten blinken daraufhin 5 mal auf Während des Blinkens ist Schritt 5 auszuführen 5 Geben Sie während des Blinkvorgangs...

Page 5: ...US Taste für 10 Sekunden Alle Tasten blinken daraufhin 5 mal auf 2 Drücken Sie die Umluft Taste Das Symbol leuchtet nun mit voller Leuchtkraft 3 Drücken Sie die EIN AUS Taste Alle Tasten leuchten für 3 Sekunden auf 4 Drücken Sie die EIN AUS Taste für 10 Sekunden Alle Tasten blinken daraufhin 5 mal auf Während des Blinkens ist Schritt 5 auszuführen 5 Geben Sie während des Blinkvorgangs aus Schritt ...

Page 6: ...n 1 Drücken Sie die EIN AUS Taste für 10 Sekunden Alle Tasten blinken daraufhin 5 mal auf 2 Drücken Sie die Umluft Taste Das Symbol leuchtet nun mit voller Leuchtkraft 3 Drücken Sie die EIN AUS Taste Alle Tasten leuchten für 3 Sekunden auf 4 Drücken Sie die EIN AUS Taste für 10 Sekunden Alle Tasten blinken daraufhin 5 mal auf Während des Blinkens ist Schritt 5 auszuführen 5 Geben Sie während des B...

Page 7: ...EIN AUS Taste für 10 Sekunden Alle Tasten blinken daraufhin 5 mal auf 2 Drücken Sie die Umluft Taste Das Symbol leuchtet nun mit voller Leuchtkraft 3 Drücken Sie die EIN AUS Taste Alle Tasten leuchten für 3 Sekunden auf 4 Drücken Sie die EIN AUS Taste für 10 Sekunden Alle Tasten blinken daraufhin 5 mal auf Während des Blinkens ist Schritt 5 auszuführen 5 Geben Sie während des Blinkvorgangs aus Sch...

Page 8: ... Drücken Sie die EIN AUS Taste für 10 Sekunden Alle Tasten blinken daraufhin 5 mal auf 2 Drücken Sie die Umluft Taste Das Symbol leuchtet nun mit voller Leuchtkraft 3 Drücken Sie die EIN AUS Taste Alle Tasten leuchten für 3 Sekunden auf 4 Drücken Sie die EIN AUS Taste für 10 Sekunden Alle Tasten blinken daraufhin 5 mal auf Während des Blinkens ist Schritt 5 auszuführen 5 Geben Sie während des Blin...

Page 9: ...el Control App auf Ihrem Smartphone die Sie über folgende Internetadressen beziehen können iOS www berbel de App berbel_control IOS Android www berbel de App berbel_control Android Unabhängig von Ihrem Modell öffnen Sie anschließend die App auf Ihrem Smartphone Es erscheint folgende Oberfläche Abb 1 Klicken Sie nun auf den Button um ins Einstellungsmenü zu gelangen Unter dem Menüpunkt Konfiguratio...

Page 10: ...im Menü weitere Konfigurationen befinden wie unter 3 0 auf Seite 9 beschrieben können die Einstellungen gemäß Abb 2 vorgenommen werden Verlassen Sie das Menü anschließend über den Pfeil in der oberen linken Ecke Ihre Dunstabzugshaube ist nun betriebsbereit Abb 2 ...

Page 11: ... sich im Menü weitere Konfigurationen befinden wie unter 3 0 auf Seite 9 beschrieben können die Einstellungen gemäß Abb 3 vorgenommen werden Verlassen Sie das Menü anschließend über den Pfeil in der oberen linken Ecke Ihre Dunstabzugshaube ist nun betriebsbereit Abb 3 ...

Page 12: ... weitere Konfigurationen befinden wie unter 3 0 auf Seite 9 beschrieben können die Einstellungen gemäß Abb 4 vorgenommen werden Verlassen Sie das Menü anschließend über den Pfeil in der oberen linken Ecke Ihre Dunstabzugshaube ist nun betriebsbereit Abb 4 ...

Page 13: ...L Sobald Sie sich im Menü weitere Konfigurationen befinden wie unter 3 0 auf Seite 9 beschrieben können die Einstellungen gemäß Abb 5 vorgenommen werden Verlassen Sie das Menü anschließend über den Pfeil in der oberen linken Ecke Ihre Dunstabzugshaube ist nun betriebsbereit Abb 5 ...

Page 14: ... Menü weitere Konfigurationen befinden wie unter 3 0 auf Seite 9 beschrieben können die Einstellungen gemäß Abb 6 vorgenommen werden Verlassen Sie das Menü anschließend über den Pfeil in der oberen linken Ecke Ihre Dunstabzugshaube ist nun betriebsbereit Abb 6 ...

Page 15: ...obald Sie sich im Menü weitere Konfigurationen befinden wie unter 3 0 auf Seite 9 beschrieben können die Einstellungen gemäß Abb 7 vorgenommen werden Verlassen Sie das Menü anschließend über den Pfeil in der oberen linken Ecke Ihre Dunstabzugshaube ist nun betriebsbereit Abb 7 ...

Page 16: ...Configuration of your extractor hood ...

Page 17: ... FLU BEH 90 FLU BWH 60 120 BL BWH 60 120 EL 28 3 5 BEL 90 ML BEH 60 90 GL 29 3 6 BWH 90 GL BTH 100 ML BIH 90 120 BL BIH 110 EG BIH 100 GL 30 2 0 Preface The following manual helps you with the initial configuration of the specific characteristics of your berbel extractor hood You can choose whether to operate the hood with the accompanying berbel remote control or the berbel control app on your sm...

Page 18: ...g the initial commissioning Step Touch field Action 1 Press and hold the ON OFF button for 10 seconds All buttons will blink 5 times 2 Press the recirculating air button The symbol now illuminates with full brightness 3 Press the ON OFF button All buttons illuminate for 3 seconds 4 Press and hold the ON OFF button for 10 seconds All buttons will blink 5 times Carry out step 5 while the buttons are...

Page 19: ...ton for 10 seconds All buttons will blink 5 times 2 Press the recirculating air button The symbol now illuminates with full brightness 3 Press the ON OFF button All buttons illuminate for 3 seconds 4 Press and hold the ON OFF button for 10 seconds All buttons will blink 5 times Carry out step 5 while the buttons are blinking 5 Enter this button combination during the blinking process from step 4 6...

Page 20: ...conds All buttons will blink 5 times 2 Press the recirculating air button The symbol now illuminates with full brightness 3 Press the ON OFF button All buttons illuminate for 3 seconds 4 Press and hold the ON OFF button for 10 seconds All buttons will blink 5 times Carry out step 5 while the buttons are blinking 5 Enter this button combination during the blinking process from step 4 6 Press these ...

Page 21: ...the ON OFF button for 10 seconds All buttons will blink 5 times 2 Press the recirculating air button The symbol now illuminates with full brightness 3 Press the ON OFF button All buttons illuminate for 3 seconds 4 Press and hold the ON OFF button for 10 seconds All buttons will blink 5 times Carry out step 5 while the buttons are blinking 5 Enter this button combination during the blinking process...

Page 22: ...r 10 seconds All buttons will blink 5 times 2 Press the recirculating air button The symbol now illuminates with full brightness 3 Press the ON OFF button All buttons illuminate for 3 seconds 4 Press and hold the ON OFF button for 10 seconds All buttons will blink 5 times Carry out step 5 while the buttons are blinking 5 Enter this button combination during the blinking process from step 4 6 Press...

Page 23: ... ON OFF button for 10 seconds All buttons will blink 5 times 2 Press the recirculating air button The symbol now illuminates with full brightness 3 Press the ON OFF button All buttons illuminate for 3 seconds 4 Press and hold the ON OFF button for 10 seconds All buttons will blink 5 times Carry out step 5 while the buttons are blinking 5 Enter this button combination during the blinking process fr...

Page 24: ...done so Install the berbel control app on your smartphone It is available via the following internet addresses iOS www berbel de App berbel_control IOS Android www berbel de App berbel_control Android Then open the app on your smartphone The following interface appears Fig 1 Now click on the button to open the settings menu Select the Additional configurations tab under the Configuration menu item...

Page 25: ... you have opened Additional configurations in the menu as described under 3 0 on page 9 you can change the settings as indicated in Fig 2 Then exit the menu with the arrow in the upper left corner Your extractor hood is now ready for operation Fig 2 ...

Page 26: ...2 Once you have opened Additional configurations in the menu as described under 3 0 on page 9 you can change the settings as indicated in Fig 3 Then exit the menu with the arrow in the upper left corner Your extractor hood is now ready for operation Fig 3 ...

Page 27: ...ave opened Additional configurations in the menu as described under 3 0 on page 9 you can change the settings as indicated in Fig 4 Then exit the menu with the arrow in the upper left corner Your extractor hood is now ready for operation Fig 4 ...

Page 28: ...BWH 60 120 EL Once you have opened Additional configurations in the menu as described under 3 0 on page 9 you can change the settings as indicated in Fig 5 Then exit the menu with the arrow in the upper left corner Your extractor hood is now ready for operation Fig 5 ...

Page 29: ...ou have opened Additional configurations in the menu as described under 3 0 on page 9 you can change the settings as indicated in Fig 6 Then exit the menu with the arrow in the upper left corner Your extractor hood is now ready for operation Fig 6 ...

Page 30: ...BIH 100 GL Once you have opened Additional configurations in the menu as described under 3 0 on page 9 you can change the settings as indicated in Fig 7 Then exit the menu with the arrow in the upper left corner Your extractor hood is now ready for operation Fig 7 ...

Page 31: ...Configuration de votre hotte aspirante ...

Page 32: ...0 BL BWH 60 120 EL 43 3 5 BEL 90 ML BEH 60 90 GL 44 3 6 BWH 90 GL BTH 100 ML BIH 90 120 BL BIH 110 EG BIH 100 GL 45 3 0 Avant propos La notice suivante vous permet de réaliser la première configuration des caractéristiques spécifiques de votre hotte aspirante Berbel Vous pouvez soit utiliser la télécommande berbel jointe soit l app de commande berbel sur votre Smartphone Les deux méthodes sont déc...

Page 33: ... en service Étape Touche tactile Action 1 Appuyer sur la touche MARCHE ARRÊT pendant 10 secondes Toutes les touches clignotent ensuite 5x 2 Appuyer sur la touche Recyclage d air Le symbole s allume désormais en pleine luminosité 3 Appuyer sur la touche MARCHE ARRÊT Toutes les touches s allument pendant 3 secondes 4 Appuyer sur la touche MARCHE ARRÊT pendant 10 secondes Toutes les touches clignoten...

Page 34: ...utes les touches clignotent ensuite 5x 2 Appuyer sur la touche Recyclage d air Le symbole s allume désormais en pleine luminosité 3 Appuyer sur la touche MARCHE ARRÊT Toutes les touches s allument pendant 3 secondes 4 Appuyer sur la touche MARCHE ARRÊT pendant 10 secondes Toutes les touches clignotent ensuite 5x L étape 5 doit être réalisée pendant le clignotement 5 Saisir cette combinaison de tou...

Page 35: ...ches clignotent ensuite 5x 2 Appuyer sur la touche Recyclage d air Le symbole s allume désormais en pleine luminosité 3 Appuyer sur la touche MARCHE ARRÊT Toutes les touches s allument pendant 3 secondes 4 Appuyer sur la touche MARCHE ARRÊT pendant 10 secondes Toutes les touches clignotent ensuite 5x L étape 5 doit être réalisée pendant le clignotement 5 Saisir cette combinaison de touches pendant...

Page 36: ...10 secondes Toutes les touches clignotent ensuite 5x 2 Appuyer sur la touche Recyclage d air Le symbole s allume désormais en pleine luminosité 3 Appuyer sur la touche MARCHE ARRÊT Toutes les touches s allument pendant 3 secondes 4 Appuyer sur la touche MARCHE ARRÊT pendant 10 secondes Toutes les touches clignotent ensuite 5x L étape 5 doit être réalisée pendant le clignotement 5 Saisir cette comb...

Page 37: ...es touches clignotent ensuite 5x 2 Appuyer sur la touche Recyclage d air Le symbole s allume désormais en pleine luminosité 3 Appuyer sur la touche MARCHE ARRÊT Toutes les touches s allument pendant 3 secondes 4 Appuyer sur la touche MARCHE ARRÊT pendant 10 secondes Toutes les touches clignotent ensuite 5x L étape 5 doit être réalisée pendant le clignotement 5 Saisir cette combinaison de touches p...

Page 38: ...secondes Toutes les touches clignotent ensuite 5x 2 Appuyer sur la touche Recyclage d air Le symbole s allume désormais en pleine luminosité 3 Appuyer sur la touche MARCHE ARRÊT Toutes les touches s allument pendant 3 secondes 4 Appuyer sur la touche MARCHE ARRÊT pendant 10 secondes Toutes les touches clignotent ensuite 5x L étape 5 doit être réalisée pendant le clignotement 5 Saisir cette combina...

Page 39: ... le cas Installer également l app de commande berbel disponible aux adresses Internet suivantes iOS www berbel de App berbel_control IOS Android www berbel de App berbel_control Android Quel que soit le modèle ouvrir ensuite l app sur le Smartphone L interface suivante apparaît Fig 1 Cliquer sur le bouton pour accéder au menu de réglage Sous l option de menu Configuration sélectionner l onglet Aut...

Page 40: ...s le menu Autres configurations comme décrit sous 3 0 à la page 9 les réglages peuvent être réalisés conformément la Fig 2 Quitter ensuite le menu en appuyant sur la flèche dans le coin en haut à gauche Votre hotte aspirante est désormais fonctionnelle Fig 2 ...

Page 41: ...is dans le menu Autres configurations comme décrit sous 3 0 à la page 9 les réglages peuvent être réalisés conformément la Fig 3 Quitter ensuite le menu en appuyant sur la flèche dans le coin en haut à gauche Votre hotte aspirante est désormais fonctionnelle Fig 3 ...

Page 42: ...nu Autres configurations comme décrit sous 3 0 à la page 9 les réglages peuvent être réalisés conformément la Fig 4 Quitter ensuite le menu en appuyant sur la flèche dans le coin en haut à gauche Votre hotte aspirante est désormais fonctionnelle Fig 4 ...

Page 43: ...20 EL Une fois dans le menu Autres configurations comme décrit sous 3 0 à la page 9 les réglages peuvent être réalisés conformément la Fig 5 Quitter ensuite le menu en appuyant sur la flèche dans le coin en haut à gauche Votre hotte aspirante est désormais fonctionnelle Fig 5 ...

Page 44: ...le menu Autres configurations comme décrit sous 3 0 à la page 9 les réglages peuvent être réalisés conformément la Fig 6 Quitter ensuite le menu en appuyant sur la flèche dans le coin en haut à gauche Votre hotte aspirante est désormais fonctionnelle Fig 6 ...

Page 45: ...GL Une fois dans le menu Autres configurations comme décrit sous 3 0 à la page 9 les réglages peuvent être réalisés conformément la Fig 7 Quitter ensuite le menu en appuyant sur la flèche dans le coin en haut à gauche Votre hotte aspirante est désormais fonctionnelle Fig 7 ...

Page 46: ...Configurazione della vostra cappa aspirante ...

Page 47: ...L 58 3 5 BEL 90 ML BEH 60 90 GL 59 3 6 BWH 90 GL BTH 100 ML BIH 90 120 BL BIH 110 EG BIH 100 GL 60 4 0 Introduzione La seguente vi consente di eseguire la configurazione iniziale delle caratteristiche specifiche della vostra cappa aspirante berbel A voi innanzitutto la scelta se utilizzare il telecomando berbel in dotazione o la berbel App Control sul vostro smartphone Entrambi i metodi sono descr...

Page 48: ...e impostazioni sono necessarie solo per la prima messa in funzione Passi operativi Tasto Azione 1 Premere il tasto ON OFF per 10 secondi Tutti i tasti lampeggiano 5 volte 2 Premere il tasto di ricircolo Il simbolo si accende con la massima luminosità 3 Premere il tasto ON OFF Tutti i tasti si accendono per 3 secondi 4 Premere il tasto ON OFF per 10 secondi Tutti i tasti lampeggiano 5 volte Durante...

Page 49: ...remere il tasto ON OFF per 10 secondi Tutti i tasti lampeggiano 5 volte 2 Premere il tasto di ricircolo Il simbolo si accende con la massima luminosità 3 Premere il tasto ON OFF Tutti i tasti si accendono per 3 secondi 4 Premere il tasto ON OFF per 10 secondi Tutti i tasti lampeggiano 5 volte Durante la fase lampeggiante eseguire il passo 5 5 Durante la fase lampeggiante del passo 4 inserire quest...

Page 50: ...to ON OFF per 10 secondi Tutti i tasti lampeggiano 5 volte 2 Premere il tasto di ricircolo Il simbolo si accende con la massima luminosità 3 Premere il tasto ON OFF Tutti i tasti si accendono per 3 secondi 4 Premere il tasto ON OFF per 10 secondi Tutti i tasti lampeggiano 5 volte Durante la fase lampeggiante eseguire il passo 5 5 Durante la fase lampeggiante del passo 4 inserire questa combinazion...

Page 51: ...sto Azione 1 Premere il tasto ON OFF per 10 secondi Tutti i tasti lampeggiano 5 volte 2 Premere il tasto di ricircolo Il simbolo si accende con la massima luminosità 3 Premere il tasto ON OFF Tutti i tasti si accendono per 3 secondi 4 Premere il tasto ON OFF per 10 secondi Tutti i tasti lampeggiano 5 volte Durante la fase lampeggiante eseguire il passo 5 5 Durante la fase lampeggiante del passo 4 ...

Page 52: ... il tasto ON OFF per 10 secondi Tutti i tasti lampeggiano 5 volte 2 Premere il tasto di ricircolo Il simbolo si accende con la massima luminosità 3 Premere il tasto ON OFF Tutti i tasti si accendono per 3 secondi 4 Premere il tasto ON OFF per 10 secondi Tutti i tasti lampeggiano 5 volte Durante la fase lampeggiante eseguire il passo 5 5 Durante la fase lampeggiante del passo 4 inserire questa comb...

Page 53: ... Azione 1 Premere il tasto ON OFF per 10 secondi Tutti i tasti lampeggiano 5 volte 2 Premere il tasto di ricircolo Il simbolo si accende con la massima luminosità 3 Premere il tasto ON OFF Tutti i tasti si accendono per 3 secondi 4 Premere il tasto ON OFF per 10 secondi Tutti i tasti lampeggiano 5 volte Durante la fase lampeggiante eseguire il passo 5 5 Durante la fase lampeggiante del passo 4 ins...

Page 54: ... App Control sul proprio smartphone scaricabile dai seguenti indirizzi internet iOS www berbel de App berbel_control IOS Android www berbel de App berbel_control Android Indipendentemente dal vostro tipo di modello aprire poi la App sul proprio smartphone Apparirà la seguente interfaccia Fig 1 Cliccare sul pulsante per accedere al menu di impostazione Sotto la voce Configurazione è possibile selez...

Page 55: ... menu Ulteriori configurazioni come descritto al punto 3 0 a pagina 9 è possibile eseguire le impostazioni come mostrato nella Fig 2 Uscire infine dal menu utilizzando la freccia nell angolo in alto a sinistra La cappa aspirante ora è pronta per il funzionamento Fig 2 ...

Page 56: ...ti nel menu Ulteriori configurazioni come descritto al punto 3 0 a pagina 9 è possibile eseguire le impostazioni come mostrato nella Fig 3 Uscire infine dal menu utilizzando la freccia nell angolo in alto a sinistra La cappa aspirante ora è pronta per il funzionamento Fig 3 ...

Page 57: ...Ulteriori configurazioni come descritto al punto 3 0 a pagina 9 è possibile eseguire le impostazioni come mostrato nella Fig 4 Uscire infine dal menu utilizzando la freccia nell angolo in alto a sinistra La cappa aspirante ora è pronta per il funzionamento Fig 4 ...

Page 58: ...essere entrati nel menu Ulteriori configurazioni come descritto al punto 3 0 a pagina 9 è possibile eseguire le impostazioni come mostrato nella Fig 5 Uscire infine dal menu utilizzando la freccia nell angolo in alto a sinistra La cappa aspirante ora è pronta per il funzionamento Fig 5 ...

Page 59: ...enu Ulteriori configurazioni come descritto al punto 3 0 a pagina 9 è possibile eseguire le impostazioni come mostrato nella Fig 6 Uscire infine dal menu utilizzando la freccia nell angolo in alto a sinistra La cappa aspirante ora è pronta per il funzionamento Fig 6 ...

Page 60: ...ere entrati nel menu Ulteriori configurazioni come descritto al punto 3 0 a pagina 9 è possibile eseguire le impostazioni come mostrato nella Fig 7 Uscire infine dal menu utilizzando la freccia nell angolo in alto a sinistra La cappa aspirante ora è pronta per il funzionamento Fig 7 ...

Reviews: