BenQ TH682ST, User Manual
The BenQ TH682ST projector offers exceptional home entertainment with its high-quality visuals and stunning clarity. Unlock the full potential of your device by downloading the free user manual from manualshive.com. This comprehensive manual guides you through setup, operation, and troubleshooting, ensuring a seamless user experience.
Share
Download


Reviews:
No comments
Related manuals for TH682ST

NANO
Brand: IGNIA LIGHT Pages: 12

PT-VX500
Brand: Panasonic Pages: 12

WS-48511 Guide
Brand: Mitsubishi Pages: 14

PHxx Series
Brand: Barco Pages: 17

VP1000-W
Brand: Ltc Audio Pages: 32

B05166
Brand: JB Systems Pages: 10

PJ1165 - XGA LCD Projector
Brand: ViewSonic Pages: 52

CP-X2 series
Brand: Hitachi Pages: 65

CP-X201
Brand: Hitachi Pages: 17

LG-3355
Brand: Chauvet Pages: 17

PB63U
Brand: LG Pages: 69

RL-JA20
Brand: LG Pages: 68

RD-JT91
Brand: LG Pages: 34

PF80G
Brand: LG Pages: 72
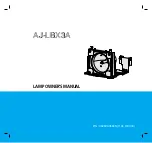
AJ-LBX3A
Brand: LG Pages: 8

PF80A
Brand: LG Pages: 78

AJ-LCF3
Brand: LG Pages: 4

RD-JT40 1024X768 XGA
Brand: LG Pages: 90


