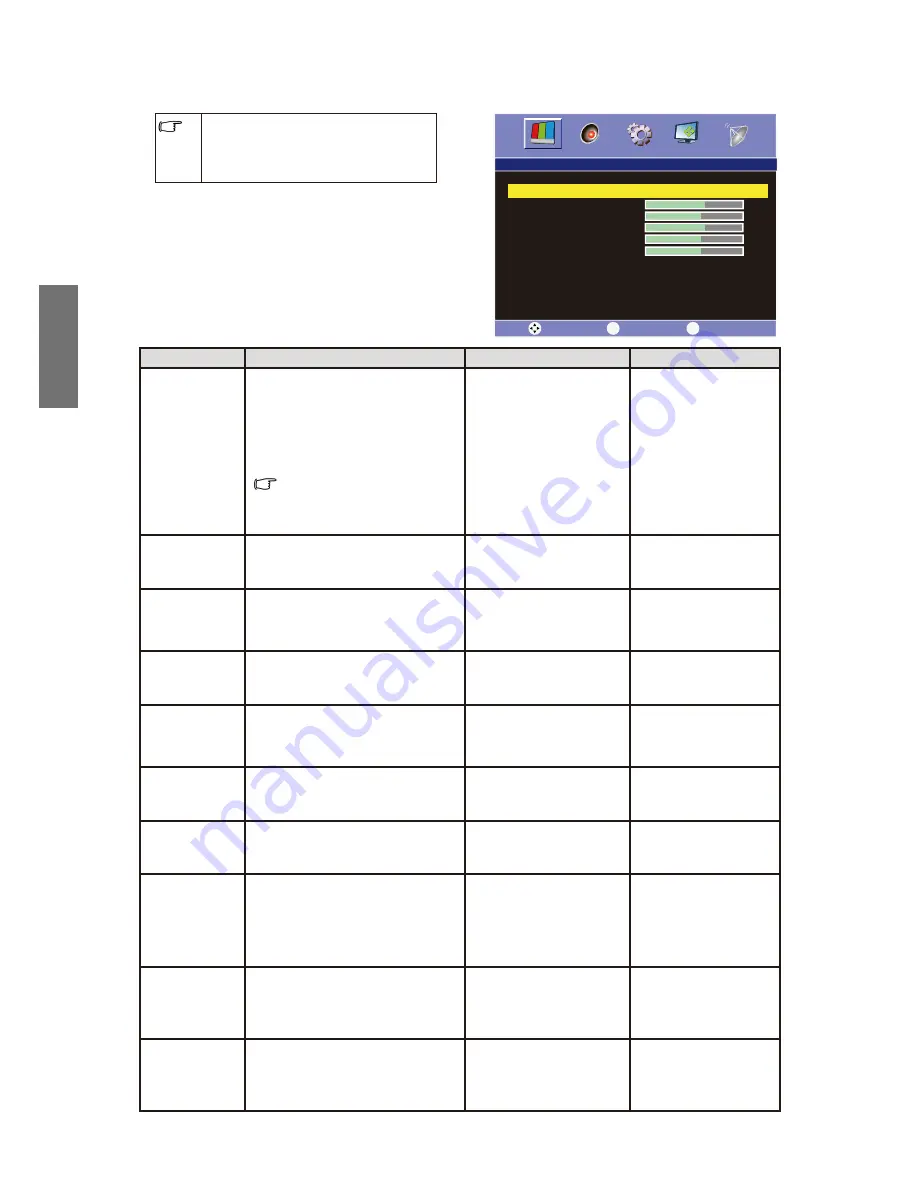
background image

24

E

N

G

LIS

H

Picture menu

The available menu items are 

dependent on the input source 

being selected. The illustration is for 

reference only.

Item 

Function 

Operation 

Range

Picture Mode

Allow you to select the preset 

picture modes or to customize 

your own picture mode. When 

you select "User", you can 

adjust the contrast, brightness, 

Tint, color and sharpness to your 

preference.

  To press Picture Mode 

button allows you to toggle 

among the preset modes 

directly.

Press 

 or 

 to select

the picture mode of 

your TV.

User


Standard


Cinema


Dynamic


Contrast

When "User" is selected, this 

item is for adjusting the contrast 

of your TV image.

Press 

 to increase the 

contrast, or press 

 to 

decrease the contrast.

0~100

Brightness

When "User is selected, this item 

is for adjusting the brightness of 

your TV image.

Press 

 to increase 

the contrast, or press 

 to decrease the 

brightness.

0~100

Sharpness

When "User" is selected, this 

item is for adjust the sharpness 

level of your TV image.

Press 

 to sharpen the 

image, or press 

 to 

blur the image.

0~10

Hue

It can only be adjusted in Color 

System NTSC mode. 

Press 

 to enhance 

green and weaken red, 

and press 

 to weaken 

green and enhance red.

0~100

Saturation

When "Personal" is selected, 

this item is for adjusting the tint 

level of your TV image.

Press 

 to enhance the 

color, and press 

 to 

soft en the color.

0~100

Color Temp.

To adjust the color temperature 

of the image.

Press 

 or 

 to select 

the color temperature.

Standard


Warm 


Cool


Aspect Ratio

Aspect ratio adjustment.

TV, AV, S-Video, YPbPr, HDMI 

SD: 16:9, 4:3, Panorama, ZOOM

VGA, DVI: 16:9,4:3

HDMI HD: 16:9, 4:3, ZOOM, FULL

YPbPr HD: 16:9, 4:3, ZOOM

Press 

 or 

 to select 

the Aspect Ratio.

1 6:9


Panorama


Zoom


4 :3


Full


3D NR

Image Noise Reduction Function 

will help reduce  noises of video. 

It is suitable for disturbance belt 

and poor signal reception areas. 

Press 

 or 

 to select.

OFF


Low


Medium


High


ACE

To enhance the image contrast:  

the  colors will all deepen.

Press 

 or 

 to select.

OFF


Low


Medium


High


Picture

Select 

Return 

Exit

MENU

EXIT

Picture Mode 

◄ 

User 

Contrast 


60

Brightness 


50

Sharpness 


60

Hue


50

Saturation 


50

Color Temp. 

◄ 

Standard 

Aspect Ratio 

◄ 

4:3 

3D NR 

◄ 

Medium 

ACE 

◄ 

Medium 

Summary of Contents for SC3211

Page 1: ...SC3211 LCD TV...

Page 2: ...w Control Panel 8 Rear View 9 Getting to know the remote control 11 Using your remote control 13 Power on and off 13 Power on the TV 13 Put the TV to off mode 13 Switch inputs 13 Adjust the audio sett...

Page 3: ...23 Picture menu 24 Sound menu 25 Setup menu 26 PC menu 27 Channel menu 28 Manual Scan 29 Features for Multimedia Playback 30 VIDEO menu 31 MUSIC menu 32 PHOTO menu 33 TEXT menu 34 Reference 35 Copyrig...

Page 4: ...1 ENGLISH SC3211 LCD TV User Manual Welcome...

Page 5: ...t Guide Remote control x1 Power Cable x1 AAA Battery x2 Base x1 Base fix screws x3 User Manual x1 User Manual The actual items come with your TV such as the power cable may look different from that il...

Page 6: ...damages to the outer casing as well as the components inside Do NOT place the TV on an uneven sloping or unstable surface such as a trolley where it may fall and cause damage to itself or others Have...

Page 7: ...from it The supplied power cord is suitable for use with 100 250V AC power only The type of power cord plug and jack illustrated may differ from the type used in your region Only use an appropriate p...

Page 8: ...In this case you will use the ten keys on your remote control to enter the number For example just press 8 to select channel 8 If want to enter a double digit channel number rst press the Channel Entr...

Page 9: ...o consider removing the batteries from the remote control as they may leak LCD Liquid Crystal Display screens like plasma PDP and conventional CRT Cathode Ray Tube screens are also susceptible to scre...

Page 10: ...ect your necessary TV Video and Graphic sources to your TV and no need to connect all available sources Analog TV source input You can connect an external VHF or UHF TV antenna if available to the TV...

Page 11: ...Button Decrease the volume of the speaker or adjust the value of an item highlighted in OSD menu 4 CH Next Channel Button Increase the channel number by one when the source is TV input or select a co...

Page 12: ...ct the power cable on page 4 2 HDMI 1 DVI IN 1 HDMI 2 DVI IN 1 Connect to the HDMI digital audio video output or DVI digital video output on digital video devices See Connect to a HDMI input on page 1...

Page 13: ...Connect your USB drive to the USB port on the TV set You may select playing video music photo text les See Features for Multimedia Playback on page 30 for detailed description 12 S VIDEO IN Connect to...

Page 14: ...e Change channels sequentially on page 14 6 PICTURE Press to select a preset picture mode See Select a picture mode on page 14 7 SOUND Press to toggle among available TV sound modes may vary from your...

Page 15: ...e sound output Press again to restore the sound output See Mute setting on page 13 17 INFO Press to display the information about current input See Display information for current input source on page...

Page 16: ...as shown below TV AV 1 AV 2 S Video YPbPr HDMI1 HDMI2 PC MEDIA 3 Continue to press the INPUT button to circulate the signal input or press the and OK buttons to select the signal source Adjust the au...

Page 17: ...ture mode Cinema Suitable for darker environments The contrast of the TV display will be adjusted to lower level for better view Freeze image on screen Press the FREEZE button on the remote control to...

Page 18: ...ou can press the TV AUDIO button on the remote control to toggle the audio type among Mono DUAL I DUAL II STEREO and FM Mono This function is only valid for TV Source The available options depend on t...

Page 19: ...Recommended for use when viewing 4 3 aspect video presenting compressed 16 9 aspect images in a 4 3 aspect frame in a so called letterbox format black strips along the top and bottom Not recommended...

Page 20: ...each plug into its corresponding jack by its color If you want to watch the Composite Video input press the INPUT button on the remote control and then press button or repeatedly press the INPUT butt...

Page 21: ...ideo jacks on one same video device just connect one of them For better image quality S Video jacks is recommended Connect to a Component Video input 1 Connect the component video output jacks on your...

Page 22: ...information on how to connect your video devices please refer to the manuals supplied with the devices Connect to a HDMI input Connect the HDMI output jack on your video device to the HDMI jack on th...

Page 23: ...UDIO IN HDMI Audio cable DVI to HDMI convert cable See Supported PC DVI input signal mode on page 38 for more about the resolution options Connect to a DVI input Video devices 1 Connect the DVI output...

Page 24: ...e AUDIO OUT L R output jacks on your TV using a audio cable Please note that the outputted audio is xed in its level and cannot be adjusted with the volume controls on your TV and remote control HDMI...

Page 25: ...ak Out Setup OSD Language Sleep Timer ECO Mode OSD Duration Calendar OSD Reset PC Not available Auto Adjust H Position V Position Phase Clock Channel Auto Scan Channel No Color System TV System AFT Ma...

Page 26: ...ess or on the remote control or VOL or VOL on the TV to change the setting 5 Press the EXIT button on your remote control or MENU on your TV to back to previous menu or to quit the OSD menu For exampl...

Page 27: ...ss to sharpen the image or press to blur the image 0 10 Hue It can only be adjusted in Color System NTSC mode Press to enhance green and weaken red and press to weaken green and enhance red 0 100 Satu...

Page 28: ...ddle treble middle middle bass and bass settings Press or to select sound mode User Standard Music Movie Bass To adjust the bass Press or to select 0 100 Treble To adjust the treble Balance To adjust...

Page 29: ...tdown and Power Saving function If you turn on this function PC will enter Power Saving mode after 30 seconds when there is no signal input and other Sources will shutdown automatically after 10 minut...

Page 30: ...e horizontal vertical position automatically Press to Auto Adjust H Position Adjust the horizontal position of the image Press or to select 0 100 V Position Adjust the vertical position of the image P...

Page 31: ...em I D K M BG AFT The nonstandard signal frequency left sided or right sided from the TV station will result in poor image or noise Through this function we can automatically adjust the frequency to i...

Page 32: ...umber 3 Move the highlight to Manual Scan and use to search available channels Please take note that the time for auto scanning will differ according to the local signals If the scanning process is un...

Page 33: ...to music and enjoy video audio les of multiple formats Before operating for multimedia playback please rst connect the device to the USB interface As the programs may be produced by various tools it...

Page 34: ...The USB inlet of the digital multimedia player will support the most hard disk USB and etc which however is not intended for all purposes Any identi cation failure should not be considered as a mechan...

Page 35: ...he USB inlet of the digital multimedia player will support the most hard disk USB and etc which however is not intended for all purposes Any identi cation failure should not be considered as a mechani...

Page 36: ...h however is not intended for all purposes Any identi cation failure should not be considered as a mechanical problem which may be related with the drive in that device 2 The USB inlet on this machine...

Page 37: ...power consumption external power as a must Attention 1 The USB inlet of the digital multimedia player will support the most hard disk USB and etc which however is not intended for all purposes Any id...

Page 38: ...vision or changes Battery safety notice Using wrong type of batteries may causes your batteries to leak chemical substance and or explode Please note the following Always ensure that the batteries are...

Page 39: ...36 ENGLISH Dimension...

Page 40: ...S Video audio x 2 Component Video Y Cb Pb Cr Pr audio x 1 PICTURE DVI over HDMI x 2 PC VGA D sub x 1 PC DVI audio x 1 Signal outputs RCA Stereo Sound output x 1 Component video resolutions 480i 480p...

Page 41: ...60 25 200 VGA 640 x 480 37 5 75 31 500 VGA 800 x 600 37 879 60 40 000 SVGA 800 x 600 46 875 75 49 500 SVGA 1024 x 768 48 363 60 65 000 XGA 1024 x 768 56 476 70 75 000 XGA 1024 x 768 60 023 75 78 750...

Page 42: ...25 1920 x 1080p60 67 5 60 148 5 1920 x 1080p50 56 25 50 148 5 The PC DVI and Component Video resolutions not listed in these tables will not be recognized and displayed When you connect your TV to a P...

Page 43: ...rtion in image Check if the aspect ratio is the right one for the input source The Image is too bright and the sharpness of the bright area is degraded Decrease your contrast setting If the input sour...

Page 44: ...ay caused by the interference from radio broadcasting amateur radio communication mobile phone communication Keep away any device that could generate interfering signal Claim for RoHS Compliance The n...

Page 45: ...4J V0K01 001 S PART No 4J V0T01 001...

Reviews: