background image


Product Service Manual 

– Level


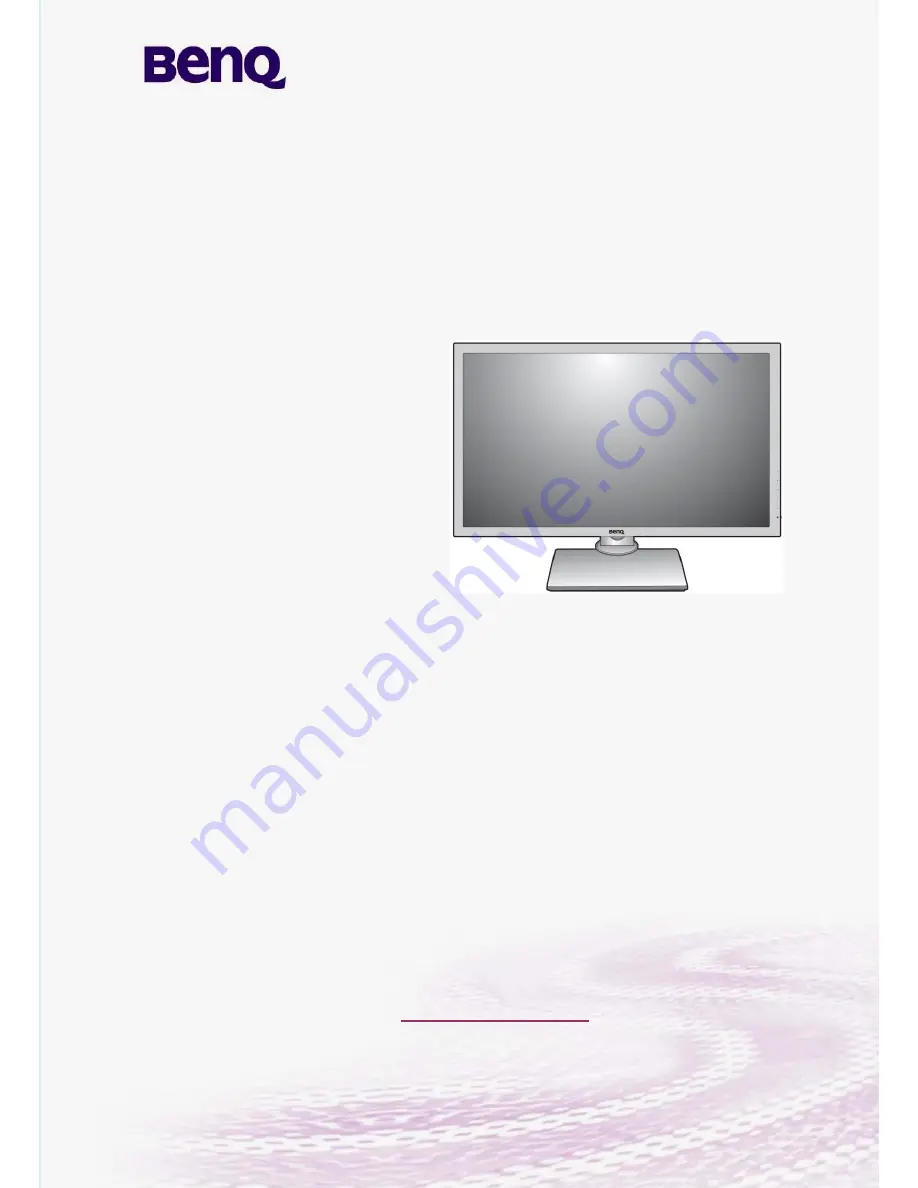
Service Manual for BenQ: 


Version: 2

nd


Date:12-13-2016 


Notice: 

For RO to input specific “Legal Requirement” in specific NS regarding to responsibility and 

liability statements. 

Please check 

BenQ’s eSupport web site, http://esupport.benq.com, to ensure that you have the 

most recent version of this manual. 


First Edition (Aug. 2016) 

©

 Copyright BenQ Corporation 2016. All Right Reserved.

BL2423PT 

9H.LFSLA.TBA 

Applicable for All Regions 

Summary of Contents for BL2423PT

Page 1: ...equirement in specific NS regarding to responsibility and liability statements Please check BenQ s eSupport web site http esupport benq com to ensure that you have the most recent version of this manual First Edition Aug 2016 Copyright BenQ Corporation 2016 All Right Reserved BL2423PT 9H LFSLA TBA Applicable for All Regions ...

Page 2: ...lated service information 8 5 Product Overview 9 5 1 Monitor Specifications 9 5 1 1 Certification 12 5 2 Panel Inspection Specification 18 Level 1 Cosmetic Appearance Alignment Service 26 Visual Inspection Cleaning 26 Software Firmware Upgrade Process 26 Factory mode 34 Adjustment Alignment Procedure 41 Level 2 Circuit Board and Standard Parts Replacement 65 Product Exploded View 65 Six Angles Vie...

Page 3: ... Digital Micro mirror Device DRAM Dynamic RAM DVI Digital Visual Interface DVI D Digital Visual Interface digital DVI I Digital Visual Interface Integrated E EEPROM Electrically Erasable and Programmable Read Only Memory F FLASH FLASH memory G G TXT Green Teletext H HDMI High Definition Multimedia Interface digital audio and video interface HP Head Phone I I 2 C Integrated IC bus L LED Light Emitt...

Page 4: ...olor signals for TV By mixing levels of R G and B all colors Y C are ROM Read Only Memory S SDA Data signal on I 2 C bus SDRAM Synchronous DRAM SW Sub Woofer Software T THD Total Harmonic Distortion V VGA Video Graphics Array Y YPbPr Component video Y Luminance Pb Pr Color difference signals B Y and R Y other amplitudes w r t to YUV Y C Video related signals Y consists of luminance signal blanking...

Page 5: ...l any time When repairing the circuit board please follow the requirement of RoHS and refer to the circuit diagram and repairing process that attached in the Service Manual The method of firmware updated the way of using the menu and some information that may be used when repairing are also attached in the Service Manual that provide repair engineer various choice 1 1 Important Only trained servic...

Page 6: ...equire replacing any parts please confirming the RoHS requirement before replace them 2 2 Safety Warning and Notice Installation 1 Do not use your monitor under any of the following environmental conditions Extremely high or low temperature or in direct sunlight Dusty places Highly humid exposed to rain or close to water Exposed to vibrations or impacts in places such as cars buses trains and othe...

Page 7: ...electric shock do not dissemble or repair the monitor 7 If a bad smell or an abnormal sound appears to come from the monitor contact your nearest BenQ service center for assistance immediately Cleaning 1 Ensure that the power is unplugged before cleaning your monitor 2 Use a monitor cleaner and a soft cloth to clean your monitor 3 Do not use solvents such as alcohol to clean your monitor Power 1 T...

Page 8: ...t in use This operating manual contains important information you require to start up and run your LED monitor This specification defines the requirements for the 24 MICROPROCESSOR based Multi mode supported high resolution color LED monitor The monitor can be directly connected to general 15 pin VGA connector 24 pin DVI connector Also support VESA DPMS power management and plug play function Addi...

Page 9: ...178 178 Display Colors 16 7M Response Time 14ms Typ GTG_AVR GtG response Time 4ms Premium 8ms High sRGB ratio 100 Color Space 72 NTSC Panel maker LGD BenQ Senseye TM Technology Yes BenQ Senseye TM Preset Modes 10 Modes by hotkey sRGB CAD CAM Animation 0 10 Standard Low Blue Light Movie Photo Eco M Book User BenQ Senseye TM Demo Modes 5 Modes CAD CAM Animation Movie Photo M Book Color Temperature S...

Page 10: ...ssis Colors Follow ID Artwork Carton Brown carton Power LED White On Amber Standby OSD Key Touch Key Tilt Up Down 5 to 20 Height Adjustment 140mm Pivot 90 Swivel 45 45 VESA Wall Mount 100x100 MNT without stand 4230g L 563 2mm W 73mm H 338 7mm Kensington Lock Yes Container Loading 40 Refer to B405 Container Loading 20 Refer to B405 OSD 17 Languages English Francais Deutsch Italiano Espanol Polish C...

Page 11: ...scan Yes Light Sensor Eye Protect Yes Proximity Sensor ECO sensor Yes DC 調光 Yes Smart Scaling NA Smart Reminder Yes AC Switch Yes On line Gamma calibration Yes Dynamic Power Saving Yes New UI Follow BL2420PT Bundle Software Display Pilot Accessories Bundle Power cord 1 5m VGA cable 1 5m Audio cable 1 5m USB2 0 cable 1 5m warranty card QSG CD Regulation Approvals Refer to B106 ...

Page 12: ...da cTUVus Y Certificate BQA USA Canada FCC and IC Y DOC BQA USA Canada FCC and IC Y Reports BQC China CCC Y Certificate BQC China CCC Y Printing Permission BQC China CCC Y Reports BQC China CECP Y Certificate BQC China CECP Y Printing Permission BQC China CECP Y Reports BQC China China Energy Label Y Certificate BQC China China Energy Label Y Reports BQE EU CE Y DOC BQE EU CE Y DOI BQE EU CE Y Rep...

Page 13: ...E EU ErP Y Reports BQE EU REACH Y Evidence BQE EU WEEE Y Reports BQE Germany Ergo Y Certificate BQE Germany GS Y Certificate BQE Russia Belarus CU Y Certificate BQE Ukraine Safety EMC DoC Y Certificate BQE Ukraine UkrSEPRO Y Certificate BQP Korea e Standby Y Certificate ...

Page 14: ...e International CB Scheme CB Y Reports International International Energy Star Y Certificate International International Energy Star Y Reports International International RoHS BenQ GP Guideline Y Evidence International International TCO Y Certificate Standard BenQ Information Request Document provide Assign Lab Quotation Remark Target Date Actual Date ...

Page 15: ... ICES 003 FCC part 15B ICES 003 GB4943 GB9254 GB17625 1 製造商 明基電 通有限公司 GB4943 GB9254 GB17625 1 製造商 明基電 通有限公司 GB4943 GB9254 GB17625 1 製造商 明基電 通有限公司 CQC31 452629 GB 21520 CQC31 452629 GB 21520 CQC31 452629 GB 21520 GB 21520 GB 21520 EN55022 EN55024 EN55022 EN55024 EN55022 EN55024 IEEE 1680 1 IEEE 1680 1 ...

Page 16: ...lists No 552 2009 2002 96 EC and its amendments ISO9241 307 prEN 50279 EK1 ITB 2000 EN60950 1 EK1 ITB 2000 ZEK 01 2 08 12 8 CISPR22 CISPR24 IEC60950 1 IEC60950 1 Ministry of Knowledge Economy Notification No 2008 116 Ministry of Knowledge Economy Notification No 2008 116 K60950 1 For safety approval ...

Page 17: ...2 KN24 K00022 CISPR22 K00024 CISPR24 IEC 60950 1 Includes JP deviation IEC 60950 1 Includes JP deviation ENERGY STAR Program Requirements for Displays ENERGY STAR Program Requirements for Displays 2011 65 EU SUP QM 07 02 TCO Certified Displays 7 0 ...

Page 18: ...18 5 2 Panel Inspection Specification ...

Page 19: ...19 ...

Page 20: ...20 ...

Page 21: ...21 ...

Page 22: ...22 ...

Page 23: ...23 ...

Page 24: ...24 ...

Page 25: ...25 ...

Page 26: ...the back or top of the cabinet are for ventilation They must not be blocked or covered Your monitor should never be placed near or over a radiator or heat source or in a built in installation unless proper ventilation is provided Never push objects or spill liquid of any kind into this product Software Firmware Upgrade Process Upgrade by 715GT089 B 1 Materials ISP JIG 715GT089 B VGA cable TPV P N ...

Page 27: ...USB cable to PC USB port will pop up a Hardware Wizard to help you install the USB driver if you use this ISP board first time You can install it successfully as the below instruction step by step Remark The USB driver files path D FTC100103 Mstar FTCUSB INF ...

Page 28: ...28 ...

Page 29: ...29 After installation the USB serial port driver please check the port Look the properties of my Computer 4 Install RTD tool 4 1 double clicks the icon to run it Note Must to install driver firstly ...

Page 30: ...30 4 2 Choose the FTDIUSB communication way 4 3 Click ISP and ISP Option to set the parameter ...

Page 31: ...31 4 4 Close the ISP Option window and click the BigBin to load the correct F W 4 5 Click to start programming ...

Page 32: ...eck the FW version after upgrade 5 1 The way to open factory menu 1 Connect signal source and power cable to monitor and DC off it 2 Press menu key and power on key synchronously as below figure When the screen lights release the two buttons and then press menu again to open below Service Page Power on key Menu key ...

Page 33: ...33 3 If the version is right please do factory reset in user menu as below or re upgrade F W as the above steps The reset will turn off burn in mode Check this F W version Menu key ...

Page 34: ...power cable to monitor and DC off it 2 Press source key return key and power on key synchronously as below figure When the screen lights release the three buttons and then press return key to open below factory menu Factory mode source key return key Power key return key ...

Page 35: ...35 Upgrade by 715GT089 B 1 Materials list VGA cable USB cable TPV P N 089G728 GAA DB TPV P N 089G1758 X MSTAR driver ISP JIG 715GT089 B PC Monitor USB port driver ISP tool EDID ...

Page 36: ...the icon to install the driver Restart PC after installation 4 Prepare the EDID written 4 1 Change the EDID files name as below rule VGA EDID WA dat DP EDID WP dat DVI EDID WD dat 4 2 Copy these files to one folder named as BENQ BL2423PT which must contains config ini file ...

Page 37: ...37 4 3 Copy BENQ BL2423PT to DDC folder and put DDC and ISP tool together 5 Run the ISP tool 5 1 Double click the icon to open the tool ...

Page 38: ...38 5 2 Select the EDID folder 5 3 Load EDID successful ...

Page 39: ...39 5 4 Tick the Only connect VGA and Debug Imformayion 5 5 type in the date and the 13 digit S N ...

Page 40: ...S appear the process is finished 6 Troubleshooting 6 1 Can t write 1 AC on the monitor and turn on it Restart the monitor 2 Take apart the monitor and connect the 7pin of EEPROM to GND to diable write protection then write EDID one by one 3 Set the Burn in on last to try again ...

Page 41: ...41 Adjustment Alignment Procedure The Control Panel ...

Page 42: ...42 Basic menu operation All OSD On Screen Display menus can be accessed by the control keys You can use the OSD menu to adjust all the settings on your monitor ...

Page 43: ...43 ...

Page 44: ...es functions and settings Menu options that are not available will become grayed out And keys that are not available will be disabled and the corresponding OSD icons will disappear For models without certain functions their settings and related items will not appear on the menu ...

Page 45: ...45 ...

Page 46: ...es functions and settings Menu options that are not available will become grayed out And keys that are not available will be disabled and the corresponding OSD icons will disappear For models without certain functions their settings and related items will not appear on the menu ...

Page 47: ...47 ...

Page 48: ...ources functions and settings Menu options that are not available will become grayed out And keys that are not available will be disabled and the corresponding OSD icons will disappear For models without certain functions their settings and related items will not appear on the menu ...

Page 49: ...49 ...

Page 50: ...50 ...

Page 51: ...51 ...

Page 52: ...s functions and settings Menu options that are not available will become grayed out And keys that are not available will be disabled and the corresponding OSD icons will disappear For models without certain functions their settings and related items will not appear on the menu ...

Page 53: ...s functions and settings Menu options that are not available will become grayed out And keys that are not available will be disabled and the corresponding OSD icons will disappear For models without certain functions their settings and related items will not appear on the menu ...

Page 54: ...54 ...

Page 55: ...55 ...

Page 56: ...ces functions and settings Menu options that are not available will become grayed out And keys that are not available will be disabled and the corresponding OSD icons will disappear For models without certain functions their settings and related items will not appear on the menu ...

Page 57: ...57 ...

Page 58: ... functions and settings Menu options that are not available will become grayed out And keys that are not available will be disabled and the corresponding OSD icons will disappear For models without certain functions their settings and related items will not appear on the menu ...

Page 59: ...59 ...

Page 60: ...1 DMT 2 FS 640x480 31 50 37 50 75 00 DMT 3 O 640x480 36 00 43 27 85 01 NP 640x500 25 25 31 00 57 76 IDF 2 FS 720x400 28 32 31 47 70 08 O 720x400 35 5 37 93 85 04 FS 832x624 57 27 49 71 74 53 BenQ NP 800x480 29 5 29 74 59 476 P 800x600 36 00 35 16 56 25 DMT 4 P 800x600 40 00 37 88 60 32 O 800x600 50 00 48 08 72 19 DMT 5 FS 800x600 49 50 46 88 75 00 DMT 6 O 800x600 56 25 53 67 85 06 DMT 26 NP 848x48...

Page 61: ... 1280x768 117 50 68 63 84 84 NP 1280x800 71 49 31 59 91 CVT 8 P 1280x800 83 50 49 702 59 81 GTF NP 1280x800 98 894 58 3 70 O 1280x800 102 8 60 048 72 FS 1280x800 106 6 62 795 74 934 O 1280x800 122 5 71 55 84 88 P 1280x960 108 00 60 00 60 00 O 1280x960 148 50 85 94 85 00 DMT 11 P 1280x1024 108 00 63 98 60 02 NP 1280x1024 126 99 74 88 69 85 NP 1280x1024 124 90 74 40 70 00 O 1280x1024 134 60 77 90 72...

Page 62: ...2 41M3 FS 1792X1344 203 25 83 57 59 9 CVT2 41M3 O 1792X1344 257 75 105 290 75 00 CVT2 58M3 O 1856X1392 217 25 86 485 59 934 CVT2 58M3 O 1856X1392 277 5 109 74 918 CVT2 59M4 O 1800x1440 218 25 89 4 59 9 P 1920x1080 R 138 5 66 587 59 934 P 1920x1080 173 67 158 59 963 DMT P 1920x1080 148 5 67 5 60 Nvidia 85Hz timing O 1920x1080 198 50 95 43 84 905 Nvidia 144Hz timing O 1920x1080 317 49 158 11 144 000...

Page 63: ...1536 R 209 25 94 7 59 9 CVT3 15M3 O 2048x1536 267 25 95 4 59 9 O 2560x1440 241 5 88 787 59 951 CVT4 10MA R O 2560x1600 R 268 5 98 713 59 972 4 10MA O 2560x1600 348 5 99 4 59 9 DMT 4E O 2560x1600 443 25 125 354 74 972 DMT 4F O 2560x1600 505 25 142 887 84 951 O 3840x2160 R 257 404 65 66 29 97 O 3840x2160 R 522 092 133 187 59 94 O 3840x2160 297 67 5 30 O 3840x2160 594 135 60 ...

Page 64: ...rm the reset function The timer should record up to 99999 hours and will be reset once launch 7 Add three selected items for HPD HDMI HPD DP HPD DVI HPD at Service menu HDMI HPD To disable the hot plug pin detection HDMI port default Off DP HPD To disable the hot plug pin detection DP port default Off DVI HPD To disable the hot plug pin detection DVI port default Off 8 Add BenQ logo on off item th...

Page 65: ...ge without notice Please go to http cs tpv com cn hello1 asp for the latest information Item Description Qty Unit 1 BEZEL 1 2 PANEL 1 3 INSULATING SHEET 1 4 ADAPTER BOARD NA 1 5 stand base ass y 1 6 MAIN BOARD 1 7 RUBBER PAD 1 8 SPEAKER 1 9 MAINFRAME 1 10 STAND_BUTTON 1 11 Cover_BTM 1 12 REAR_COVER 1 13 LENS 1 14 TAPE_DOUBLE 1 15 INSULATING SHEET 1 16 COVER_KEY 1 ...

Page 66: ...2 S3 0M1G1740 6120 SCREW 1 S4 0D1G1030 6120 SCREW 4 S5 0M1G3030 6120 SCREW 1 S6 0Q1G2030 6120 SCREW 2 S7 Q01G6146 3 SCREW 4 ART Part NO Description Qty Unit Q44GD1781010KL CUSHION REAR L24W Xbenq1 p1 Non region 1 PCS Q44GD1782010KL CUSHION FRONT L24W Xbenq1 p1 Non region 1 PCS Q44GD1783010KL CUSHION M L24W Xbenq1 p1 Non region Glo 1 PCS Q44GD17888104A00DL ARTWORK CARTON BL2423PT WW 1 PCS ...

Page 67: ...67 Six Angles View ...

Page 68: ...e the monitor on a smooth surface Be careful to avoid scratch and injury during the process of uninstall Remove the screws and then rotate the base as below picture to remove the base 2 Remove the stand Holding the stand and press the button and so you can remove the stand Open ...

Page 69: ...69 3 Remove the rear cover Unscrew the screws from the rear cover Pull apart bezel rear cover Note Be careful the BEZEL CLIP is easy to break ...

Page 70: ...ggested to separate bezel and rear cover from the gaps 4 Remove the main frame from the panel Remove the aluminum foil pull out the wire marked in red circles to remove the mainframe Note When you assembled the LCD you must tidy the wire as follow picture Example You can separate the bezel and rear cover from here ...

Page 71: ...71 Turn over the mainframe to remove the tapes LVDS cable and the connector 5 Remove the AC cover from the mainframe 6 Remove the boards from the main frame Remove the mylar from the mainframe ...

Page 72: ...72 And then remove screws in red pull out the wire to remove the main board and power board Turn over the power board and main board remove the cables The power board The main board ...

Page 73: ...f the speaker strongly as follow picture 8 Remove the panel Note Be course the panel is easy to broken when we remove the panel we should hold the iron on the panel edge use two hands at the same time and should avoid touching the panel surface ...

Page 74: ...74 9 Unscrew the screws and remove the cover to remove the key board and daughter board from bezel ...

Page 75: ...ture The wire will connect main board and speaker 2 Assemble the wires Assemble the wire the power board to main board the wire speaker to main board and LVDS cables the Wire from main board will connect to panel Connect main board and panel Connect main board and key board Connect main board and speaker Connect main board and power board Connect power board and panel ...

Page 76: ... 3 Assemble the main board and power board on the main frame Connect main board and power board Lock the main board and power board on the mainframe 4 Assemble the AC COVER The power board The main board ...

Page 77: ...77 5 Assemble the panel on the bezel ...

Page 78: ...main frame Connect the LVDS cable key board cable and past the tapes Turn over the mainframe connect the cables Stick the black rubberized fabric and aluminum foil and Stick the black rubberized fabric and aluminum foil ...

Page 79: ...79 7 Assemble the stand Lock the screws on the rear cover 8 Assemble the stand Push the stand to the rear cover ...

Page 80: ...e permanently on or off and that is a natural defect occurs in LCD technology The image has a faulty coloration It has a yellow blue or pink appearance Go to Picture and Reset Color and then choose YES to reset the color settings to the factory defaults If the image is still not correct and the OSD also has faulty coloration this means one of the three primary colors is missing in the signal input...

Page 81: ...e of each type of input sources you can use the Display Mode function to set a proper aspect ratio for the input sources The image is displaced in one direction Read the instructions on the link Adjusting the Screen Resolution on the CD and then select the correct resolution refresh rate and make adjustments based on these instructions The OSD controls are inaccessible To unlock the OSD controls w...

Page 82: ...d Check Power On Off is On Re plug the power cable Replace main board and check connections Check the LED indicates is OK Check the AC power er Replace the power board OK NG OK NG NG Turn on the Power On Off switch Replace key board and check connections NG ...

Page 83: ...hite Press the power button is OK Check the LVDS FFC cable or panel The end NG OK OK NG Replace the main board Replace the power board Replace the LVDS FFC cable or panel NG The end Replace the key board NG OK Replace the main board and connection OK ...

Page 84: ...y mode Set to the optimal frequency select the recommended frequency Pull out signal cable and check Self Test Feature Check is ok Check the signal cable and the PC Readjust the phase and pixel clock in the user mode Replace the main board Replace the panel NG NG NG OK NG NG OK The end OK NG ...

Page 85: ... shift Replace the signal cable Pull out the signal cable and check the screen color display is normal The end Replace the signal cable or PC Reset the factory mode In the user mode set the color settings until customer satisfy Replace the main board NG OK NG OK NG ...

Page 86: ... D3 6 SCREW FOR POWER BOARD MAINFRAME 2 6 1kgf cm 0M1G1740 6120 M4 6 SCREW FOR POWER BOARD MAINFRAME 1 6 1kgf cm 0D1G1030 6120 D3 6 SCREW FOR MAIN BOARD MAINFRAME 4 6 1kgf cm 0M1G3030 6120 M3 6 SCREW FOR MAIN BOARD MAINFRAME 1 6 1kgf cm 0Q1G2030 6120 Q3 6 SCREW FOR REAR_COVER STAND_BUTTON 2 6 1kgf cm Q01G6146 3 Q4 8 SCREW FOR REAR_COVER MAINFRAME 4 12 2kgf cm ...

Reviews: