background image

Interlude 

Owners’ Notes


 42 


Charging

: Turn on Battery Charging switch on electrical panel whenever connected to shore 

power to charge the batteries. 


Shore power

: 50 ft. AC power cable (store in aft port locker under the helm when not in use); 

blue LED will illuminate on the boat plug when connected to shore power; a 25 ft. extension 
cord is also stored in the aft port locker. 


Inverter

: ON/OFF switch located on electrical panel. Do not use appliances that draw lots of 

power, like hair dryers. 

Batteries 

Interlude

’s battery system has

 been upgraded to include five (5) high capacity AGM batteries, four (4) 

for the house electronics (providing ~420 amp-hours) and one for starting the engine. The battery bank 
and battery switches are in the aft port cabin, with the batteries located under the berth. Under normal 
operations all battery switches should be 

set to “ON.”


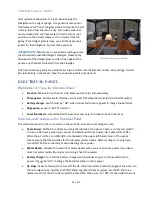
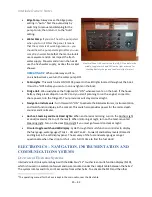
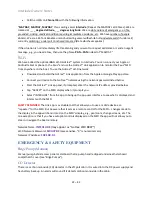
The voltage readouts for the batteries are on LCD readout on the electrical panel in the main cabin, 
press the battery icon to toggle between Domestic and Engine battery levels. Note that 

12.5 volts

 at rest 

(no load) is 

fully charged

 while 

11.8 volts

 is 

empty

which is


not good

; don’t let the batteries fall below 

12V without recharging. If the battery level drops to 12.1V, run the engine for about an hour at 1100 
RPM to re-charge the batteries. We monitor the voltage readouts regularly when running on battery 
power to e

nsure we don’t draw the batteries down too far, and we 

always check them before turning in 

at night. With proper power management, expect to use ~60-100 AH overnight

2

. The LCD panel provides 

a readout of the current amperage draw. If the charge level drops to 12.1V 

and you can’t recharge

, turn 

off as many systems as possible, for example, the fridge (draws about 4 amps; it will keep food cold 
overnight).  
 

SAFETY REMINDER


 Never turn off the batteries when the engine is running, as this will seriously 

damage the electrical system. If you have small children on board, the nice big red & black switches can 
look like something fun to play with. 

Please make sure no one touches them while the engine is running

.  


2


𝐼 =

𝑃

𝑉

 where I is amperage, P is power (watts) and V is volts. For example, 100 AH over 12 hours is ~8 amp/hr; at 

12.5 volts, this is producing ~100 W of power, which is quite a bit on a sailboat. 

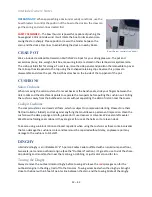
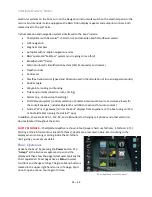
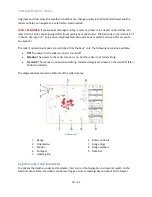
Battery bank 

 aft port cabin. 

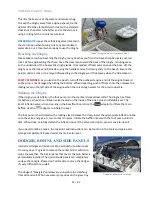
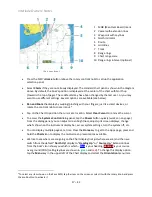
Battery switches 

 aft port cabin. 

Summary of Contents for Oceanis 41.1 2017

Page 1: ...INTERLUDE Owners Notes 2017 Beneteau Oceanis 41 1 2019 Crosswinds Sailing LLC interlude crosswindssailing com Last Updated May 15 2019 ...

Page 2: ...tion display autopilot radar and AIS The MFD supports multiple panels on one screen to customize the information presented It includes tide and current displays photo overlays sun and moon charts and many more useful features We ve added a 40 inch Samsung 1080p HD SmartTV with DVD Blu ray player in the salon for a rainy day A FUSION audio system with Bluetooth and USB connections lets you enjoy yo...

Page 3: ...S 10 BOW THRUSTER 11 CRAB POT 12 CUSHIONS 12 DINGHY 12 DODGER BIMINI AND SIDE PANELS 13 ELECTRICAL PANEL 14 ELECTRONICS NAVIGATION INSTRUMENTATION AND COMMUNICATION SYSTEMS 15 EMERGENCY SAFETY EQUIPMENT 22 ENGINE AND HANDLING 24 ENTERTAINMENT SYSTEM 28 FUEL TANK REFUELING 29 GALLEY 30 HEADS SHOWERS AND HOLDING TANKS 32 HEATING SYSTEM 34 KEEL DEPTH 35 OUTBOARD ENGINE 35 PROPANE 37 SAILS AND RIGGING...

Page 4: ...issues that might arise OPERATING TIP San Juan Sailing has provided an excellent set of resources on their Web site that cover many topics that will make your trip easier and more enjoyable Check them out at http www sanjuansailing com about resources html SAFETY REMINDER Please do not smoke on Interlude flames and fuel don t mix well Should a question problem arise please contact us also in the S...

Page 5: ...Hot water 12 gal Holding tanks 20 gal each in Forward and Aft heads House battery capacity 420 Amp Hours AH 4 105 AH each Engine battery capacity 106 Amp Hours 1 105 AH Shore power 30 Amp 120 volt No cabins 3 with queen size berths salon settee converts to bed No heads 2 with electric toilets showers Headroom 6 7 Hull number BEYKL025J617 U S Coast Guard Number 1277560 MMSI No 367783890 AIS identif...

Page 6: ...latform The swim platform has a sliding lock bolt located on the starboard end Press the button on the bolt and slide it back to unlock The operating switch is on the starboard helm Simultaneously press the red button and toggle the black rocker switch down up to open close the platform Close the bolt lock to secure the platform in the up position There is a remote control fob stored in the Nav ta...

Page 7: ...ontrol is mounted in the chain locker Wash down pump Located in chain locker uses raw water Use to hose off mud and debris as you retrieve the anchor ON OFF switch is in the chain locker Snubber line 15 heavy snubber line with chain hook located in the anchor locker Please always use the snubber to carry the load of the chain and anchor once you have set the anchor Secondary anchor Heavy duty alum...

Page 8: ...rol the windlass 5 Pick the spot where you want to stop the boat when the anchor is set turn into the wind or current and motor forward 3 4 boat lengths 6 The anchor will swing between the bow and the water line Proceed slowly using short bursts of the windlass until the anchor is in the water We like to hand push the anchor forward keeping the shank level before gradually allowing it to ease into...

Page 9: ...g the UP button on the windlass control Then seat the anchor by hand and snug up any slack chain 7 Retrieve the snubber line and store in the chain locker Return the windlass remote to its cradle Turn off the anchor wash down hose switch in the anchor locker Safety Suggestions for Anchoring high winds small coves If strong winds are forecast 15 knots test the anchor hold by putting the transmissio...

Page 10: ... valve in the propane locker if you won t be using the BBQ again on your trip Clean the grill grates with the brush provided and close and lock the lid That s all there is to it happy grilling OPERATING TIP Cooking with the lid closed provides the best heat distribution and shortest cooking times The grill cooks very hot monitor your temperatures and cooking times carefully There s a meat thermome...

Page 11: ... no load is fully charged while 11 8 volts is empty which is not good don t let the batteries fall below 12V without recharging If the battery level drops to 12 1V run the engine for about an hour at 1100 RPM to re charge the batteries We monitor the voltage readouts regularly when running on battery power to ensure we don t draw the batteries down too far and we always check them before turning i...

Page 12: ...r for the electrical outlets microwave and entertainment system TV DVD Blu ray when you are operating on battery power The ON OFF switch and volt meter for the inverter are on the electrical panel in the main cabin When running on batteries turn on the inverter and flip the AC outlet switch on the panel to ON Turn off the inverter when not in use to minimize drain on the battery We recommend not u...

Page 13: ... Drop the salon table leaves remove the settee cushions In the settee storage compartments find the crossbeams and folding panel insert Insert the support cross beams into the notches and place the panel insert on top Place the mattress insert on top stored in the port aft cabin Replace the cushions BILGE PUMPS Please visually inspect the bilge each day which is accessed by lifting the floorboard ...

Page 14: ...d helm SAFETY REMINDER In emergencies the shower sump pumps can be turned on if water rises into the heads to speed up removing water from the main cabin BOW THRUSTER ON OFF Switch is located at port helm Press both left red and right green buttons at same time to activate Repeat to deactivate it will turn off automatically after 15 minutes of inactivity Engine must be running before you can use t...

Page 15: ...g the cushion out Pulling the cushions away from the bulkheads or seats without separating the Velcro first can tear the covers Cockpit Cushions The cockpit cushions are closed cell foam which is subject to compression denting Please store them flat not rolled or folded and not against anything that could leave a permanent impression Clean the cushions with a damp sponge or cloth please don t use ...

Page 16: ...prop to operate Inflating the Dinghy If the dinghy needs inflation the foot pump is in the starboard cockpit lazarette The dinghy has three 3 baffles each with an inflation valve located on the inside of the boat plus an inflatable keel The keel s inflation valve is in an opening in the bow floor board Use the black adapter to inflate the main baffles Use the grey adapter to inflate the keel The f...

Page 17: ...to shore power to charge the batteries Bilge pump Leave in AUTO position Fuses breakers Located behind the panel access only if a breaker needs to be reset Switches and Controls on the Electrical Panel The electrical panel is in the main salon on the port side Here are some things to note Shore Power All the AC controls are along the left side of the panel There is no master switch to turn on AC p...

Page 18: ...i function display in the cockpit This switch also provides power for the radar depth sounder and knotmeter Anchor Steaming and Deck Flood Lights When anchored or mooring turn on the Anchor Light at dusk located at the top of the mast When motoring at night turn on the mast mounted Steaming Light Turn on the deck Flood Light if you must go forward on deck at night Circular toggle switch and LED di...

Page 19: ... selection of entertainment audio source and volume levels for the cockpit speakers includes Bluetooth and USB connections for audio sources GoFree Wi Fi 1 gateway mirrors the Zeus2 displays from anywhere on the boat using an iPad or Android tablet running the GoFree app In addition there are 110V AC 12V DC and USB outlets for charging cell phones and other electronic devices located throughout th...

Page 20: ...plays change what s shown on the instrument display bar access system settings turn the system off etc You can display multiple pages at a time Press the Home key to get to the Apps page press and hold the Charts icon to display the multi screen presentations available We like to see where we are going on the Chart display not just where we are and then we switch from the default North Up display ...

Page 21: ...ons on the autopilot control panel or MFD display Tap a button one time to change your heading by the indicated angle SAFETY REMINDER An autopilot is a useful navigational aid but does not replace a human navigator Keep your head on a swivel is still the best advice SailSteer The SailSteer panel provides a composite view of key data while you are sailing Press the Home key to access the Apps panel...

Page 22: ...onal modes are controlled from the Zeus2 unit The following modes are available Off The power to the radar scanner is turned off Standby The power to the radar scanner is on but the radar is not transmitting Transmit The scanner is on and transmitting Detected targets are drawn on the radar PPI Plan Position Indicator The diagram below shows the features of the radar display 1 Range 2 Orientation ...

Page 23: ...ventually floats off If it s stubborn try removing it by traveling briefly in reverse But if the knotmeter is temporarily out of service use the speed over ground SOG data provided by the GPS navigation system Wind Sensors Wind speed and wind direction sensors are located at the top of the mast True and apparent winds are reported by the Zeus2 MFD and the Triton repeater located at the port helm A...

Page 24: ...d the Canadian Gulf Islands You will also hear Strait of Juan de Fuca south of the San Juan s Georgia Strait north and Rosario Strait runs through the eastern part of the San Juans In Canadian waters listen to the Canadian weather station which also transmits warnings of military area activity such as area Whiskey Golf WG outside of Nanaimo VHF Radio Channels Here s a summary of the common radio c...

Page 25: ...ect your device to the GoFree network using the network password listed below Start the GoFree Link app and if prompted enter the network IP address provided below Tap ACCEPT on the MFD display when it prompts you Select INTERLUDE from the app to bring up the app user interface to see what is displayed and interact with the MFD SAFETY REMINDER The Link app is a valuable tool that allows you to use...

Page 26: ...guishers onboard 1 Galley mounted on the bulkhead next to the sink 2 Nav table mounted on bulkhead beneath the table 3 Port cockpit lazarette Check the gauge before departing SJS If a fire extinguisher is low on suppressant notify the SJS crew and get a replacement First Aid Kit A USCG approved first aid kit is in a storage compartment in the aft head Flares Visual day night distress signals are s...

Page 27: ...ting underway Lift the companionway steps to access the engine compartment Look around and below the engine for any signs of oil or other fluid leaks Check the coolant level Anywhere between the two lines high and low on the overflow reservoir is where you want to be Inspect the raw water strainer for debris In case of an engine overheat alarm check for eelgrass clogging the strainer Unscrew the t...

Page 28: ...tact SJS OPERATING TIP Allow 5 10 minutes of warm up before placing a load on the engine It stresses a diesel engine to be placed under load when cold Conversely allowing a diesel engine to idle too long will cause carbon build up Running the Engine Engage forward or reverse gear by moving the transmission directly from Neutral to Idle Forward or Idle Reverse the transmission will click into each ...

Page 29: ...lly no prop walk just a bit to starboard in reverse Driving in reverse is a pleasure We recommend you stand on the forward side of the port helm and face backwards allowing you to steer with easy access to the throttle transmission Grip the wheel firmly wheel when in reverse water pressure on the aft edge of the rudder can push the rudder over to one side which is hard on the steering mechanism an...

Page 30: ...d but the gasket won t seal Then restart the engine If after restarting the engine it overheats again check the seal between the strainer the rubber gasket and the lid If the strainer is drawing air it won t draw water If needed open and then retighten the lid on the strainer and check to make sure the rubber gasket is in place in the lid and not lying in the bilge If the above steps fail to solve...

Page 31: ... HD SMART TV with built in Wi Fi DVD Blu ray Sony DVD Blu ray disk player We ve left a collection of movies onboard for your viewing pleasure Remote controls Remotes for the TV and video player are stored with the DVDs Other video sources Connect PC or other video source to TV with HDMI cable provided FUSION Audio System The FUSION unit is located next to the VHF radio near the Nav station The sys...

Page 32: ...e DVD player is located behind the bench seat in the main cabin on the starboard side next to the TV Turn both on using their remotes open the video player disk drawer insert a movie disk and close the door press play If the movie doesn t start automatically check that the video source for the TV is set to HDMI 2 HDMI 1 is used for connecting other video sources like your PC Other Video Sources Yo...

Page 33: ...lley make sure the burner and oven control knobs are fully OFF rotated all the way to the right Push down and hold the red button on the solenoid toggle switch and toggle the rocker switch to the ON position a green LED light indicates it is on The solenoid switch is located to the left of the stove see figure The burner knobs for the stovetop are on the right side of the stove When ready to light...

Page 34: ...level doesn t get too low 12V or less The top access is great for storing all your foods The front door access is where we like to place drinks and other quick access items There s a small freezer section that works well 8 Water from the fridge such as melting ice drains into the bilge and then overboard SAFETY REMINDER When you open the top a support arm locks the lid in place Please be sure to p...

Page 35: ...er switches see photo The top button flushes and fills the toilet The bottom rocker button is used to add water to the bowl left and to evacuate water right To use a toilet wet the bowl first with the bottom rocker switch then flush the bowl by pressing the top rocker switch Once the waste is pumped out wet the bowl again with clean water and fully evacuate it using the bottom rocker buttons This ...

Page 36: ...on usage The tanks are in the cabinet next to each toilet The tanks are green and the waste level inside can be seen by shining a flashlight from the top downwards San Juan Sailing staff will discuss holding tanks overboard discharge and pump outs during the charter briefing on the day of your arrival OPERATING TIP When pumping out the holding tanks use the small winch handle to remove replace the...

Page 37: ...red temperature Vents Located in main cabin and in each berth and head rotate to direct air flow pivot louvers to open close vents Using the Heating System Interlude is equipped with a Webasto thermostatically controlled forced air diesel heating The system uses the same diesel fuel as the engine and the heater s fan is powered by the DC house batteries The heating unit is in the aft starboard coc...

Page 38: ...y recommends that you maintain a minimum of 10 12 under the keel both underway and at low tide on anchor SAFETY REMINDER The depth sounder zero datum point is immediately in front of the keel about 2 feet below the water line with the keel extending down another 6 feet or so OUTBOARD ENGINE Interlude is equipped with a 2017 Honda 4 stroke 2 3 horsepower outboard engine for the dinghy This make and...

Page 39: ...uel valve Pull out the choke left forward corner of the housing as you are looking at it Open the air vent on the top of the fuel cap top of outboard by turning to ON indicator Make sure the black U shaped kill clip with the red lanyard is clipped into the red shut off knob left forward corner of the outboard Turn the throttle handle turn counter clockwise Pull the cord until it starts Don t jerk ...

Page 40: ...e engine suddenly quits it s usually because a the vent on the fuel cap isn t open the engine will die soon after starting or b you ve run out of fuel Open the vent cap and or add fuel from the gas can to the engine PROPANE The propane tank locker can be found in the cockpit storage compartment located in the deck between the helms The propane tank s provide fuel for both the galley stove and the ...

Page 41: ...iment to find what works best for you Reefing Recommend reefing when winds reach 15 knots Deploying the Mainsail Here are the steps we follow to deploy the mainsail 1 Uncoil and prepare all needed lines outhaul red with white flecks furling line white black mainsheet grey with black flecks and boom vang black 2 Open the clutch for the outhaul and furling line Ease the mainsheet and boom vang Take ...

Page 42: ...e hanging storage bag beneath the winch The mainsheet is very long we usually just coil it and hang it over the winch Reefing the Mainsail Reefing the mainsail follows the same furling instructions given above except for starting the engine Note the two vertical black marks at the foot of the sail near the mast these are your reefing marks The first vertical mark one reef point the second vertical...

Page 43: ...m Don t sail or motor with the swim platform open it s designed for use when anchored on a mooring ball or docked To open close the platform press the button on the sliding lock bar on the starboard side of the deck behind the starboard helm Slide the lock bar to the right To lower the deck depress and hold down the red button on the rocker switch located on the side of the starboard helm then sim...

Page 44: ...ded a tool kit and collection of spare parts that might be needed to make repairs These are located under the main salon seat on the starboard side The manuals for the boat are also stored here WATER Fresh Water Tanks There are two fresh water tanks on Interlude The aft primary tank Tank 1 is under the aft starboard berth capacity 53 gallons The fill port is in the propane locker located in the af...

Page 45: ... have a blue ring around them OPERATING TIP Only have the valve open for one tank at a time If both valves are open you could accidently drain both tanks and run out of water Hot Water When the engine is running the water heater operates by heat recovery from the engine cooling system The heater also runs off the AC electrical supply when you are connected to shore power Turn ON the water heater s...

Reviews: