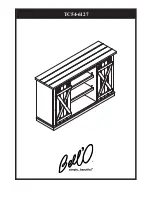
Bell'O TC54-6127 Manual Download Page 4

TOOLS REQUIRED

SAFETY INFORMATION

Please read and understand this entire manual before attempting to assemble, operate or install 
the product.

WARNING

Some steps are more easily


handled with two adults.

CAUTION

Before assembly and/or


installation, carefully


unwrap all parts.

Locate and set aside the


hardware kit before


discarding packaging.

Use care when assembling


your new product. Take


your time and follow the


assembly 

instructions


closely.

(NOT INCLUDED)

Summary of Contents for TC54-6127

Page 1: ...TC54 6127 ...

Page 2: ... lb or less Use with televisions or loads heavier than the maximum weights specified may result in instability causing tip over resulting in death or serious injury MAXIMUM LOAD 34 kg 75 lb MAXIMUM LOAD 9 1 kg 20 lb MAXIMUM LOAD 9 1 kg 20 lb MAXIMUM LOAD 6 8 kg 15 lb ...

Page 3: ...TC54 6127 H H H J L P L Q I I E F D D B C A G H K K M N O ...

Page 4: ...all the product WARNING Some steps are more easily handled with two adults CAUTION Before assembly and or installation carefully unwrap all parts Locate and set aside the hardware kit before discarding packaging Use care when assembling your new product Take your time and follow the assembly instructions closely NOT INCLUDED ...

Page 5: ... x28 PH KDCZNC001 PH BDRBLK002 PH KDBZNC002 x28 x8 x28 Ø8x30mm Ø6 3x12mm x42 x4 HARDWARE AA EE FF CC DD BB PH DWLNTL001 PH SCRBLK006 x4 GG Ø3x12mm Ø15mm PH SCRBLK007 PH BLTBLK002 x8 HH ...

Page 6: ... x2 x2 x4 x4 Ø6 3x25mm Ø4x15mm Ø4x19mm x24 x12 HARDWARE II MM NN KK LL JJ PH SPNPCSPLB2 PH BDGBLK001 Touch Up pen x1 ZZ x2 OO PH BKTWHT003 ...

Page 7: ...AA x4 1 A ...

Page 8: ...CC x8 B C 2 ...

Page 9: ...GG x4 3 A B C ...

Page 10: ...AA x6 4 Q P ...

Page 11: ...CC x12 5 F E ...

Page 12: ...BB x6 6 Q P F E ...

Page 13: ...BB x4 7 F A E ...

Page 14: ...CC x6 8 O ...

Page 15: ...9 O ...

Page 16: ...FF x2 10 ...

Page 17: ...AA x12 11 G ...

Page 18: ...12 G BB x12 ...

Page 19: ...DD HH EE x4 x8 x8 13 M N ...

Page 20: ...14 M N ...

Page 21: ...JJ II x2 x2 15 ...

Page 22: ...16 LL x12 KK x4 ...

Page 23: ...17 MM x4 L ...

Page 24: ...18 FF x40 I I J ...

Page 25: ...19 D D CC x4 ...

Page 26: ...AA x6 20 K K ...

Page 27: ...21 BB x6 D D K K ...

Page 28: ...22 NN x8 D D ...

Page 29: ...23 NN x16 H H H H ...

Page 30: ...Note It is very important that your unit is level in order for your doors to function properly After moving your unit to its final location you may need to adjust the floor levelers 24 ...

Page 31: ...WARNING You must install the tipping restraint hardware to help prevent any accidents or damage to the unit We strongly recommend mounting this hardware to a wall stud and your unit OO x2 25 Wall ...

Page 32: ...lways use protective pads under hot dishes and plates Heat can cause chemical changes that may create spotting within the furniture Further advice about wood furniture care It is best to keep your furniture in a climate controlled environment Temperature and humidity changes can cause fading warping shrinking and splitting of wood It is advised to keep furniture away from direct sunlight as sun ma...

Page 33: ...REPLACEMENT PARTS TC54 6127 PP QQ PH LVRBLK001 PH PLTBLK001 Shop for other TV mounts stands on our website ...

Reviews: