

Belkin Corporation
501 West Walnut Street
Compton • CA • 90220 • USA
Tel: 310.898.1100
Fax: 310.898.1111
Belkin Components, Ltd.
Express Business Park • Shipton Way
Rushden • NN10 6GL • United Kingdom
Tel: +44 (0) 1933 35 2000
Fax: +44 (0) 1933 31 2000
Belkin Components B.V.
Starparc Building • Boeing Avenue 333
1119 PH Schiphol-Rijk • The Netherlands
Tel: +31 (0) 20 654 7300
Fax: +31 (0) 20 654 7349
Belkin, Ltd.
7 Bowen Crescent • West Gosford
NSW 2250 • Australia
Tel: +61 (0) 2 4372 8600
Fax: +61 (0) 2 4372 8603
Belkin Tech Support
US: 310.898.1100 ext. 2263
800.223.5546 ext. 2263
Europe: 00 800 223 55 460
Australia: 1800 666 040
P74344
© 2003 Belkin Corporation. All rights reserved. All trade names are
registered trademarks of respective manufacturers listed.
OmniView
™
KVM Switch with CAT5 Extension
Quick Installation Guide
ENTERPRISE Quad-Bus Series
F1DW116C
F1DW216C
Control up to 16 servers located up to 1000 feet
away from your KVM Switch with up to two consoles
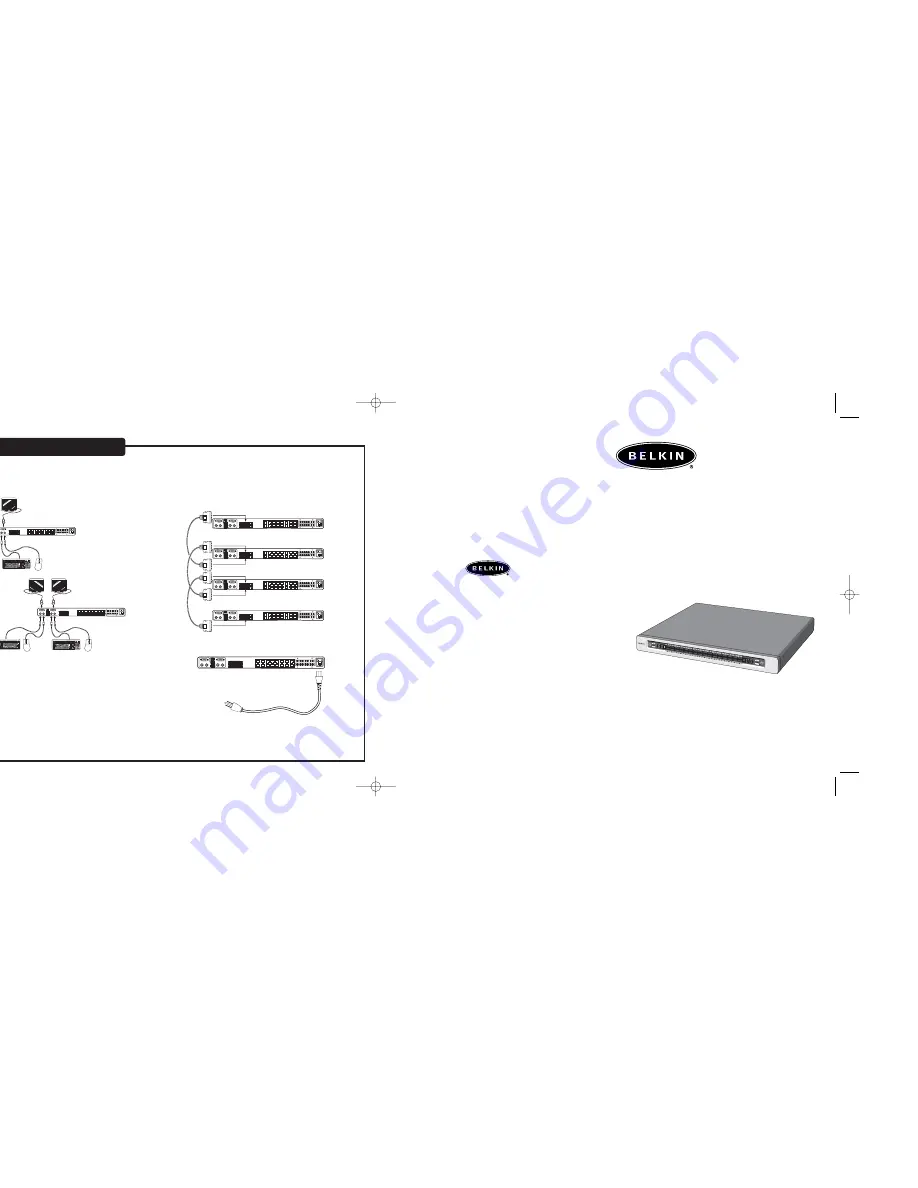
Daisy-Chain Configuration
2
Step 4: Attach the Daisy-Chain Cable (Belkin part number F1D9402-XX) to an
available daisy-chain port of the previous Switch, making sure that
the Daisy-Chain Cables are only connected in an "in-to-out" or
"out-to-in" configuration.
Step 5: Attach the IEC power cable to the power connector located
on the rear of the Switch.
Step 6: Power up the connected servers. Check for keyboard, video, and
mouse function.
belkin.com
• Expandable for control of up to 256 servers from four consoles
Step 2: Connect the console monitor, keyboard, and mouse to the console ports
of the primary Switch(es).*
*Note: Dual-console support available on 2x16 models only.
Step 3: Connect the computers to the Switch as previously described for standalone
Switches, skipping Step 4.
P74344_F1DWXXXC_QIG.qxd 7/11/03 10:43 AM Page 2


