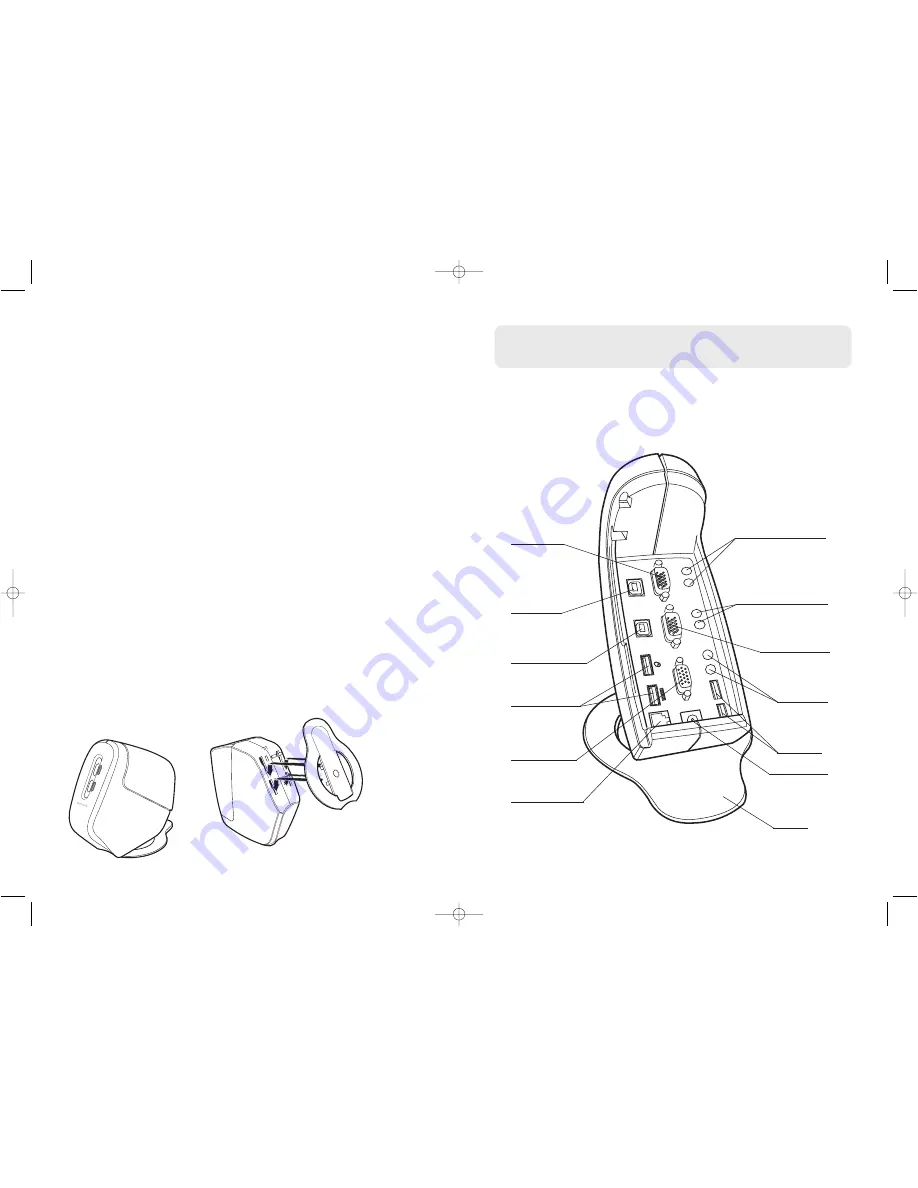
Step 1: Connecting the Video, Keyboard, and Mouse to the
CONSOLE Ports and Computers on the KVM Switch
This booklet is a quick guide through the basic steps needed to
install the SOHO Series USB KVM Switch (the KVM Switch). If you
have any problems during installation, please refer to the SOHO
Series USB KVM Switch User Manual.
™
OmniView
SOHO Series USB KVM Switch
Quick Installation Guide
You will need the following items to install the KVM Switch:
• SOHO Series USB KVM Switch
• One (each) USB keyboard, monitor, and USB mouse
• One VGA and USB KVM cable per computer installed
• One 9-volt DC, 1A power supply adapter
• Optional—audio cables (3.5mm plugs) for speakers and
microphone installation
Recommended Cable Kits:
F1D9101-XX
KVM Cables for SOHO Series with Audio, USB Style
F3X1962-XX
All-In-One KVM Cable, USB Style
F3X1895-XX-GLD
All-In-One KVM Cable, USB Style
F8V209-XX
Audio Cable
(-XX denotes the length of cable in 6, 10, and 15 feet)
Installing the KVM Switch Base
1. Power down your computers.
2. Remove the rear panel of the KVM Switch to expose the ports. (Fig. 1)
CONSOLE USB
mouse/keyboard
ports
CONSOLE
VGA port
1st computer
USB mouse/keyboard
ports
2nd computer
USB mouse/keyboard
ports
2nd computer
VGA port–VGA 2
2nd computer
audio/microphone jacks
1st computer
audio/microphone jacks
1st computer
VGA port–VGA 1
CONSOLE
audio/
microphone
jacks
DC power jack
Base
Fig. 1
Flash-upgrade port
USB input
ports—
devices 1
and 2
P73977ea_F1DS1xxU_QIG.qxd 3/9/04 11:32 AM Page 2


