background image

3

Safety is Important

Your safety and the safety of others is important.  Please, therefore, ensure you read

the Safety instructions

before

 you operate this television.

Safety instructions

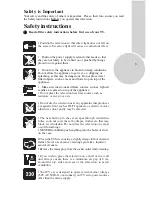
Read all the safety instructions before first use of your TV.

!

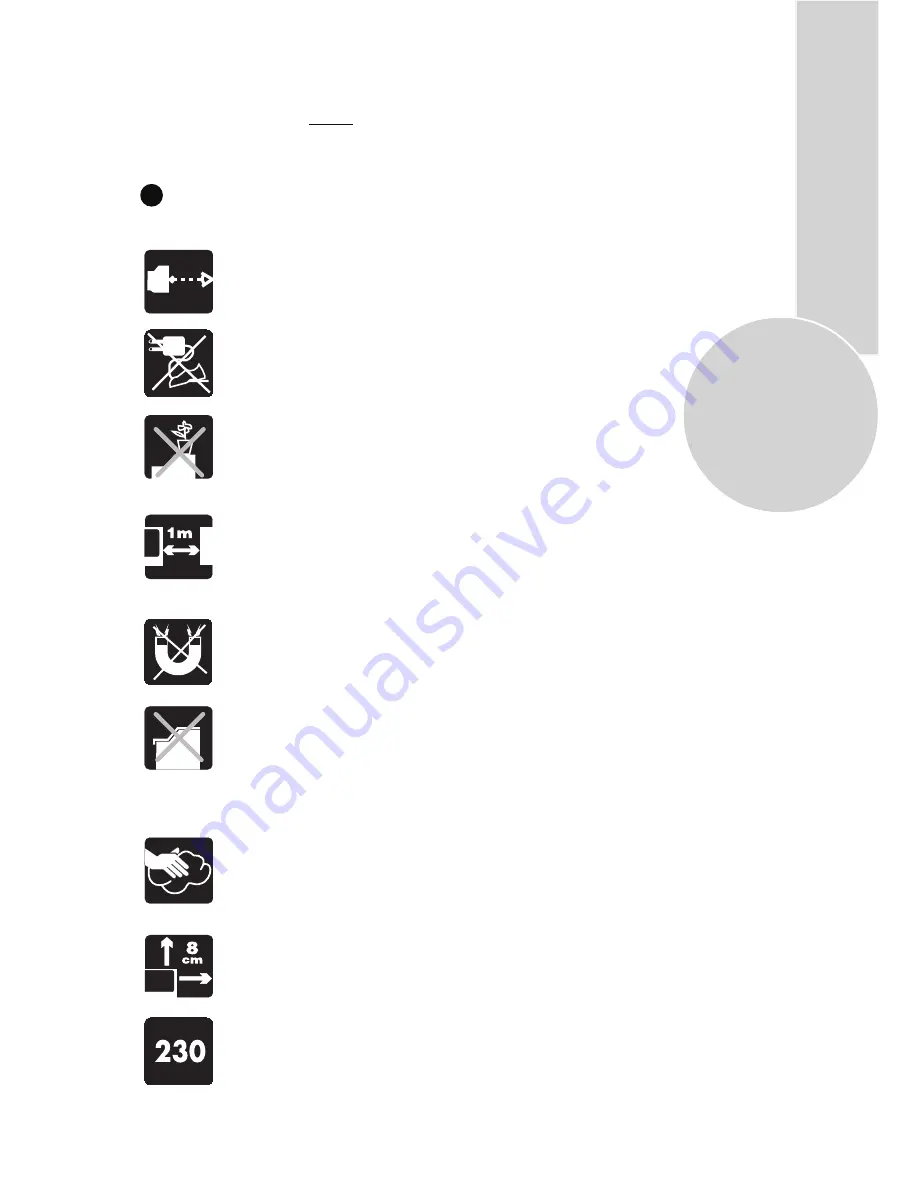
• Position the television so that direct light does not fall on
the screen. Excessive light will cause a washed out effect.

• Position the power supply lead and other leads so that
they are not likely to be walked on or pinched by things

placed on or against them.

• Do not use the appliance in humid or damp conditions.

Do not allow the appliance to get wet, i.e. dripping or
splashing, as this may be dangerous. Do not place water
filled objects, such as vases and flower top on top of the

appliance.

• Make sure that no naked flame sources, such as  lighted
candles, are placed on top of the appliance.

• Do not use the television near any apparatus that produces
a magnetic field such as HI-FI speakers or electric motors
otherwise colour purity may be affected.

• The heat built up in the set escapes through ventilation
holes, so do not cover the set by drapes, clothes etc. that may
block air circulation. Do not place the television on carpet
or soft furnishings.

• Clean the TV Screen using a slightly damp cloth or chamois
leather. Never use abrasive cleaning agents like  

liquid or

aerosol cleaners.

• If you wish to place the television on a shelf or in a wall
unit always ensure there is a minimum air gap of 8 cm
around the top, sides and rear of the television, to assist
ventilation.

• Your TV set is designed to operate with mains voltages
230V AC; 50Hz. Do not connect your TV set to power sources
other than the mains supply.

• Do not place the television near heat sources such as
radiators, ovens, stoves, etc.

• NEVER let children push anything into the holes or slots
on the case.

• Remove the mains plug from the socket outlet while cleaning.

Summary of Contents for 24C763WNS

Page 1: ...Operating Instructions C O L O U R T E L E V I S I O N S NICAM STEREO 24 25 26 28 29 32 C7 SERIES ...

Page 2: ...ctions table Remote control Using the TV Manual tuning Automatic tuning Child lock Program table TV controls TV setup Sound menu Picture menu Features menu Picture format Using teletext Connecting external equipment Help and service tips Technical specifications table Transmitter stations Guarantee Service 2 3 4 5 5 5 5 6 6 7 7 8 8 9 9 10 11 12 12 14 14 15 16 17 18 19 23 24 25 26 27 28 1 ...

Page 3: ...Audio Video PHONO sockets Model Dependant Back Audio Out Model Dependant Normalisation system to recall the setting in memory after the colour contrast brightness setting have been changed Picture adjustment using one button Smart control Sound adjustment using one button Smart control Equalizer Sound Setup Automatic Volume Limiting Your TV set is equipped with an On Screen Display system This sys...

Page 4: ...nce Do not use the television near any apparatus that produces a magnetic field such as HI FI speakers or electric motors otherwise colour purity may be affected The heat built up in the set escapes through ventilation holes so do not cover the set by drapes clothes etc that may block air circulation Do not place the television on carpet or soft furnishings Clean the TV Screen using a slightly dam...

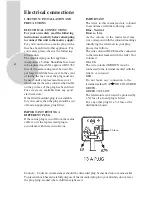
Page 5: ...ible on the pin face of the plug has been fitted Fuse covers are available from any good electrical store If the fitted moulded plug is not suitable for your socket then the plug should be cut off and an appropriate plug fitted IMPORTANT FITTING A DIFFERENT PLUG If the mains plug is cut off from the mains cable rewire the replacement plug in accordance with these instructions IMPORTANT The wires i...

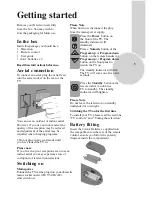
Page 6: ...ng the television Press the Standby button on the remote control to switch the TV to standby The standby indicator will brighten Please Note Do not leave the television on standby unattended or overnight Battery fitting Insert the 2 AAA Batteries supplied into the compartment on the rear of the remote control ensure you follow the polarity diagram inside the compartment Press the Power button on t...

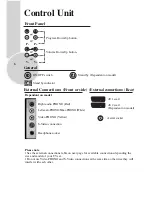
Page 7: ...Mono PHONO White Video PHONO Yellow S Video connection Headphone socket Please note See the external connections table on next page for available connections depending the size and model of your TV set Do not use Video PHONO and S Video connections at the same time otherwise they will interfer with each other AV1 scart External connections Rear AV2 scart Dependant on model Aerial socket P P V V De...

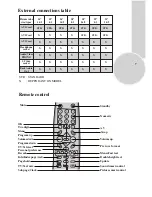
Page 8: ...gram up TV Teletext Info Index page text Reveal Page hold TV Text mix Sub page Clock Picture smart control Personal preference Two digit 28 4 3 Picture tube size typee 25 4 3 28 16 9 29 4 3 32 16 9 AV1 Scart AV2 Scart Headphone socket Audio Video PHONO S Video socket Back Audio Out STD STD STD STD STD X X STD STD STD X X X X X AV3 Scart 26 16 9 STD X X PAT X X X X X X X X X X X X X X X X X X X X X...

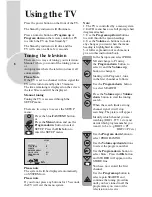
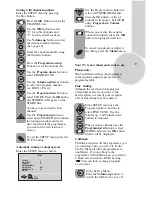
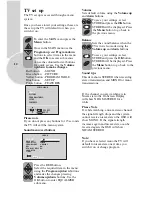
Page 9: ... BACK SETUP S 07 I 0 OFF P1 C S Using the TV Note 1 The TV is controlled by a menu system 2 EACH menu has a use full prompt chart diagram attached 3 Use the Program up down buttons to scroll throuh the menu headings 4 Use the Volume buttons to make any changes you want when the menu heading is highlighted in white 5 A fuller explanation of each menu is given in this instruction book Use theProgram...

Page 10: ...ogram down up buttons to exit the channel row Child lock Childlock switches off the programme you are watching when you select it In the Set Up Menu all other programmes are unaffected If you go back to the programme with childlock on you will see a black screen with the OSD showing You can lock as many programs as you want In the Set Up Menu Press the Volume up button to switch the Child lock on ...

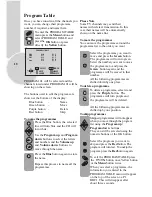
Page 11: ... the OK button Select the programs you want to skip and press the Redbutton The program will turn red To unskip the program press the Redbutton again When you select a programme the information you entered in the PROGRAM TABLE menu will appear All the following programmes are shifted down by one place on the top of the screen i e P1 BBC1 This will disappear after about three seconds To move the pr...

Page 12: ...select your input as follows Each press will move to the next option AV For use when you are connecting an external source to your TV Video recorder DVD player etc via the SCART sockets or PHONO sockets See Connecting external equipment Press the Mute button again to restore the sound The symbol will disappear See headphones page 14 2 Scart models 1 A V1 when using SCART socket 1 2 A V2 when using...

Page 13: ... menu system Sound menu red button or use the coloured fastext buttons for quick access Use the Volume up down to make changes Red button Green button Yellow button Blue button Purple button Press the RED button Select the required item in the menu using the Program up down buttons and make the changes pressing Volume up down buttons Use the OK button to enter EQUALIZER sub menu If the channel you...

Page 14: ...djust the AVL and EQUALIZER in DOLBY VIRTUAL mode menu To save your settings select STORE and press theOK button STORED will be displayed Press the Menu button to go back to the previous Manufactured under license from Dolby Laboratories Dolby Pro Logic and the double D symbol are trademarks of Dolby Laboratories Dynamic Bass optional Set DYNAMIC BASS to ON if you wish to deepen the bass sound spe...

Page 15: ... symbol will stay on until the mute button is pressed again To return to the TV speaker sound press the mute button and the mute symbol will disappear Note If you have used the headphones with high volume it is advisable to reduce it before pressing mute to avo d a loud changeover to TV sound Picture menu Green button The picture menu allows you to set up the following BRIGHTNESS CONTRAST COLOUR S...

Page 16: ...tures Menu Purple button LANGUAGE TIMER FEATURES BACK OK SELECT Timer Use Program up and down buttons to select Timer in the features menu Using the Timer fuction you can switch to a specific programme at a pre programmed time or you can turn your TV off at the time you want your TV to be turned off Press OK to access the Timer menu Clock Use the numeric buttons to set the real time If required On...

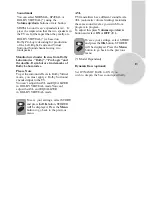
Page 17: ... box Useful for watching video some film formats Widescreen TV sets 16 9 this is the screen format of widescreen TV sets The TV will automatically switch to this format if it detects 16 9 format from the SCART inputs Zoom an enlarged 4 3 format retaining the same aspect ratio 16 9 4 3 16 9 Note 1 A Black band may be present on the top and bottom of the picture depending on the broadcast on 4 3 and...

Page 18: ...ext whilst watching a TV programme press button The text will be superimposed over the TV programme Press the button again to return to the text page In Text mode press theUpdate button The TV will return to TV mode with the text page number in the top left hand corner of the screen Enter the page number you want using the buttons The top line of the text page will appear whilst the text searches ...

Page 19: ...page using theNumeric buttons in the format S0001 for sub page 1 The teletext will search for the sub page This may take some time To return to the TV whilst the teletext is searching press the Update button When the page number is found it will appear in the top left hand corner of the screen Press the Update button again to view the text page To reveal information Press the Rev button to reveal ...

Page 20: ...io in sockets of the TV If the sound is in mono use the Audio Input L In the SOUND menu select MONO Via PHONO lead optional Connecting a video recorder Plug one end of the SCART lead not supplied into the back of the video recorder and the other end into one of the SCART sockets on the back of the TV Switch on the video recorder and the TV Press the AVbutton on the remote control to select AV1 or ...

Page 21: ...e for the video recorder on the TV Select a programme number 0 or between 55 and 99 Press the AV button three times to select A V2S available on two scart models Plug the S Video plug into the S Video socket and the audio leads into the audio sockets You can also connect it through the S Video socket of the TV optional Via PHONO lead and S Video socket Via aerial socket Make sure the TV and video ...

Page 22: ...r are both switched off Plug one end of the PHONO lead into the video and audio out sockets on the back of the DVD player and plug the other end into the video and audio in sockets of the TV Plug the S Video plug into the S Video socket and the audio leads into the audio sockets You can also connect it through the S Video socket of the TV optional Via PHONO lead and S Video socket Press the AV but...

Page 23: ... one end of the PHONO lead into the video and audio out sockets on the back of the decoder and plug the other end into the video and audio in sockets on the TV Select TINT by using Program down button and use the Volume up and down buttons adjust the colour Please Note Model Dependant You can record from one external piece of equipment to another via the TV by connecting the playback to SCART 1 re...

Page 24: ...l out TV Scart socket Video Scart socket Aerial in Aerial out Scart socket Aerial socket Scart 1 Satellite digital receiver Video Rear of TV Connecting TV games and computer R L VIDEO S Video In S Video camcorder Camcorder AV1 or AV2 AV2 2 scart models only R L VIDEO AV1 S Video In S Video TV Game Player ...

Page 25: ...nal sources at once Disconnect one of the sources Adjust the fine tuning No picture Is the aerial plugged in properly Is the aerial lead damaged Are all the plugs in the aerial lead fitted correctly Have you pressed the correct buttons on the remote control Sound coming from only one speaker Is the balance set to one side See the sound menu If you have external speakers has one of them become disc...

Page 26: ...e TV S1 S20 S21 S41 Speaker empedance 8 ohm Technical specifications table Picture tube size type 25 4 3 28 4 3 28 16 9 SF 29 4 3 SF 32 16 9 SF Visible screen size Sound Output 10 THD Power consumption 28 16 9 PF 29 4 3 PF 32 16 9 PF Stand by Power consumption 26 16 9 PF Screen size 63 cm 70 cm 70 cm 70 cm 70 cm 72 cm 82 cm 82 cm 59 cm 66 cm 66 cm 66 cm 68 cm 68 cm 77 cm 77 cm 2x10 W 2x10 W 2x10 W...

Page 27: ...MAIN UK TRANSMITTER STATIONS 26 ...

Page 28: ...eries Repairs or replacements required as a result of unauthorised repairs or inexpert installation that fails to meet the requirements contained in the user instruction book Repairs or replacements to product installed or used on commercial or non household premises Important notes The product is guaranteed for domestic household use only The guarantee will be void if the product is installed or ...

Page 29: ...ill normally be there within 48hrs of receipt of your call excluding Bank Holidays or at your earliest convenience Before telephoning for service please check the trouble shooting guide in the instruction book as often minor problems are easily identified and resolved by following the instructions contained therein Service visits where there is no fault with the product could incur a charge even t...

Page 30: ...G1B 801 ...

Reviews: