Learning to Create Methods for the Biomek® 3000
2-11
Biomek® 3000 Laboratory Automation Workstation Quick-Start Guide
2.4.3
Configuring Source Labware
To configure the labware named
Resv
as source labware in the
Transfer
step:
1. Click on
Click here to add a source
.
2. Click on
Resv
labware sitting on
P2
in the Current Deck Display.
Note:
The information you supplied during
Instrument
Setup
is displayed in
the source labware configuration.
3. Leave the
Auto-Select
checkbox selected to use the technique selected by
Biomek Software.
4. Right-click on the large tip illustration next to the microplate graphic in the
configuration and choose
Measure from the Bottom
.
5. To adjust and set the aspirate height for the depth the tip descends into the
reservoir, place the
mouse cursor over the tip illustration
. When the cursor
turns into a hand, hold the left mouse button down to move the hand up and down
until the depth is as close to
2.00 mm from bottom
as you can get. Then adjust
the height precisely to 2.00 mm using the following note. This will be your
aspirate height for this transfer.
Note:
After you click on the tip, you can adjust the height more precisely by
using the up or down arrow keys on your keyboard while holding the
Alt
key.
You can also right-click on the graphic, then select from the menu that appears to
adjust the height.
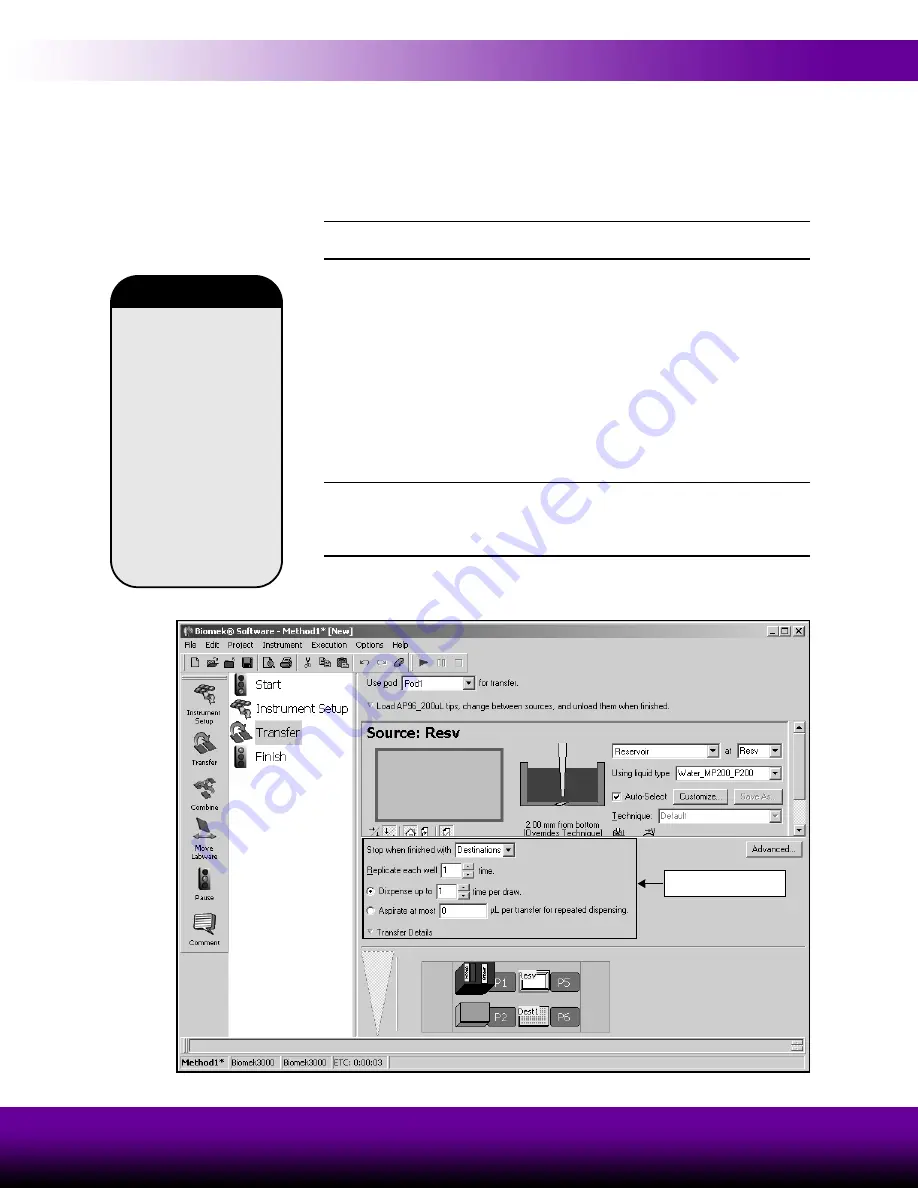
The source labware configuration is complete and the main editor now looks like
Figure 2-9. Transfer step with source labware configured
Techniques allow
pipetting settings to be
saved globally and used
in any method. Biomek
Software includes several
predefined techniques. If
Auto-Select
is chosen in
a pipetting step, such as
Transfer,
each time a
method is created,
Biomek Software
automatically selects
the technique most
appropriate for the
pipetting operation.
Techniques
Transfer Details


