ENGLISH – Motorized screen user manual
Specifications are subject to change without notice. E&OE
Doc: Q Series – HOME CINEMA MODULES Installation Manual rev2 | 24.04 2013
Please verify that you are working with the latest revision of this document before specifying your screen.
Page 8
06 CLEANING AND MAINTENANCE
Screens and their projection surfaces are delicate and must be cleaned with great care, according to the following instructions:
Never use solvents, chemical or abrasive products, or pointed tools to clean the surface.
Avoid contact with other materials (varnishes, inks etc) as they might be impossible to remove from the canvas.
FABRIC MATT WHITE, HIGH CONTRAST, 3D WHITE:
Remove dust from the case with a soft, clean cloth and a non aggressive detergent as necessary.
Clean the projection screen with a soft, clean, damp cloth, and a neutral or alcohol-base detergent as necessary. Since rubbing the screen with a cloth during cleaning operations can cause electrostatic
charge to accumulate, we recommend the subsequent application of an antistatic liquid with a clean cloth, to avoid dust being attracted again
GENERIC PROFILE: Remove dust from the case with a soft, clean cloth and a non aggressive detergent as necessary
VELVET PROFILE: Clean profile with a soft clean cloth, or a brush with soft, antistatic bristles. A vacuum-cleaner brush may be used, provided its bristles are soft and perfectly clean.
STRUCTURE and ANCHORING BRACKETS:
The state of the product and the anchoring capacity of its brackets must be checked regularly. In case of canvas deformation or rips, or loosening of structural
components such as brackets or screws, action must be taken immediately to clear the area around the screen and avoid hazard to people and things, replace the defective component and restore the
product's functionality.
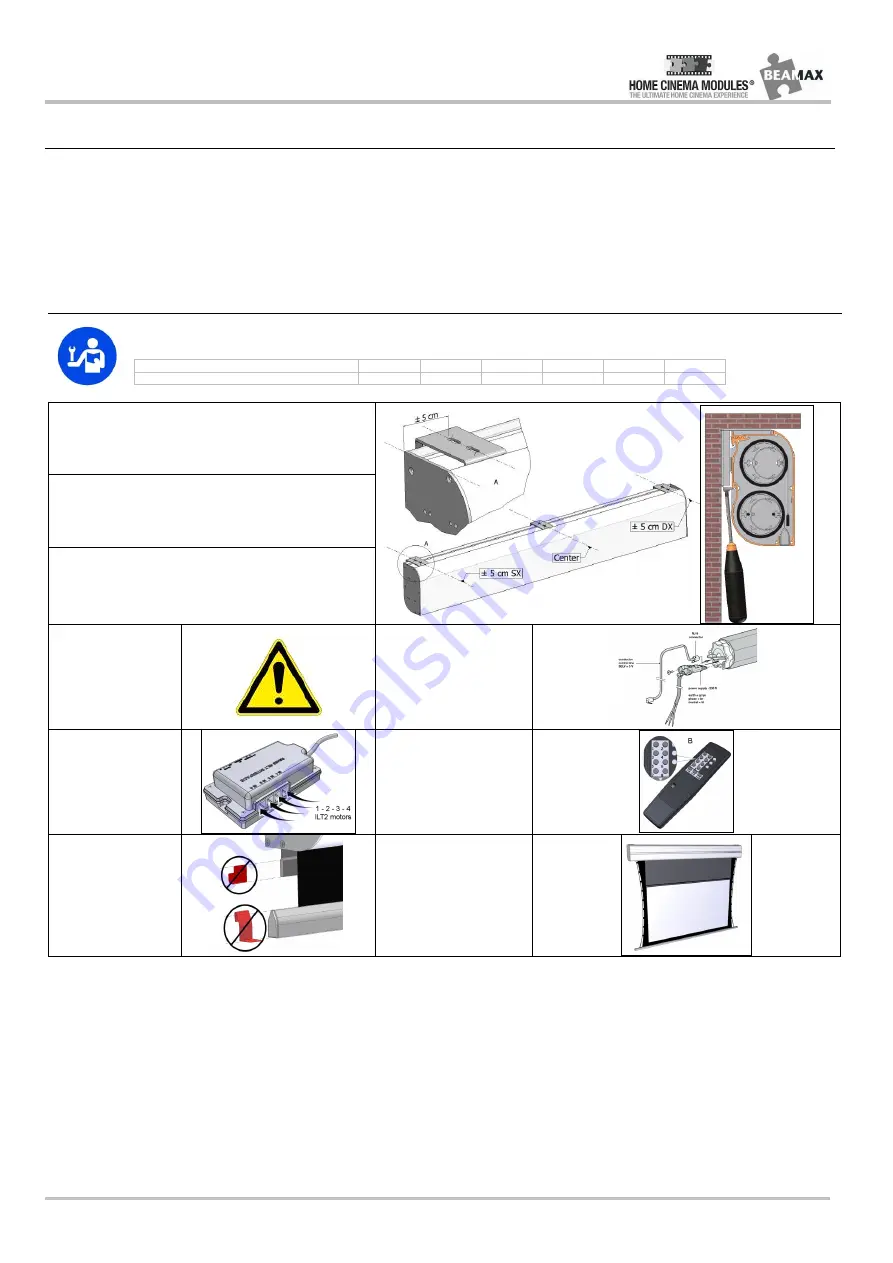
07 INSTALLATION INSTRUCTIONS
WARNING:
When installing the screen use plugs and screws suitable for the screen’s weight and for the type of wall or ceiling on which the mount brackets are to be fixed, based on the
following criteria
Screen width view area up to cm
225
250
275
300
325
350
Overall weight
Kg 34
Kg 40
Kg 47
Kg 55
Kg 58
Kg 60
1. Fasten the brackets to the wall or ceiling, respecting the distances indicated in
the figure (the third bracket is present only in versions over 3m long).
2. Mount the screen by hooking the brackets into the dedicated slots.
3. Tighten the lower screw of the bracket until the case is firmly anchored (it is not
necessary to exert any force).
4.To execute “compulsorily
“the procedures described to
point 2 before using the
screen.
5° operation:
To connect the motors to power
6° operation:
To connect the RJ9 cables to
Interface (M1 and M2)
7° operation:
Press the 7 button on the remote
control for open all fabrics of about
10cm
8° operation:
remove all the seafty
accessories applied on the
surface
Now the screen is
ready
Page 2
Summary of Contents for HOME CINEMA MODULES Q Series
Page 1: ......


