background image

169890

•  When the connection is completed, no stray strands or cut 

wire should be present. The cord clamp must be secured over 
the outer sheath.

•  It is advisable that your appliance is only installed in a location 

where the ambient temperature of the room, corresponds with 
the climate classi

fi

 cation that is stated on the rating plate of 

your appliance. Your appliance may not function correctly if the 
ambient temperature falls outside of the following ranges.

Climate classi

fi

 cation

Appropriate ambient temperature

SN

+10 to +32 degrees centigrade

N

+16 to +32 degrees centigrade

ST

+10 to +38 degrees centigrade

T

+18 to +43 degrees centigrade

•  Positioning the appliance requires two persons in order to 

avoid injuries or damage to the appliance.

•  Your appliance should not be located in direct sunlight or 

exposed to continuous heat or extremes of temperature (e.g. 
next to a radiator or boiler).

•  You should check whether there is an electrical socket 

available, which will be accessible after your appliance is 
installed.

•  Place the appliance 

fl

 atly and 

fi

 rmly on a solid base. The 

appliance is 

fi

 tted with adjustable feet on the front side, used 

to level the appliance.

•  The rear side of the appliance is 

fi

 tted with wheels which 

facilitate the positioning of the appliance into its 

fi

 nal location.

•  Anything positioned above the appliance must be at least 5 

cm away to allow suf

fi

 cient cooling of the condenser. You must 

allow a 15 mm gap to the rear of the appliance.

•  Avoid exposing the appliance to direct sunlight or heat 

sources. If this is not feasible, then you should install an 
insulation plate between the appliance and the adjacent heat 
source.

•  The bottom front corners of your appliance are 

fi

 tted with 

handles to facilitate moving. The appliance may stand 
independently or adjacent to a cupboard or wall.

•  Be sure to leave enough space for the opening of the door, to 

avoid damage to the appliance or personal injury. Also leave 
ample space for extracting shelves (see diagram on the next 
page).

19

Positioning

169890en.indd   19

169890en.indd   19

16.10.2006   11:36:29

16.10.2006   11:36:29

Summary of Contents for BFE320

Page 1: ...Instruction manual BFE320SS BFE350SS FRIDGE FREEZER Z Raid HZA BAUMATIC 169890a5 169890_naslovka_a5 cdr 16 oktober200611 47 09 Composite133lpiat45degrees ...

Page 2: ...ual contains important information including safety installation points which will enable you to get the most out of your appliance Please keep it in a safe place so that it is easily available for future reference 169890en indd 1 169890en indd 1 16 10 2006 11 36 09 16 10 2006 11 36 09 ...

Page 3: ... appliance 7 Using your Baumatic fridge freezer 9 Arranging and storing food in the refrigerator 12 The freezer compartment 13 Cleaning and maintenance 16 Installation 18 Troubleshooting 22 Baumatic ltd Conditions of guarantee 24 2 Contents 169890en indd 2 169890en indd 2 16 10 2006 11 36 20 16 10 2006 11 36 20 ...

Page 4: ...n health which could otherwise be caused by inappropriate waste handling of this product The symbol on the product or on the documents accompanying the product indicates that this appliance may not be treated as household waste Instead it shall be handed over to the applicable collection point for the recycling of electrical and electronic equipment Disposal must be carried out in accordance with ...

Page 5: ...ecification of the appliance must not be attempted for reasons of safety Check the appliance for any signs of transport damage If you notice any damage then you should not connect your appliance to your mains supply and should contact your retailer Your appliance contains R600a refrigerant which is a natural gas that does not contain CFCs that can damage the environment However it is a flammable s...

Page 6: ...ance or performing maintenance work ensure that the appliance has been disconnected from your mains supply Never allow the back coils of the appliance to come into contact with the wall surface Always ensure that the location where you are installing your appliance is free of stored items such as papers and other flammable materials Never block the ventilation openings of the appliance either on t...

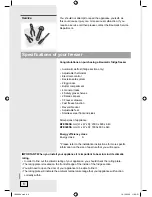
Page 7: ... x D 2000 x 600 x 640 BFE320SS mm H x W x D 1800x 600 x 640 Energy efficiency class Energy class A Please refer to the installation instructions for more specific information on the size of aperture that you will require IMPORTANT When you install your appliance it is important to bear in mind its climatic rating In order to find out the climatic rating of your appliance you should check the ratin...

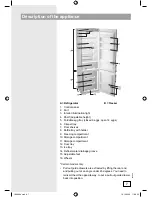
Page 8: ...ge compartment 11 Storage compartment 12 Door tray 13 Ice tray 14 Defrost water drainage groove 15 Adjustable feet 16 Wheels Certain models only Pull out guide drawers are extracted by lifting the rear end and pulling out at an angle under 45 degrees You need to reinsert them the opposite way to put a pull out guide drawer back into position 7 Description of the appliance 169890en indd 7 169890en ...

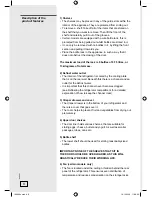
Page 9: ... an outlet for the defrost water It is important that this channel never becomes clogged see Defrosting the refrigerator compartment for a detailed explanation of how to keep the channel clear 3 Crisper drawers and cover The crisper drawer is in the bottom of your refrigerator and there is a cover that goes over it The cover helps to prevent fruit and vegetables from drying out prematurely 4 Upper...

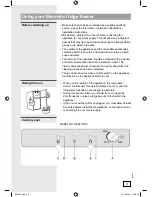
Page 10: ...and accessories should be thoroughly dried after the cleaning process has been completed There can be an odour when you first switch on the appliance It will lessen as the appliance starts to cool When you first switch on the appliance the compressor will run continuously for approximately 24 hours or until the refrigerator reaches a cool enough temperature During this period of time you should tr...

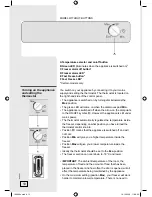
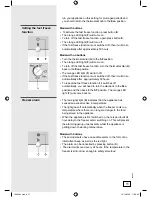
Page 11: ...e inside the freezer Position Max will give you a lower temperature inside the freezer Ideally the thermostat should be set to the Eco position The freezer section can cool down to 18 C and lower IMPORTANT The ambient temperature of the room the temperature of food and the amount of food that has been placed in the freezer and how often the door is opened will all affect the temperature being main...

Page 12: ...ches off automatically you will need to turn the dial back to the Eco position and then back to the SF position The orange LED light F will come back on The red signal light D indicates that the appliance has sensed an excessive rise in temperature The light goes off automatically when the freezer cools to a temperature where there is no longer a danger to the food being stored in the appliance Wh...

Page 13: ...h as the oils in lemon orange peel and acid in butter can cause damage to the plastic parts contained inside of the refrigerator Do not open the refrigerator door too often or leave the door open for long periods of time as this will increase the temperature inside of the appliance Meat should be wrapped in polythene bags and then placed on the glass shelf above the salad drawers Meat should only ...

Page 14: ...d be allowed to cool down before you attempt to freeze it If you place warm food in the freezer compartment then the increased humidity will cause quicker ice formation and increase the amount of power that the appliance uses The guidance of the food manufacturer should be followed in regard to the maximum storage time Thawed foods must not be frozen for a second time To freeze the maximum quantit...

Page 15: ...e fresh food is satisfactorily frozen If it is then the fast freeze function should be switched off Freezer bags polythene wraps aluminium foil extra thick and special cans for frozen foods are suitable packaging for storing frozen goods in Tape rubber bands or plastic clips are suitable for sealing bags and wrappings Before sealing a suitable bag you should compress the air out of it as this will...

Page 16: ... place them in your freezer This will shorten the length of time that you can safely store the food for Partially thawed or defrosted foods should be used as soon as possible Cold air preserves the food but it does not destroy the micro organisms which rapidly activate themselves after defrosting and make foods perishable Partial defrosting reduces the nutritional value of food especially fruits v...

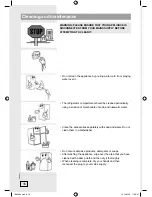
Page 17: ...carbonate of soda and lukewarm water Clean the accessories separately with soap and water Do not clean them in a dishwasher Do not sure abrasive products detergents or soaps After washing the appliance wipe over the area that you have cleaned with a damp cloth and then dry it thoroughly When cleaning is complete dry your hands and then reconnect the plug to your mains supply 16 Cleaning and mainte...

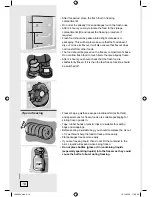
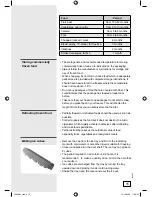
Page 18: ...d 3 5 mm 24 hours prior to defrosting you should turn on the fast freeze function by pressing button E This will continuously freeze the food inside the freezer helping to preserve it during the defrost process After this period of time empty the freezer of all food Switch the freezer section off by using the ON OFF button for the freezer section B To drain the defrost water you should pull the fu...

Page 19: ...d the regular operation of the electric system YOUR REFRIGERATOR IS INTENDED FOR FITTED AND PERMANENT INSTALLATION We recommend that the appliance is connected by a qualified electrician who is a member of the N I C E I C and who will comply with the I E E and local regulations Your refrigerator comes supplied with a 13 amp plug fitted If in future you need to change the fuse in this plug then a 1...

Page 20: ...cket available which will be accessible after your appliance is installed Place the appliance flatly and firmly on a solid base The appliance is fitted with adjustable feet on the front side used to level the appliance The rear side of the appliance is fitted with wheels which facilitate the positioning of the appliance into its final location Anything positioned above the appliance must be at lea...

Page 21: ...side of the upper door unscrew the swing stopper screws and remove the stopper A Fix the attached stopper with its bearing on the opposite side of the door Unscrew the forced door closure system B and fix it to the opposite side of the door certain models only Unscrew the middle hinge screws and remove the door from the bottom hinge Unscrew the leg holder fixing screws Tilt the appliance backward ...

Page 22: ...e To fit the door on the opposite side of the freezer proceed with the above procedure in reverse Repeat the procedure 3 and 4 on the bottom door In case there is no bottom door limit peg transfer the bearing G and washer to the opposite side of the door To fit the doors on the opposite side of the fridge freezer proceed with the above procedure in reverse 21 169890en indd 21 169890en indd 21 16 1...

Page 23: ...TENT ALARM KEEPS SOUNDING The ambient temperature is too high Frequent opening of the door door is open for too long Door not closed properly An excessive quantity of fresh food has been inserted at once Check that there is sufficient ventilation around the appliance The refrigerator sensor A has fresh food crammed around it Free the sensor and allow air to circulate around it MY FREEZER IS NOISY ...

Page 24: ... door immediately after you have just closed it you may experience some resistance This happens because a certain quantity of cold air escapes from the appliance through the open door and is replaced by warm ambient air Cooling of such air creates negative pressure a vacuum and suction which prevents easy opening of the door This will normalise after several minutes and you should be able to open ...

Page 25: ...extend the warranty period Should any person other than an authorised representative of Baumatic Ltd interfere with the appliance the policy is negated and Baumatic Ltd will be under no further liability The guarantee covers the appliance for normal domestic use only unless otherwise stated Any claims made under the terms of the guarantee must be supported by the original invoice bill of sale issu...

Page 26: ...this process This guarantee is in addition to and does not diminish your statutory or legal rights Contacting Baumatic Ltd SALES SERVICE SPARES TECHNICAL ADVICE TEL 0118 933 6900 TEL 0118 933 6911 TEL 0118 933 6922 0118 933 6933 FAX 0118 931 0035 FAX 0118 986 9124 FAX 0118 933 6942 FAX 0118 933 6942 For ROI Republic of Ireland please contact one of the numbers below TEL 01 6266798 FAX 01 6266634 T...

Page 27: ...elephone 44 118 933 6900 Sales Fax 44 118 931 0035 Service Telephone 44 118 933 6911 Service Fax 44 118 986 9124 Spares Telephone 44 118 933 6922 Technical Advice Telephone 44 118 933 6933 E mail sales baumatic co uk technical baumatic co uk Http Internet site www baumatic com 26 169890en indd 26 169890en indd 26 16 10 2006 11 36 32 16 10 2006 11 36 32 ...

Page 28: ...NAVODILO UPORABE COMBI CLA BFE320SS BFE350SS 169890 10 en 06 Z Raid HZA BAUMATIC 169890a5 169890_naslovka_a5 cdr 16 oktober200611 47 09 Composite133lpiat45degrees ...

Reviews: