16 | ON-SCREEN SET UP
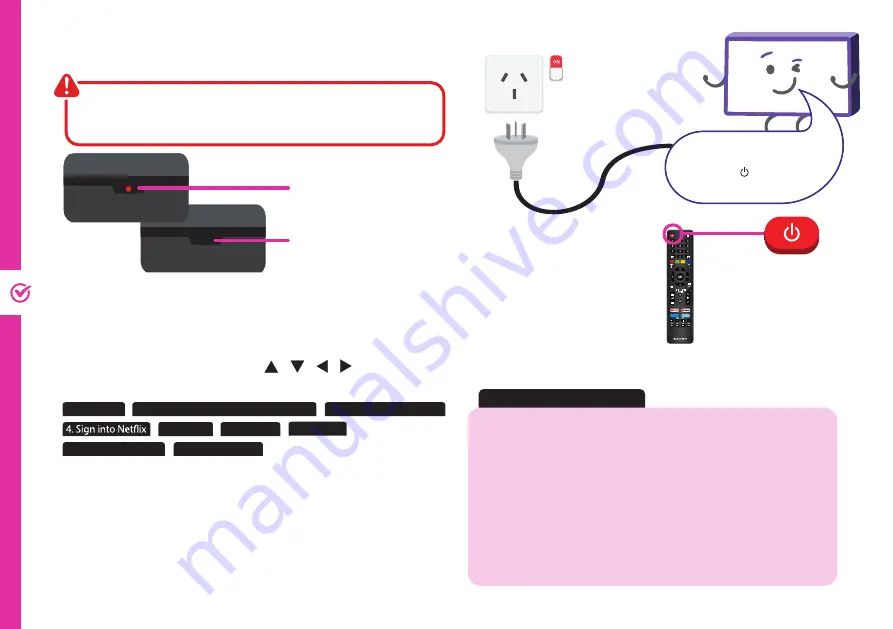
Make sure the TV is plugged in at
the power socket and switched
on. Press the
(POWER)
button
to turn on the TV.
1
2
3
4
5
7
8
0
6
9
INFO
OK
SOURCE
P.MODE
S.MODE
LIST
GUIDE
Web Browser
MENU
EXIT
On-Screen Set Up
Make sure equipment is properly connected (as shown on pages
10-11) before connecting the TV to power.
On/Standby light is RED
in standby mode.
On/Standby light is OFF
when the TV is on.
First Time Setup menu
When you turn the TV on for the first time, the First Time
Setup menu will appear.
Follow the prompts using the
/ / / /
OK
buttons
to select your preferences. You will be guided through:
1. Language
5. Country
6. Timezone
7. TV Mode
2. Data Collection and Firmware Update
3. Connect to the Internet
8. Select Input Source
9. Channel Tuning
When selecting input source, make sure to select DTV to
scan TV channels. If you choose to select an input source
other than DTV or setup Netflix, the setup wizard will
exit and will not let you tune TV channels.
To tune channels, go to: Menu > Channel > Auto Tuning.
If you make an error, you can update your preferences in the settings
menu later.
If you are using a wired network, connect an ethernet cable
to the TV and select 'Wired Mode'. The TV will automatically
connect to the Internet.
If you are using a wireless connection, select 'Wi-Fi Mode'. The
TV will scan for nearby wireless networks. Make sure that the TV
is within the range of your wireless modem/router, and you have
your Wi-Fi password handy.
Or, you can connect to the internet later by going to the User
Menu settings.
Image is an example
only. Plug may vary.
3. Connect to the Internet
Summary of Contents for ATV40FHDS-0320
Page 1: ...User Manual MODEL ATV40FHDS 0320 40 ...
Page 54: ...54 Notes ...
Page 55: ...55 Notes ...


