background image

After Sales Support 


Menu Operation

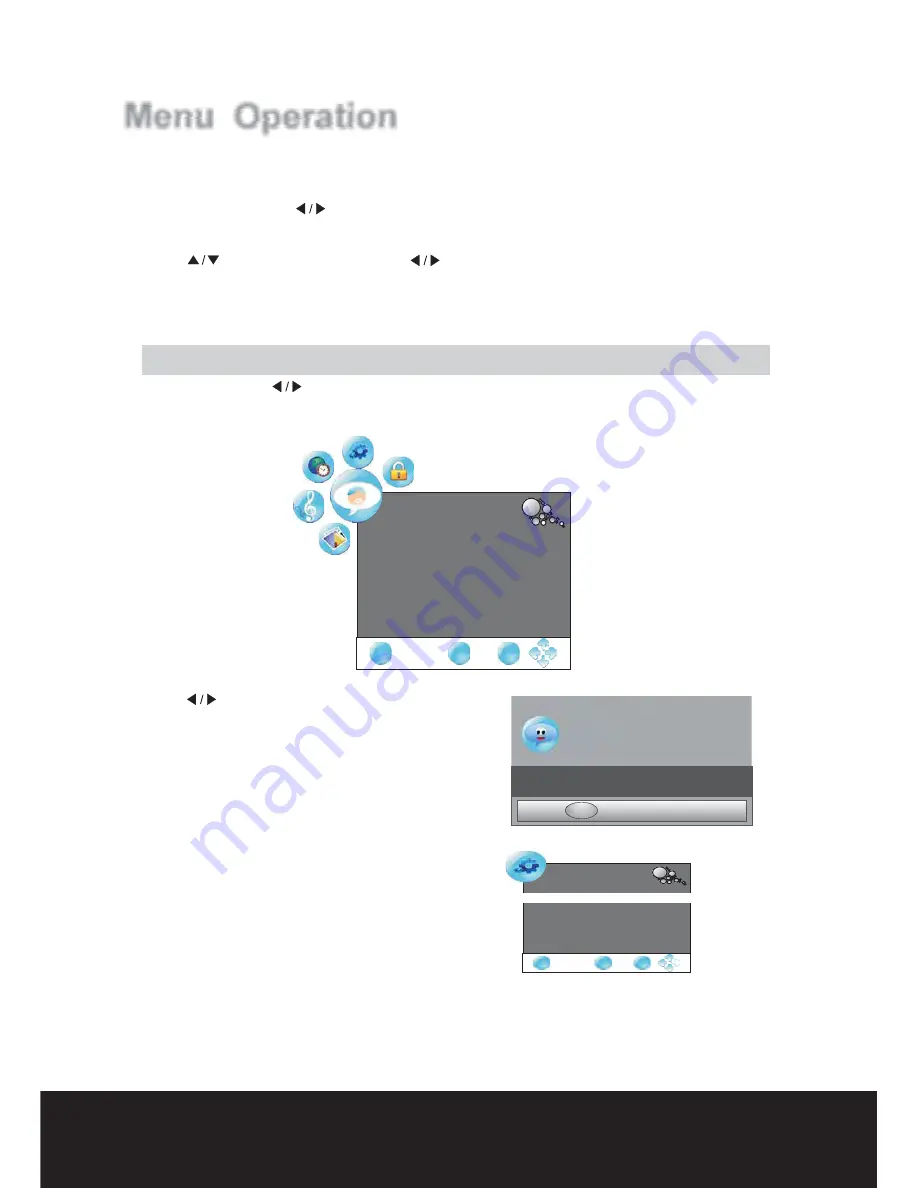
If you want to adjust the display settings, please follow the instruction below.

Press the "MENU" and

to browse the

Picture Menu, Sound Menu,

Menu,

Menu in turn.

"

"

"

"

"

"

"

"

"

"

Press "EXIT"

to exit "MENU" mode.

,

.

.

.

:

,

.

"

" buttons

Channel Menu

Time

Option Menu and Lock

Press OK or

button to enter into the submenu

Press

button to select items and

button to adjust it

Press MENU button to return to the previous menu

button

Note

When an item in MENU is displayed as gray it means that the item is not available

or cannot be adjusted

S o u n d

Select

Adjust

MENU

Return

D i s p l a y

Return

select

return

Select

Adjust

MENU

Return

Channel Menu

search channels automatically.

In the course of auto

searching,

Press

to select the items

"

"

" OK " or

button

.

Press

Press

"

"

.

to

Start

"

and OK " buttons

select

T u n e

MENU

Return

Auto Tuning

with Installation Guide Menu

.

Press "

button to enter ''Auto Searching'', the TV will

OK "

Press "MENU"

.

"

"

and

buttons to select the CHANNEL MENU

EXIT

MENU

OK

CHANNEL

Auto Tuning

DTV Manual Tuning

ATV Manual Tuning

Programme Edit

Select

Adjust

Installation Guide

Language

Auto

Tuning

English

EXIT

MENU

OK

Please select country first
Then select Start to update info

,

.

Please select country first
Then select Start to update info

,

.

Country selection

Australia

Country selection

Australia

Start

Cancel

has been completed.

please do not press the EXIT button as you 

may


not have received all channels.

once the 

searching 

All channels will be

 saved automatically 

TEL:

 1300 886 649

NOTE

:

If it is the first time installation

,

      it will start

13

"

" or "OK" button to enter the Submenu

.

Summary of Contents for AC-42FZ2

Page 1: ...Instruction Manual With Full High Definition Resolution Display After sales support TEL 1300 886 649 Model Number AC 42FZ2 1 06cm 42 200Hz Digital LCD TV...

Page 2: ...se of the first years after the date of purchase we will remedy the problem as quickly as possible once it has been brought to our attention In the unlikely event of such an occurrence or if you requi...

Page 3: ...Cable Installation Introduction Basic Operation Menu Operation Unique ButtonsOperation Teletext FAQ s Contents Safety Instructions Getting Started TEL 1300 886 649 Welcome page 2 What your 2 year warr...

Page 4: ...fill in the Warranty card and store in a safe place along with your proof of purchase We hope you will enjoy using your purchase for many years to come Congratulations on choosing to buy a product By...

Page 5: ...uipment into an outlet on a circuit different from that to which the receiver is connected Consult the dealer or experienced radio TV technician for help Any changes or modifications not expressly app...

Page 6: ...onsult an electrician for replacement of the obsole te outlet 10 Protect the power cord from being walked on or pinched particularly at plugs convenience rece ptacles and the point where they exit fro...

Page 7: ...lets extension cords frayed power cords or damaged or cracked wire insulation are dangerous Any of these conditions could result in electric shock or fire Periodically examine the cord of your applian...

Page 8: ...els Tuning in your Digital Channels Once you have made connections turn on the TV via the ON OFF switch Remove the cover on the rear of the Remote control and fit the batteries supplied select OK Tuni...

Page 9: ...ntrol sensor of the wireless TV and use it within 7 meters Installing Batteries Installing Batteries 1 Open the battery compartment cover on the back side 2 batteries with new ones 3 Closed the cover...

Page 10: ...NAME FUNCTION DESCRIPTION ITEM BUTTON NAME FUNCTION DESCRIPTION BUTTON NAME FUNCTION DESCRIPTION BUTTON NAME FUNCTION DESCRIPTION VOL Press to increase or decrease the sound level VOL CH CH Press to...

Page 11: ...of DVD AV audio video signal input terminal Connect the antenna COMPONENT 1 2 AV IN RF IN AUDIO Connect the Audio output jack of PC Connect the VGA output jack of PC Connect the HDMI output jack of DV...

Page 12: ...IO HDMI 1 0 2 3 4 5 6 7 8 9 OK Standby Zoom Recall Number buttons Channel list Input source Picture mode Sound mode Exit Menu Arrows Channel up Channel down Volume up Volume down Electronic program gu...

Page 13: ...or side panel Now Now the main power is turned off you are not using the TV for a long time please disconnect the power cord from the wall you have connected all the cables before making the selectio...

Page 14: ...auto searching Press to select the items OK or button Press Press to Start and OK buttons select Tune MENU Return Auto Tuning with Installation Guide Menu Press button to enter Auto Searching the TV...

Page 15: ...elect channel then press ENTER to search Tune Select Adjust OPTION EXIT EXIT SAVE System DK Current CH 1 Search Fine Tune Fine Tune Skip NO Frequency 535 25 535 25 MHz Storage To 1 ATV Manual Tuning P...

Page 16: ...ol Aspect Ratio Press button to select the ratio of the screen Noise Reduction Press button to turn on off the function of noise reduction Screen only available in PC RGB mode Press buttons to enter t...

Page 17: ...o turn on off the function of surround sound Time Menu Press MENU and buttons to select the TIME MENU EXIT MENU OK TIME Clock Time Zone New South Wales GMT 10 Sleep Timer Off Clock Sleep Timer Press b...

Page 18: ...eration button on the remote control and turn on the TV again Press MENU and buttons to select the OPTION MENU Press Blue Screen Press button to turn on off the function of blue screen With this funct...

Page 19: ...t button Parental Guidance Only available in DTV mode Press button to select the parental guidance rate Menu Operation Lock Menu Set Password Press number buttons to enter the new password Please ente...

Page 20: ...200 ABC DIG Radio Radio 1 BBC1 TV 2 cy K 2 cy K TV 3 S 42 3 S 42 TV 4 C 04 4 C 04 TV LIST Press to CH CH button page up or down the channel list Press EXIT to exit button Press OK to enter the channel...

Page 21: ...ss EPG to display the You can check the program information for the next 7 days If the information is available from the broadcaster button Electronic Programme Guide Press to button select the channe...

Page 22: ...on is applicable only to teletext page with puzzles riddles etc REVEAL BUTTONS A red green yellow and blue field are shown at the bottom of the screen BUTTONS SUBPAGE Some teletext may contain several...

Page 23: ...other channel the problem may be with the broadcast Are the VIDEO cables installed properly Activate the any function to restore the brightness of the picture Horizontal vertical bars or picture shaki...

Page 24: ...iption Name 1142 27 7WX2 TEL 1300 886 649 23 TURN ON LCD TV TURN OFF LCD TV standby mode 2 Press button on TV or button on remote control can turn on LCD TV from standby mode 1 Press button on TV or b...

Page 25: ...igital ABC VHF 12 226 5 Artarmon Digital SBS UHF 34 571 5 Gore Hill Gold Coast Digital 7 UHF 53 704 5 Mt Tamborine Digital 9 UHF 59 746 5 Mt Tamborine Southern Cross 10 UHF 43 634 5 Mt Tamborine Digit...

Page 26: ...After Sales Support TEL 1300 886 649...

Page 27: ...After Sales Support TEL 1300 886 649...

Page 28: ...After Sales Support TEL 1300 886 649...

Reviews: