Page 9
For technical questions, please call 1-888-866-5797.
Item 64825
S
AFE
ty
Op
ERA
ti
O
n
M
A
int
E
n
A
nc
E
S
E
t
U
p
Operating instructions
Read the EntiRE iMpORtAnt SAFEty inFORMAtiOn section at the beginning of this
manual including all text under subheadings therein before set up or use of this product.
Battery charging and connection to Radio
Charge battery after unpacking and before using this tool. Follow instructions included
with battery charger.
Battery pack and charger sold separately.
Attach the Battery Pack to the Radio by sliding it into the Radio’s Battery Receptacle.
Remove the Battery by pressing its Latch and pulling the Battery out.
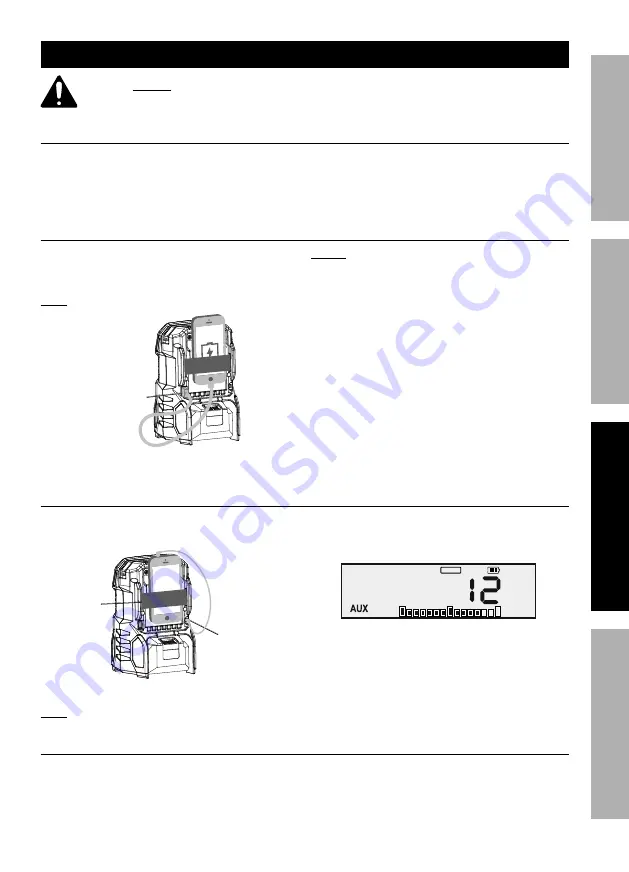
charging Auxiliary Device
1. To charge a MP3 player, or similar device that
uses 2.1A or less at 5 VDC, connect its USB cable
to the Radio’s USB connector. See Figure A.
note:
USB cable not included.
USB
connector
Figure A: USB power connection
notice:
If the player/device uses more than 2.1A,
the Radio’s self-resetting overload protection
will be tripped and temporarily disable the
output. Disconnect the device and, after a few
minutes, the output will be active again.
2. To prevent accidents, turn off the tool and
remove its Battery Pack after use. Clean, then
store the tool indoors out of children’s reach.
connecting Audio cable
1. Connect an Auxiliary device (Ex: MP3 player)
to the Auxiliary Stereo Jack. See Figure B.
Auxiliary
Stereo
Jack
Strap
Figure B: Audio Output connection
note:
The player and cables are not included.
2. Once the Auxiliary device is connected, power on
the Radio and press the MODE button several times
until AUX is seen on the Display. See Figure C.
USB 5V
VOLUME
Figure c: Auxiliary mode
3. The strap on the Radio’s back panel can be used
to secure a MP3 player to the MP3 Storage Area.
4. To prevent accidents, turn off the tool and
remove its Battery Pack after use. Clean, then
store the tool indoors out of children’s reach.
connecting Bluetooth (audio file playback)
1. Power on the Radio and press the MODE
button several times until BT is seen
on the Display. See Figure D.


