STEP 3: ATTACHING
EZ-Find!
®
Tags
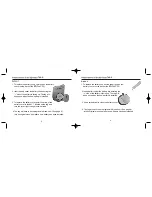
Adhesive strips and key rings are available to attach
EZ-Find
!
®
tags to items you wish
to keep track of. Four adhesive strips and four key rings are included in this starter kit.
To use the adhesive strips:
1. Adhesive strips are best used on a flat surface. Remove paper cover from one side
of one of the double sided adhesive strips. Place sticky side in center of the
recessed cavity of an
EZ-Find!
®
tag. Press firmly.
2. Remove paper cover from other side of the adhesive.
3. Press firmly against the item you want to track.
4. Let is set for 15 minutes (ideally for 24 hours) before using tracked item.
To use the key ring loops:
1. Attach key ring loop to keys, pet collars, belts, purses, etc. Push the key ring loop
through the hole on the corner of the
EZ-Find!
®
tag.
Tag Number labels (Included in this package):
You may want to place a number
label on each tag to keep track of the tags that you have programmed into the EZ-
Finder.
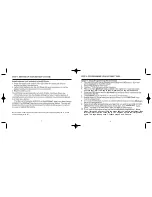
STEP 4: FINDING LOST ITEMS
1. Turn EZ-Finder ON by pressing and holding the FIND button. “EZ-Find” will be
displayed on the LED screen.
2. Press FIND button again to go to the menu screen.
3. Scroll up or down to item you want to find.
4. Press the FIND button. A series of audible beeps will sound if tagged item is
within range (approximately 60 feet).
5. If no beep is heard, walk around with the EZ-Finder while continuously
pressing the FIND button until item is located.
6. You can turn the EZ-Finder off once the item is found by pressing the “E”
button for three seconds or the EZ-Finder will automatically turn itself off after 2
minutes.
7. If the lost item cannot be located it may be due to:
- Lost item is out of range.
- The incorrect item in the menu was pressed.
- The
EZ-Find!
®
tag has weak batteries. (See page 3)
- The EZ-Finder has weak batteries. (See page 3)
Note: The EZ-Finder can be manually turned off by pressing and holding the “E” button
until the display turns off.
InstructionManual:Layout 1 6/8/07 7:48 PM Page 9
9
10

