This is a publication by Conrad Electronic SE, Klaus-Conrad-Str. 1, D-92240 Hirschau (www.conrad.com).
All rights including translation reserved. Reproduction by any method, e.g. photocopy, microfilming, or the capture in electronic data
processing systems require the prior written approval by the editor. Reprinting, also in part, is prohibited. This publication represent
the technical status at the time of printing.
© Copyright 2016 by Conrad Electronic SE.
Maintenance and cleaning
• Only a professional repair shop should attempt to maintain or repair the device. The product
contains no parts that require servicing. Therefore, do not open/dismantle it.
• Before cleaning, disconnect the mains plug of the freeze protection from the power supply. To
do this, pull the mains plug out of the socket.
Then allow the freeze protection to cool down completely.
• To clean the outside of the product, a dry, soft and clean cloth is sufficient.
• Dust can easily be removed using a clean long-haired brush and a vacuum cleaner.
Do not use abrasive cleaning agents, cleaning alcohol or other chemical solutions,
since these could damage the housing or even impair operation. There is furthermo-
re a danger of fire and explosion!
Disposal
The product must not be disposed of with the household waste.
Dispose of an unserviceable product in accordance with the relevant statutory regu-
lations.
Technical data
Operating voltage ........................................ 220 - 240 V/AC, 50 Hz
Power consumption ..................................... 450 - 500 W
Protection class ........................................... I
Degree of protection .................................... IP20
Thermostat .................................................. yes, stepless (+5 °C to +30 °C)
Installation location ...................................... dry, enclosed indoor locations
Installation position ...................................... Wall installation at vertical walls
Cable length ................................................ approx. 1.5 m
Dimensions (W x H x D) .............................. 295 x 245 x 110 mm
Weight ......................................................... approx. 0.95 kg
Installation
Please refer to the section “Safety instructions”.
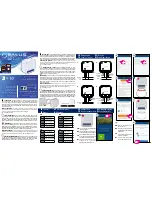
• Select an appropriate installation location at a vertical
wall. Maintain a suitable distance to objects, furniture, etc.,
see depiction on the right (at least 0.5 m at the top, 0.3 m
at the sides and 0.2 m at the bottom).
• The freeze protection can be installed with a bracket at the
backside.
First, unscrew one screw at the left and right, respectively,
that fasten the bracket at the freeze protection.
After unscrewing the screws, pull the bracket out carefully.
• Now attach the bracket to the wall with the screws. Mark
the respective positions on the wall using the holes in the
bracket.
Use screws and plugs that are suitable for the surface.
Pay attention when drilling and tightening the screws that
no cable or pipes are damaged!
• Attach the freeze protection to the bracket and fix it with
both screws loosened at the beginning.
Operation
• Turn the thermostat controller into position “0”- The corresponding position
is marked with an arrow on the housing next to the controller.
• Plug the mains plug into a mains socket.
• The thermostat controller can be used to set the ambient temperature at
which the heating element in the freeze protection is switched on or off.
If the heating element is switched on, the indicator light next to the thermostat controller is
illuminated.
In position “0”, the freeze protection works to prevent freezing; the heating element
is switched on automatically below a temperature of approx. +5 °C.
If you would like to set a certain room temperature, turn the thermostat controller to
the right (clockwise) into the highest position and wait until the desired room tempe-
rature is reached.
Then, slowly turn the thermostat controller to the left (anti-clockwise) until the indica-
tor light goes out.
Important!
The freeze protection is not equipped with a power switch. After inserting the mains
plug into a mains socket, the freeze protection is always ready for operation and
activates the heating element depending on the settings of the thermostat controller.
Thus, unplug the mains plug from the mains socket, if the freeze protection is not
required.
• At initial start-up (or if the product was stored for a long period of time), heated housing
elements might cause unpleasant odours for some time. If you experience this, ventilate the
room where the freeze protection is set up.
• An integrated temperature protections switches off the freeze protections in case of over-
heating. After cooling down, the freeze protection is ready for operation again.


