background image

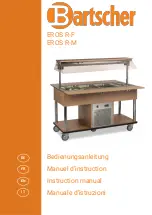
EROS R-F

EROS R-M

Bedienungsanleitung
Manuel d'instruction
Instruction manual
Manuale d’istruzioni

FR

IT

EN

DE

Summary of Contents for EROS R-F

Page 1: ...EROS R F EROS R M Bedienungsanleitung Manuel d instruction Instruction manual Manuale d istruzioni FR IT EN DE...

Page 2: ......

Page 3: ...Entpacken 2 4 1 Inbetriebnahme des Ger tes 3 4 2 Technische Eigenschaften 4 4 3 Vorschl ge zur Verwendung 4 4 3 1 Dome Bewegung 5 4 4 Zusatzausstattung 6 4 5 Optionals 9 4 5 1 Optional 9 9 Jegliche M...

Page 4: ...eutiger M ngel in der Verarbeitung und den verwendeten Materialien zu ersetzenden oder zu reparierenden Produkte oder Teile m ssen dem Hersteller vorgelegt werden der sie dann nach sorgf ltiger Pr fun...

Page 5: ...Sie den Netzschalter am vorderen Verdichtergitter Sie h ren ein leises Summen vom Kompressor und die Thermostatanzeige zeigt die Starttemperatur des Ger ts an Einmal gestartet erreicht das Ger t die g...

Page 6: ...130 180 210 240 4 3 Vorschl ge zur Verwendung Nachfolgend finden Sie eine Liste von Vorschl gen f r die optimale Nutzung des Buffetwagens Gastronorm Beh lter mit Speisen in verschiedenen Kombinationen...

Page 7: ...aus ihrer Position heraus Fassen Sie den Griff und senken Sie die Kuppel bis zum Tankrand wo sie h ngen bleibt Um die Kuppel anzuheben entriegeln Sie die Kn pfe und ziehen Sie sie vorsichtig wieder a...

Page 8: ...6 4 4 Zusatzausstattung Please do always mention the model of your reference...

Page 9: ...1 1 Power switch 13 1 1 1 1 Schuko Cable 14 2 2 2 2 Screws 3 5x12 15 1 1 1 1 Grounding coupler 16 1 1 1 1 Cablegland plate 17 1 1 1 1 Cable gland 18 1 1 1 1 Probe cover 19 2 2 2 2 Screws 4x10 20 2 2 2...

Page 10: ...ture 37 1 1 1 2 Chromed handle mod Eros 38 1 1 1 1 Reinforced handle hose mod Eros 3 1 39 2 2 2 4 Screws 6x40 TS black burnished 40 2 2 2 2 Knobs 41 2 2 2 2 Pins 42 12 12 12 12 Screws 4x30 4x40 43 2 2...

Page 11: ...o 4x Up to 5x Up to 6x Grid dim GN1 1 Opt 7 1 2 1 2 1 2 1 2 Tube structure long side dish holder Opt 9 1 2 1 2 1 2 1 2 Long dish holder short side Please do always mention the model of your reference...

Page 12: ...cken heraus und reinigen Sie die L cher von hinten Der Verdampfer ist wegen eines Ausfalls des Heizelements f r die automatische Abtauung mit Eis blockiert Kontaktieren Sie den Fachh ndler Reinigen Si...

Page 13: ...11 5 2 Schaltpl ne Ref Beschreibung E TH Digitaler thermostat L Lampe M Kompressor SON Sonde...

Page 14: ...ntsorgt werden sollte Um m gliche Sch den f r die Umwelt oder die menschliche Gesundheit durch unkontrollierte Abfallentsorgung zu vermeiden trennen Sie diese bitte von anderen Abf llen und recyceln S...

Page 15: ...s curit et l utilisation 2 3 Garantie 2 4 Installation 2 4 1 Allumer l appareil 3 4 2 Caract ristiques techniques 4 4 3 Conseils pour l utilisation 4 4 3 1 Ouverture et fermeture de la coupole 5 4 4...

Page 16: ...is par des professionnels Le producteur pourrait tout moment apporter des modifications au produit afin d en am liorer la qualit Bartscher s r l dans le respect de la L gislation de la Communaut Europ...

Page 17: ...itu e sur la partie externe de l appareil composant n 15 pag 6 4 1 Allumer l appareil Une fois pr ts allumer l appareil le brancher au r seau lectrique et appuyer sur le bouton d allumage situ sur la...

Page 18: ...es bacs gastronorm contenant des aliments de toutes les dimensions disponibles ou alors utiliser des grilles en inox Option n 5 voir croquis pag 9 pour y poser ou y exposer des plats d j pr ts Pour l...

Page 19: ...le se bloquera Pour lever la coupole d bloquer les poign es lat rales et accompagner la coupole jusqu son enclenchement Le plateau en bois au dessus de la coupole reste fixe Une bombe de silicone en s...

Page 20: ...6 4 4 Pi ces de rechange...

Page 21: ...ur 11 1 1 1 1 Thermostat digital 12 1 1 1 1 Bouton d allumage 13 1 1 1 1 C ble Schuko 14 2 2 2 2 Vis 3 5x12 15 1 1 1 1 Crochet mise terre 16 1 1 1 1 Plaquette presse toupe 17 1 1 1 1 Presse toupe 18 1...

Page 22: ...1 1 1 1 Structure Inox 37 1 1 1 2 Poign e chrom e 38 1 1 1 1 Tube renfort poign e 39 2 2 2 4 Vis 6x40 TS brunies 40 2 2 2 2 Poign es 41 2 2 2 2 Crics 42 12 12 12 12 Vis 4x30 4x40 43 2 2 2 2 Plastique...

Page 23: ...e Opt 5 Up to 3x Up to 4x Up to 5x Up to 6x Grille bac dim GN1 1 Opt 7 1 2 1 2 1 2 1 2 Porte assiette tube cot long Opt 9 1 2 1 2 1 2 1 2 Porte assiette long cot courte Accessoires non illustr s Toujo...

Page 24: ...bib d un peu d alcool mais ne jamais utiliser de produits corrosifs ou agressifs Le producteur ne r pond pas des dommages d s l utilisation de substances qui endommagent la structure du chariot Le cha...

Page 25: ...11 5 2 Sch ma lectrique Abr viation Description TH Thermostat 30 90 C L Lampada M Compressore SON Sonda...

Page 26: ...sur la documentation indique que l appareil ne doit pas tre limin avec les autres d chets m nagers Pour viter d ventuels dommages l environnement ou la sant caus s par le recyclage inappropri des d c...

Page 27: ...s 2 2 Safety and Right Use Warnings 2 3 Warranty 2 4 Settings 2 4 1 Appliance Start Up 3 4 2 Technical Features 4 4 3 Use Suggestions 4 4 3 1 Dome Motion 5 4 4 Spare Parts 6 4 5 Optionals 9 4 5 1 Opti...

Page 28: ...her s r l in compliance with European Community legislation grants its products for 24 months This warranty does not include electrical parts labour and all replacements related to an improper use of...

Page 29: ...system is provided with ground connection according to the current norms and guidelines Connect the appliance with the ground network through a cable connected to the specific screw placed on the ext...

Page 30: ...s for a optimal use of the buffet trolley Gastronorm tanks with food in all the possible splits combinations can be placed inside the general tank Otherwise a grid in the GN 1 1 see optional 5 on page...

Page 31: ...des and lift them out from their place grasp the handle and lower the dome to the tank edge where it will hang To lift the dome unlock the knobs and gently pull it up back to its place The upper shelf...

Page 32: ...6 4 4 Spare Parts Please do always mention the model of your reference...

Page 33: ...1 1 Power switch 13 1 1 1 1 Schuko Cable 14 2 2 2 2 Screws 3 5x12 15 1 1 1 1 Grounding coupler 16 1 1 1 1 Cablegland plate 17 1 1 1 1 Cable gland 18 1 1 1 1 Probe cover 19 2 2 2 2 Screws 4x10 20 2 2...

Page 34: ...cture 37 1 1 1 2 Chromed handle mod Eros 38 1 1 1 1 Reinforced handle hose mod Eros 3 1 39 2 2 2 4 Screws 6x40 TS black burnished 40 2 2 2 2 Knobs 41 2 2 2 2 Pins 42 12 12 12 12 Screws 4x30 4x40 43 2...

Page 35: ...x Up to 4x Up to 5x Up to 6x Grid dim GN1 1 Opt 7 1 2 1 2 1 2 1 2 Tube structure long side dish holder Opt 9 1 2 1 2 1 2 1 2 Long dish holder short side Please do always mention the model of your refe...

Page 36: ...born stains use a damp cloth with some alcohol do never use corrosive or abrasive detergents The manufacturer is not responsible of any structural damage caused by the use of damaging substances The t...

Page 37: ...11 5 2 Wiring Diagram Ref Description E TH Digital thermostat L Lamp M Engine SON Probe...

Page 38: ...ith other household wastes at the end of its working life To prevent possible harm to the environment or human health from uncontrolled waste disposal please separate this from other types of wastes a...

Page 39: ...la sicurezza ed il corretto uso 2 3 Garanzia 2 4 Installazione 2 4 1 Accensione dell apparecchio 3 4 2 Caratteristiche tecniche 4 4 3 Consigli per l utilizzo 4 4 3 1 Movimento della cupola 5 4 4 Ricam...

Page 40: ...rciali il produttore si riserva di apportare in ogni momento modifiche ai prodotti che ne migliorino l utilizzo e la qualit Bartscher s r l nel rispetto della legislazione della Comunit Europea garant...

Page 41: ...pronti per accendere l apparecchiatura attaccare l apparecchio alla rete elettrica e schiacciare il pulsante di accensione posto sulla griglia motore frontale Si sentir il ronzio del compressore e su...

Page 42: ...rm contenenti i cibi in tutti i loro frazionamenti possibili oppure utilizzare apposite griglie inox Optional n 5 vd disegno pag 9 per l appoggio e l esposizione dei piatti gi pronti Per l esposizione...

Page 43: ...e la cupola fino al bordo vasca dove si bloccher Per alzare la cupola sbloccare i pomelli ed aiutare la cupola a risalire fino al suo riaggancio Il piano in legno sopra alla cupola resta in ogni caso...

Page 44: ...6 4 4 Ricambistica...

Page 45: ...e 12 1 1 1 1 Pulsante accensione 13 1 1 1 1 Cavo Schuko 14 2 2 2 2 Viti 3 5x12 15 1 1 1 1 Aggancio messa a terra 16 1 1 1 1 Piastrina pressa cavo 17 1 1 1 1 Pressacavo 18 1 1 1 1 Coprisonda 19 2 2 2 2...

Page 46: ...ra acciaio Inox 37 1 1 1 2 Maniglia cromata 38 1 1 1 1 Tubo rinforzo maniglia 39 2 2 2 4 Viti 6x40 TS brunite 40 2 2 2 2 Pomelli 41 2 2 2 2 Salterelli 42 12 12 12 12 Viti 4x30 4x40 43 2 2 2 2 Plastico...

Page 47: ...5 Up to 3x Up to 4x Up to 5x Up to 6x Griglia vasca dim GN1 1 Opt 7 1 2 1 2 1 2 1 2 Portapiatti tubo lato lungo Opt 9 1 2 1 2 1 2 1 2 Portapiatti laterale lungo Indicare sempre il modello di riferimen...

Page 48: ...utilizzare un panno inumidito con un po di alcool non utilizzare mai agenti corrosivi o intaccanti Il costruttore non risponde dei danni derivanti dall uso di sostanze che danneggino la struttura del...

Page 49: ...11 5 2 Schema Elettrico Sigla Descrizione E TH Termostato digitale L Lampada M Motore SON Sonda...

Page 50: ...a che l apparecchio non deve essere smaltito con altri rifiuti domestici al temrine del ciclo di vita Per evitare eventuali danni all ambiente o alla salute causati dall inopportuno smaltimento dei ri...

Page 51: ......

Page 52: ...can change features and datas of this booklet with the proposal of keeping on increase the quality of its products Anytime and without notice this booklet can t be considered as contract with third p...

Reviews: