E500 LPR
110510
Original-Gebrauchsanleitung
V1/0717
Page 1: ...E500 LPR 110510 Original Gebrauchsanleitung V1 0717 ...
Page 2: ... Des 1 DIMENSÕES GERAIS E CABOS DE ALIMENTAÇÃO mm Afb 1 ALGEMENE AFMETINGEN EN TOEVOERCIRCUITS mm Fig 1 GENERELLE DIMENSIONER OG STRØMKABLER Рис 1 ОБЩИЕ РАЗМЕРЫ И ПОДCОЕДИНЕНИЯ мм Resim 1 GENEL EBATLAR VE ELEKTRİK TESİSATI mm Rys 1 OGÓLNE WYMIARY I PRZEWODY ZASILAJĄCE mm Obr 1 OBECNÉ ROZMĚRY A NAPÁJECÍ KABELY mm Crtež 1 OPĆENITE DMENZIJE I NAPOJNI VODOVI mm 1 ábr ÁLTALÁNOS MÉRETEK ÉS HÁLÓZATI KÁBE...
Page 3: ... de água Drenagem de água Cabo de alimentação Conector Wateraansluiting Waterafvoer Aansluitkabel Aansluitblok Vandtilslutning Vandbortledning Strømkabel Kobling Подключение воды Слив воды Провод питания Панель подключения Su bağlantısı Su çıkışı Elektrik kablosu Terminal bloğu Przyłącze wody Odpływ wody Przewód zasilający Łączówka Připojení vody Odtok vody Napájecí kabel Spojka Priključak vode Od...
Page 4: ...Fig 2 Fig 3 Fig 4 Fig 5 Fig 6 ...
Page 5: ...on in order to drain the water Fig 1 4 Press the START button 4 to start the washing cycle The indicator light in the main switch is lit until the end of the washing cycle Fig 1 5 Turn the control knob 1 to OFF 0 position Fig 1 Cleaning 1 Open the dishwasher door remove the filter Fig 4 and sliding filter Fig 2 and clean them 2 Reinstall the filter overflow with O ring gasket and sliding filter 3 ...
Page 6: ......
Page 7: ... 5 Drain connection 41 5 6 Cleaning agent dosing pump 41 5 7 Rinse aid dosing pump 42 6 Operation and maintenance instructions 43 6 1 Operation 43 6 1 1 Operating elements 43 6 1 2 Starting the device 44 6 1 3 Filling and heating process 44 6 1 4 Preparation of dishes 45 6 1 5 Starting the washing process 45 6 1 6 Interrupting and finishing the washing process 45 6 1 7 Draining the device 46 6 1 8...
Page 8: ...cessible for anyone carrying out the installation servicing maintenance or cleaning Please keep these instructions and give them to future owners of the device 1 Safety This device is designed in accordance with the presently applicable technological standards However the device can pose a danger if handled improperly and inappropriately All persons using the device must follow the recommendations...
Page 9: ... insufficient knowledge unless such persons are under the care of a person responsible for their safety or have received instructions regarding appropriate use of the device Children should be observed to ensure that they are not playing with or starting the device Only use the device indoors The device must be operated in correct and safe technical condition only In case of operational problems d...
Page 10: ...DANGER Electric shock hazard To avoid the hazard results please follow the safety instructions below Never allow the power cable to come into contact with heat sources or sharp edges The power cable should not hang over the side of the working surface Ensure that no one can step on or trip over the cable The power cable must not be folded bent or tangled and must always remain fully unrolled Never...
Page 11: ...on wet floor Remove the plug from its socket when the device is not used in case of anomalies during operation before cleaning CAUTION In order to avoid any damages to the device follow the instructions below To clean the device NEVER use cleaning agents such as acids solvents or chlorine based washing fluids to avoid damaging components of the washing machine The device is designed for operation ...
Page 12: ...service personnel only The dishwasher is designed only for washing plates glasses and cooking ware pots pans etc Cleaning of other objects which were not mentioned above is strictly forbidden CAUTION Any use going beyond the intended purpose and or any different use of the device is forbidden and is not considered as conventional Any claims against the manufacturer or his authorized representative...
Page 13: ...d by violation of advice concerning operation and cleaning use other than designed alterations made by user use of inadequate spare parts We reserve the right to make technical changes for purposes of developing and improving the useful properties 2 2 Copyright protection The instruction manual including any texts drawings images or other illustrations is copyright No part of this publication may ...
Page 14: ...ter The outer and inner packing material should be removed completely from the device before installation If you liked to dispose the packing consider the regulations applicable in your country Supply re usable packing materials to the recycling Please inspect the device upon completeness In case any part is missing please contact our customer service center immediately 3 3 Storage Keep the packag...
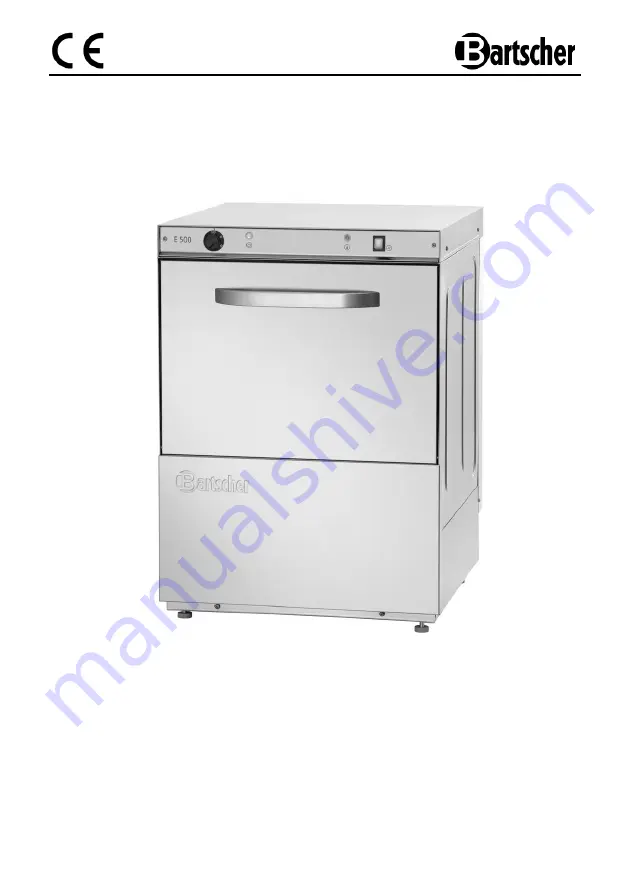
Page 15: ...W Boiler heater 2 8 kW Drain pump equipped with damping mat Non return valve Cleaning agent dosing pump Rinse aid dosing pump Double walled door Possibility to built in Dry run protection Safety thermostat Door contact switch Device connection Ready to plug in ON OFF switch Indicator lights On Off heating Power supply 3 4 kW 220 230 V 50 Hz Dimensions W 600 x D 640 x H 820 mm Weight 53 6 kg Access...
Page 16: ... 36 4 2 Overview of parts Fig 7 7 5 4 6 9 1 3 13 11 12 8 2 10 8 ...
Page 17: ... device may lead to personal injury or property damage 5 1 Unpacking Unpack the device and make sure it was not damaged during the transport Otherwise immediately notify the supplier and forwarding agent about the identified damage In case of any doubts do not use the device until the extent of damage is determined CAUTION Keep all packaging material plastic Styrofoam clamps etc outside the reach ...
Page 18: ... in a moist or wet area Place the device so that the plug is easily accessible so as to quickly disconneet the device if the need arises Before the first use remove the protective foil from the device Remove the foil slowly not to leave glue residues Remove possible glue residues with appropriate solvent CAUTION Never remove the nameplate and warning signs from the device The device is equipped wi...
Page 19: ...ld be easily accessible This device is designed for switching the device off in case of installation repair cleaning or maintenance work conducted on the device This switch must be equipped with fuses adjusted for the rated voltage of the device A properly selected magnetic thermal switch may be an alternative to the above mentioned switch The device must be properly connected to the equipotential...
Page 20: ...r quality the pressure of water supply network must be taken into account This parameter determines the correct operation of the device Water pressure should correspond to the following values Water pressure MIN MAX bar kPa kg cm2 psi bar kPa kg cm2 psi 2 200 2 03 29 3 5 350 3 56 50 76 If the water pressure is above the recommended value it is required to install the reducing valve between the wat...
Page 21: ...e drain hose must be located below the device in a way which makes the draining of water possible Fig 4 The device is equipped with a drain pump which pumps out the water after washing when setting the control knob to G position fig 7 page 36 In such a case the height of 800 mm cannot be exceeded Fig 5 Fig 4 Drain mounting Fig 5 Setting of the drain height through the drain pump 5 6 Cleaning agent...
Page 22: ... is absorbed as soon as the programmer issues a command for rinsing A SEPARATE TANK is filled with liquid rinse aid which is then mixed with rinsing water flowing from the boiler Setting this dosing device should be set up during the installation because only this way the user may use all washing features in an optimum way from the very beginning The setting must be properly adjusted depending on ...
Page 23: ...near the device The defective installation operation errors and maintenance and cleaning mistakes as well as any modifications may cause the incorrect operation damages and injuries 6 1 Operation 6 1 1 Operating elements Fig 9 A Control knob B ON indicator light orange C Standby indicator light green D START button with an indicator light E OFF position F Setting of the 120 sec washing cycle G Set...
Page 24: ...rts Although it would be now possible to start the washing process the manufacturer does not recommend this because the water inside the device has not reached the optimum temperature yet As soon as the device reaches the optimum temperature for appropriate dish washing the user is informed about it by standby indicator light coming on C The device must reach the temperature of 85 C in the rinsing...
Page 25: ...rt the cutlery holders to the basic dishwasher baskets When filling the dishwasher baskets pay attention to the following Max glass height 280 mm max plate height 320 mm 6 1 5 Starting the washing process Before starting the washing process slide the appropriate basket with dishes into the device To start the washing process turn the control knob to F position Fig 9 page 43 120 sec washing cycle C...
Page 26: ...s the device may be switched off NOTE To ensure that the draining process proceeds correctly with the use of a drain pump the drain hose must be located at the appropriate height not higher than 800 mm 6 1 8 Turning the device off To switch the device off turn the control knob to OFF 0 position Do not switch the device off during the washing process because the dishes inside the dishwasher will no...
Page 27: ...ce should carry out the following inspections water filters cleaning descaling of heating resistors checking of gaskets condition checking of condition of all other components setting of dosing devices checking of the clamps of dosing devices checking of the power cord To prevent hazards a defective power cord may be replaced only by the qualified electrician while observing all safety measures De...
Page 28: ...infection also produce optimum results o Empty the wash tank at least twice a day or every 40 50 washing cycles 6 2 4 Optimum results To achieve optimum results when washing dishes follow the instructions presented below Wash dishes only when the device is ready for work Dosing devices must be properly set Always keep the dishwasher clean 6 2 5 Interruptions in device operation If the device is no...
Page 29: ...Melted fuses Contact the service company The device is not switched on through the main switch Close the main switch The device does not absorb water Water supply valve closed Open the water supply valve Rinse arm nozzles clogged Clean the arms and check the rinse arms for limestone Solenoid valve filter clogged Contact the cleaning service Rinse pump failure Contact the service company Pressure s...
Page 30: ...n with clean water Dishes pots pans etc are not properly dried No rinse aid Add the liquid rinse aid to the tank Not enough liquid rinse aid Contact the service company to repair the rinse aid dosing pump Dishes stayed too long in the dishwasher Remove the dishes from the dishwasher immediately after the completed washing cycle and leave them for drying in the air Rinsing temperature is below 80 C...
Page 31: ...w correctly The washing cycle does not start Incorrectly closed dishwasher door Close the door Contact the service company if the door cannot be closed properly and then correctly set the tensioning device Door micro switch failure Contact the service company to order the replacement Draining of the device cannot be successfully completed The device is not set properly Set the device properly cont...
Page 32: ...posal service in your community WARNING To exclude any abuse and the dangers involved make the waste device unfit for use before disposal For that purpose disconnect device from mains supply and remove mains connection cable from the device CAUTION For the disposal of the device please consider and act according to the national and local rules and regulations Bartscher GmbH Franz Kleine Str 28 331...