background image


2014 BARSKA® | Pomona, CA 91767 | (t) 888.666.6769 | (f) 909.445.8169 

www.barska.com


BC406 

13 

3. Delete catalogue 

Click  button 

,  then  select  the  catalogues  which  you  want  to  delete,  then 

reclick the button 

  to delete catalogue. 

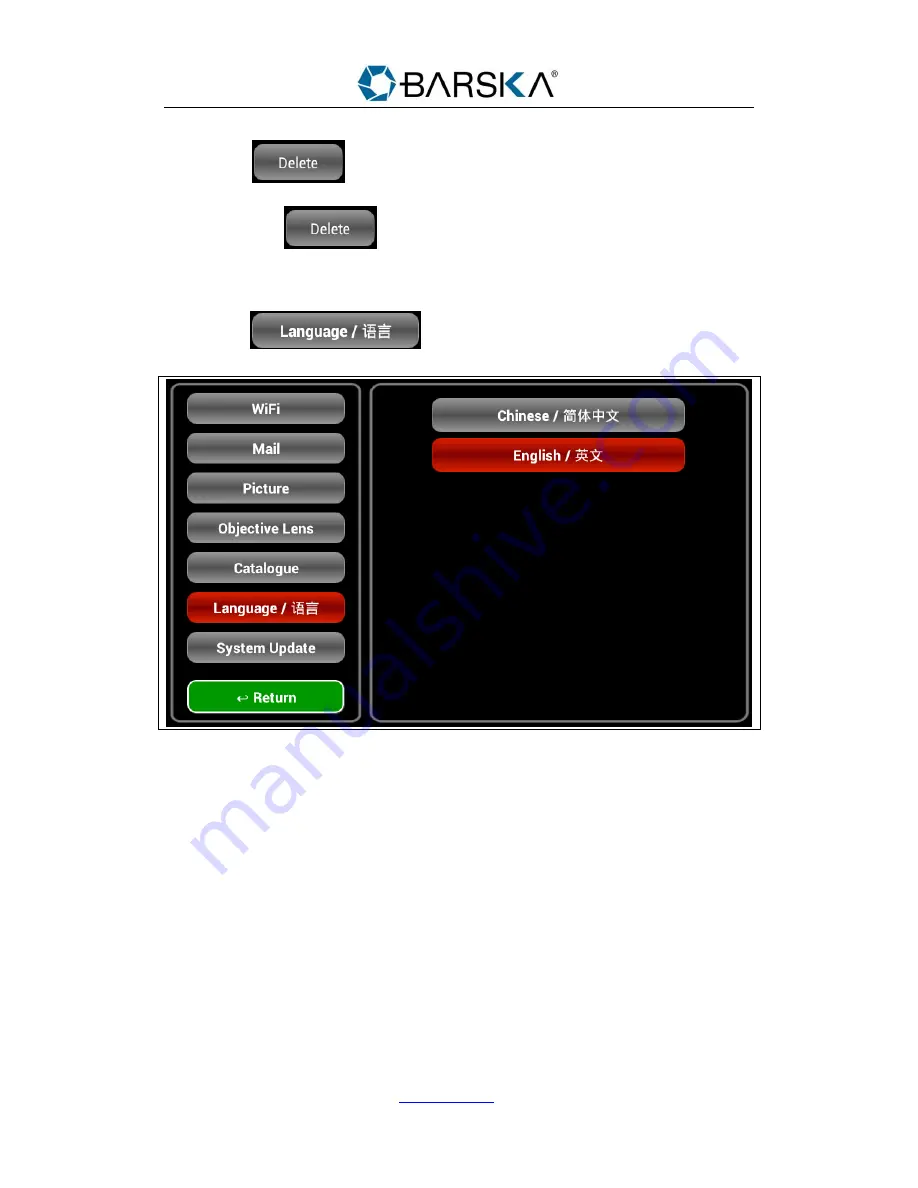
Language   

Click button 

  to set language. 


Figure 2.12 


The device support English or Chinese language. 


Summary of Contents for AY12214

Page 1: ...cessories 2 Specifications 2 Magnification Power Table 2 1 2 Power On Off 3 Chapter Two Microscope Operation 3 2 1 Illumination 3 2 2 Adjusting the Lighting 4 2 3 Microscope operation 5 2 4 LCD Operation 6 Take photo and video 6 Object lens 7 Distance measurement 7 2 5 Playback mode 8 File List 8 File operation 8 2 5 Setting mode 9 Wifi Setting 9 Mail 10 Picture 11 Objective Lens 11 Catalogue 12 L...

Page 2: ...2014 BARSKA Pomona CA 91767 t 888 666 6769 f 909 445 8169 www barska com BC406 1 Chapter One Overview 1 1 Appearance Figure 1 1 ...

Page 3: ...ition digital TFT display Resolution 800x480 pixels Focuser Smooth single motion Objectives Achromatic 4x 10x and 40x Internal Memory 4GB USB Cable USB 2 0 Filter Bule Green Red 1mm 3mm 6mm Illuminators Built in electric both are LED 3 4Volt and 0 1Watt AC Adapter Input 110V 240v 50 60Hz 0 5A Output 5Vdc 2A Weight Dimensions 3 3lbs 14 25 x 7 5 x 6 5 Compatible OS Windows 7 and 8 Magnification Powe...

Page 4: ...llumination To get the sharpest and best views the proper illumination lighting must be chosen 1 To turn the illuminator s on see Figure 2 1 below which shows the following four positions on the Illuminator Switch OFF I Bottom Illuminator II Top Illuminator and III Both Bottom Top Illuminators 2 The top illuminator I is used for specimen slides where the light shines up through the hole in the sta...

Page 5: ...n when viewing a specimen 1 Adjust the brightness dial shown below in Figure 2 2 label the dial 2 Change the EV setting on the LCD monitor The EV exposure value for brightness function increases or decreases the brightness level by using the left or right arrow keys on the LCD monitor When viewing a specimen that is not transparent or dark in color you may need to increase the amount of light to s...

Page 6: ...r lighting is selected we can begin to use the microscope Figure 2 3 1 Place specimen on stage Figure 2 3 2 Select the magnification you would like to view the object at by rotating objective lens to appropriate magnification Refer to Magnification Power Table in section 1 1 3 Rotate the adjustment knob until a clear image appears on the LCD screen See Figure 2 2 ...

Page 7: ... snapshots or a short video with your microscope with the built in digital camera With the internal storage memory you do not need to use a PC or any other devices to do imaging Transferring of images to your PC for saving and or printing them is easy and will be discussed later in this manual Photo Click To take photo Button figures show the max number you can take photo Video To start recording ...

Page 8: ...py the files to usb disk otherwise it will damage the file in usb disk Object lens To set the Objective len When you turn the nosepiece you manually set the corresponding objective len value Cautions Objective lens will affect the distance measurement Distance measurement Figure 2 5 show the buttons to measure distance Figure 2 5 1 Select Color Click one button to select color 2 Draw line After se...

Page 9: ...enter playback mode The photo and videos files are stored in the internal memory card you can browse and manage these files in playback mode File List Figure 2 6 Figure 2 6 show the files name You can click one of the file names to show the photo or video in right area File operation Click Button Action to select all the file in file list to unselect all the file in file list to delete the selecte...

Page 10: ...e the file in usb disk 2 5 Setting mode Click button to enter setting mode Wifi Setting Figure 2 7 1 Click button to enter wifi setting 2 Click button to enable wifi Then the list will show the available wifi ssid Click one of ssids then enter password to connect wifi Caution This device adopts automatic IP connection so the wireless router should open the DHCP function ...

Page 11: ...le if your mail address is icamsys_scope 163 com then your mail server usually is smtp 163 com Port is your mail port The default setting is 465 User name is your mail user name Password is your mail password 3 Set recipients information There are three recipients you can set Enter the recipient in the edittext and selecte the recipient 4 Click button to save the config you have set Then when you ...

Page 12: ...4 BARSKA Pomona CA 91767 t 888 666 6769 f 909 445 8169 www barska com BC406 11 Picture Figure 2 9 Click button to set picture In pic setting you can set pic size and pic Quality Objective Lens Figure 2 10 ...

Page 13: ...alled X4 X10 X40 three objectives with accurate magnification description Enter the objective lens value following the description Click button to save config Catalogue Figure 2 11 Click button to set catalogue The catalogue will store the photo or video which is taken in Preview mode 1 Create catalogue Click to create a catalogue 2 Select catalogue Click the a name in the catalogue list then Sele...

Page 14: ... 8169 www barska com BC406 13 3 Delete catalogue Click button then select the catalogues which you want to delete then reclick the button to delete catalogue Language Click button to set language Figure 2 12 The device support English or Chinese language ...

Page 15: ...e Click button to update system Figure 2 13 When you get latest software version please copy the software to the root directory of usb disk then plug the usb disk to the device After the device detect the usb disk click the button to update the software Return Click button to enter preview mode ...

Reviews: