The detailed way:
The rubber rail trim, rails and goal assembly must be removed from the table. With the goal assembly
wires attached, test the side by crediting it and passing a puck through the puck sensor till the gate
raises. Adjusting the actuator arms on the micro switch will be easier with the assembly exposed.
Goal assemblies getting stuck:
After following the steps to remove the goal assembly:
Remove the puck blocker and lay on a flat surface. Use a rubber mallet or any other means to adjust the
blocker and make sure that it is flat. If this piece bends it may cause the teeth to grind with the motor
gear which will in turn break the motor.
Rail installation:
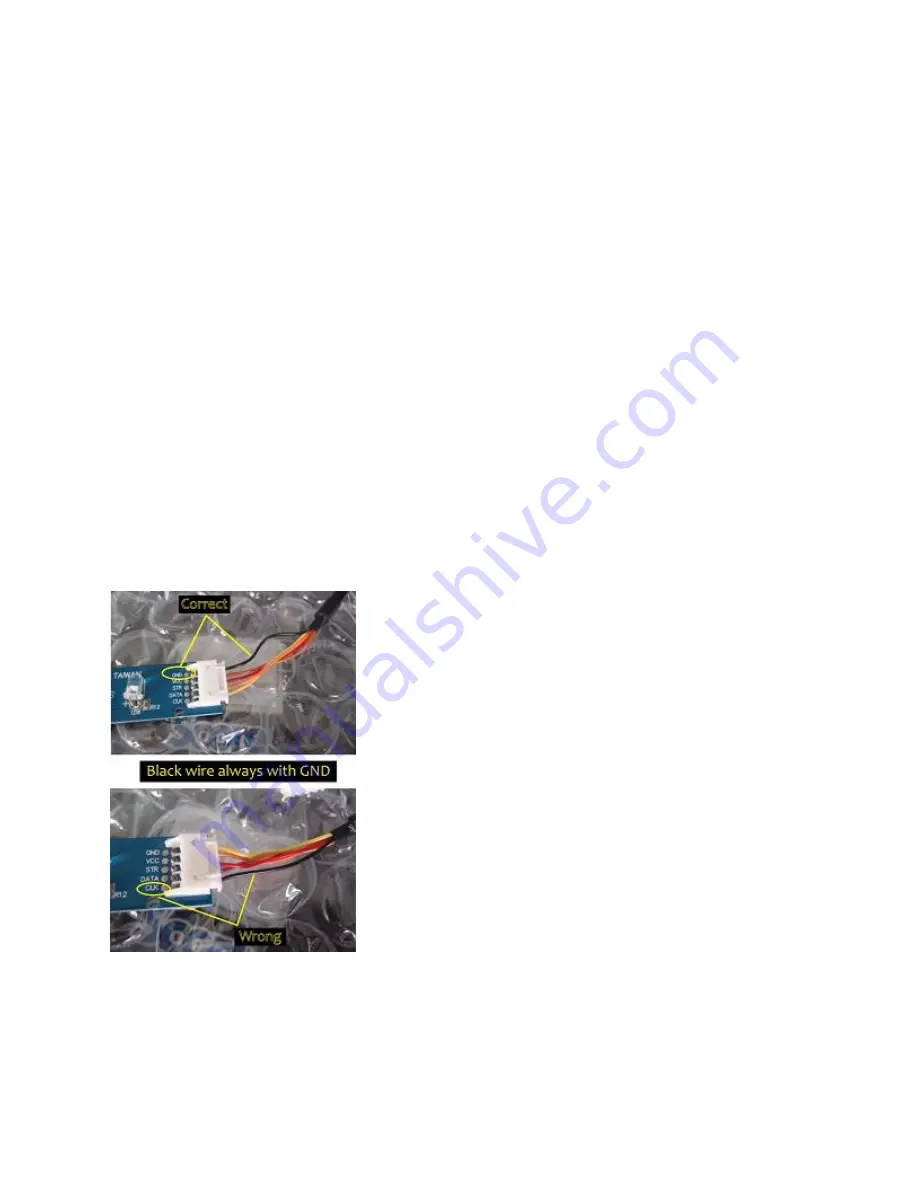
*Important* The rails are in a sequence and cannot be rearranged. Make sure they are put back in the
same spot with the same wire attached to the LEDs. Once the rail screws are in the rails reinsert the
black rubber rail trim. This can be done by hand or with the aid of a rubber mallet.
*Tip* This rubber can shrink if left in the cold. It is much easier to install when warm.
If your table shows 1 life light, and 1 time light it means that the rails are out of sequence. Please
remove them and ensure that the black wire lines up with the GND position on the rail LED strip.


