7. Image Settings
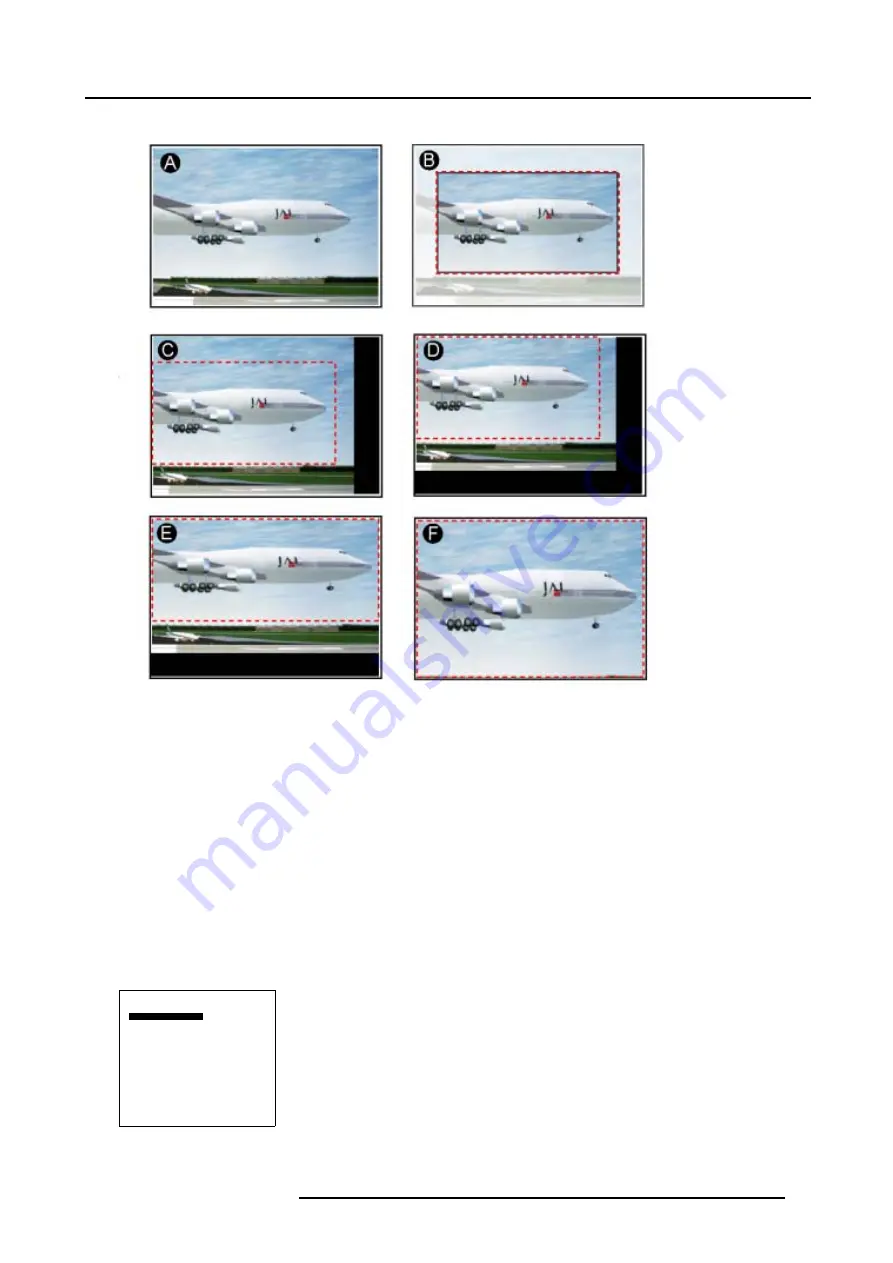
Different steps to create a viewport.
Image 7-2
Creation of a viewport, views on the screen while adjusting
A
Input signal
B
Desired image on the screen (viewport)
C Horizontal start position
D Vertical start position
E
Set up of viewport width
F
Set up of viewport height
Creating a horizontal start position
1. Select
Horizontal start
. (menu 7-10)
2. Press
ENTER
to activate.
A slider bar will be displayed. The maximum indicated values are in pixels and depends on input source.
3. Use the
↑
or
↓
to set up the horizontal start position.
When set up the start position the image will move horizontally on the screen, see image 7-2 part C.
Viewport
Horizontal start
Width
Vertical start
Height
Total pixels
Automatic
Back
Menu 7-10
R5976672 SOLARIS LC40 01122003
41
Summary of Contents for Solaris LC40 R9004120
Page 1: ...MEDIA EVENTS SOLARIS LC40 R9004120 Events R9004125 Media OWNERS MANUAL 01122003 R5976672 00 ...
Page 4: ......
Page 10: ...1 Packaging and Dimensions 6 R5976672 SOLARIS LC40 01122003 ...
Page 26: ...3 Connections 22 R5976672 SOLARIS LC40 01122003 ...
Page 38: ...6 Input Selection 34 R5976672 SOLARIS LC40 01122003 ...
Page 50: ...7 Image Settings 46 R5976672 SOLARIS LC40 01122003 ...
Page 54: ...8 Audio Settings 50 R5976672 SOLARIS LC40 01122003 ...
Page 56: ...9 Compact PC Control 52 R5976672 SOLARIS LC40 01122003 ...
Page 77: ...B Optional Mounting Equipment A Image B 5 A B Image B 6 R5976672 SOLARIS LC40 01122003 73 ...
Page 78: ...B Optional Mounting Equipment 74 R5976672 SOLARIS LC40 01122003 ...


