12. Image Files Menu
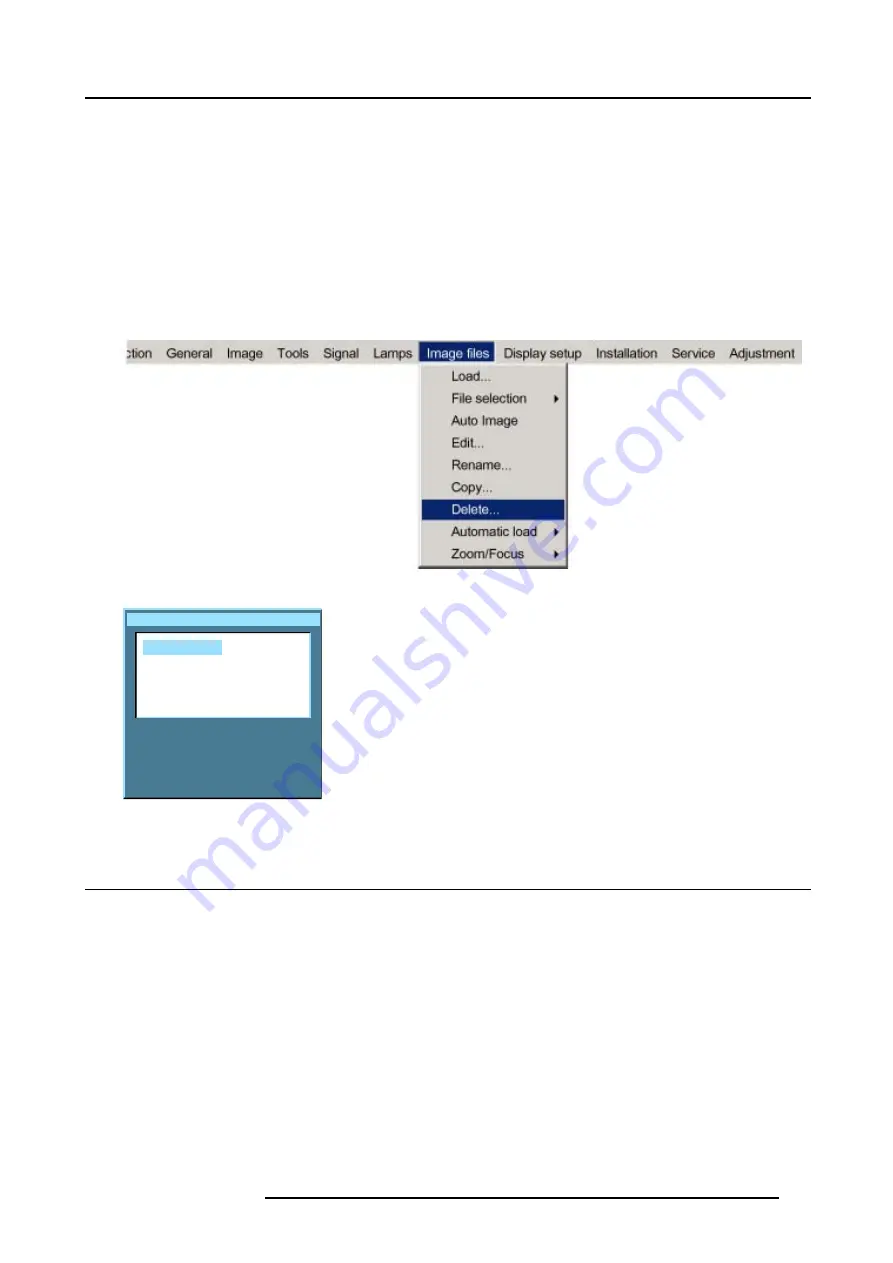
How to delete a file ?
1. Press
MENU
to activate the menu bar.
2. Press
→
to select the
Image files
item. (image 12-18)
3. Press
↓
to pull down the
Image files
menu.
4. Use
↑
or
↓
to select
delete.
5. Press
ENTER
to confirm.
A dialog box is displayed. (image 12-19)
6. Use
↑
or
↓
to select the desired file.
7. Press
ENTER
to confirm.
The selected file is deleted and is removed from the list.
Image 12-18
Delete custom file
Active files:
Video625.c01
Video625.c02
All files
Image 12-19
12.10 Automatic load
What can be done ?
When automatic load is ’off’, the projector will not load another file when the source is interrupted or when the image is suddenly
changed to another file format. The new image will be displayed with the same settings as the previous source.
When automatic load is ’on’, the projector will follow the new source settings.
How to set up ?
1. Press
MENU
to activate the menu bar.
2. Press
→
to select the
Image files
item. (image 12-20)
3. Press
↓
to pull down the
Image files
menu.
4. Use
↑
or
↓
to select
Automatic load.
5. Press
→
to display the choices.
6. Use
↑
or
↓
to select desired choice.
R5976817 RLM H5 02/06/2006
117
Summary of Contents for RLM H5
Page 1: ...RLM H5 Owners manual R9010300 R5976817 03 02 06 2006...
Page 4: ......
Page 8: ...Table of contents 4 R5976817 RLM H5 02 06 2006...
Page 14: ...1 Packaging and Dimensions 10 R5976817 RLM H5 02 06 2006...
Page 54: ...5 Getting used with the menu structure 50 R5976817 RLM H5 02 06 2006...
Page 60: ...6 Source selection 56 R5976817 RLM H5 02 06 2006...
Page 64: ...7 General Menu Image 7 7 60 R5976817 RLM H5 02 06 2006...
Page 93: ...8 Image Menu Image 8 51 R5976817 RLM H5 02 06 2006 89...
Page 94: ...8 Image Menu 90 R5976817 RLM H5 02 06 2006...
Page 104: ...9 Tools Menu 100 R5976817 RLM H5 02 06 2006...
Page 134: ...13 Display Setup 130 R5976817 RLM H5 02 06 2006...
Page 144: ...14 Installation menu 140 R5976817 RLM H5 02 06 2006...


