3. Replacing a bad LED from an ILite LED board
3.8
Creating a mould and small stick
Why creating a mould and small stick ?
While replacing a LED on a LED module the use of a mould and small stick is recommended to facilitate the positioning of the new
LED upon the LED module. This mould ensures that the new LED is perfectly aligned with the other LED’s on the LED module. The
small stick fasten the mould between the LED’s on the LED module. Both parts, mould and small stick, can be created out of the
removed mask from the LED module.
Necessary tools
•
Side cutter
•
Small smooth cut file
Necessary parts
Shader unit
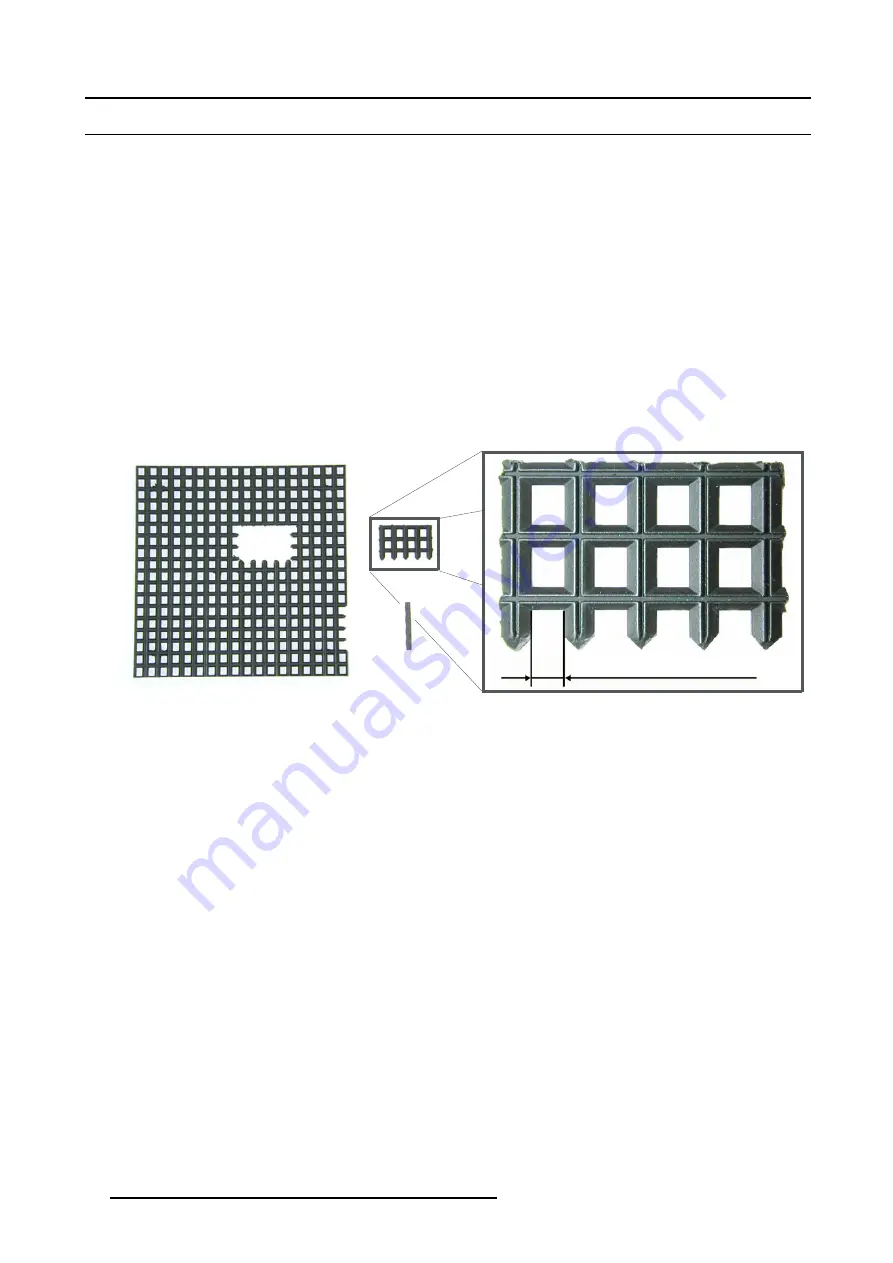
How to create a mould and small stick ?
1. Select a (used) shader unit with the same pitch as the LED module.
2. Cut a mould and small stick out of the shader. The mould should have a shape like a comb. The spikes of the comb must be
separated by the smallest side of the rectangle.
Small side of rectangle
Image 3-9
3. Remove the burr and sharpen the points of the spikes by using a small smooth cut file.
4. Try out the mould and the stick on the LED board. Do not use to much strength to lock the mould with the stick, but make the
point of the stick thinner with a small file if necessary.
20
R5976460 ILITE LED REPLACEMENT KIT 29/03/2007
Summary of Contents for R9851620
Page 1: ...ILite LED Replacement Kit Installation Manual R5976460 03 29 03 2007...
Page 4: ......
Page 6: ...Table of contents 2 R5976460 ILITE LED REPLACEMENT KIT 29 03 2007...
Page 14: ...2 General 10 R5976460 ILITE LED REPLACEMENT KIT 29 03 2007...
Page 36: ...3 Replacing a bad LED from an ILite LED board 32 R5976460 ILITE LED REPLACEMENT KIT 29 03 2007...


