


17. Adjusting the Picture
17.7.2 Adjusting the Image Size
How to adjust the Vertical and Horizontal image size
1. Select sub menu POSITION (Adjusting the Image Shift, page 112)
2. Select the SIZE item, vertical or horizontal, you desire to adjust by rotating the selection wheel on the Master or the up/down
arrow keys on the Remote Control. (menu 17-16)
3. Press the selection wheel on the Master or the key ENTER on the Remote Control to confirm.
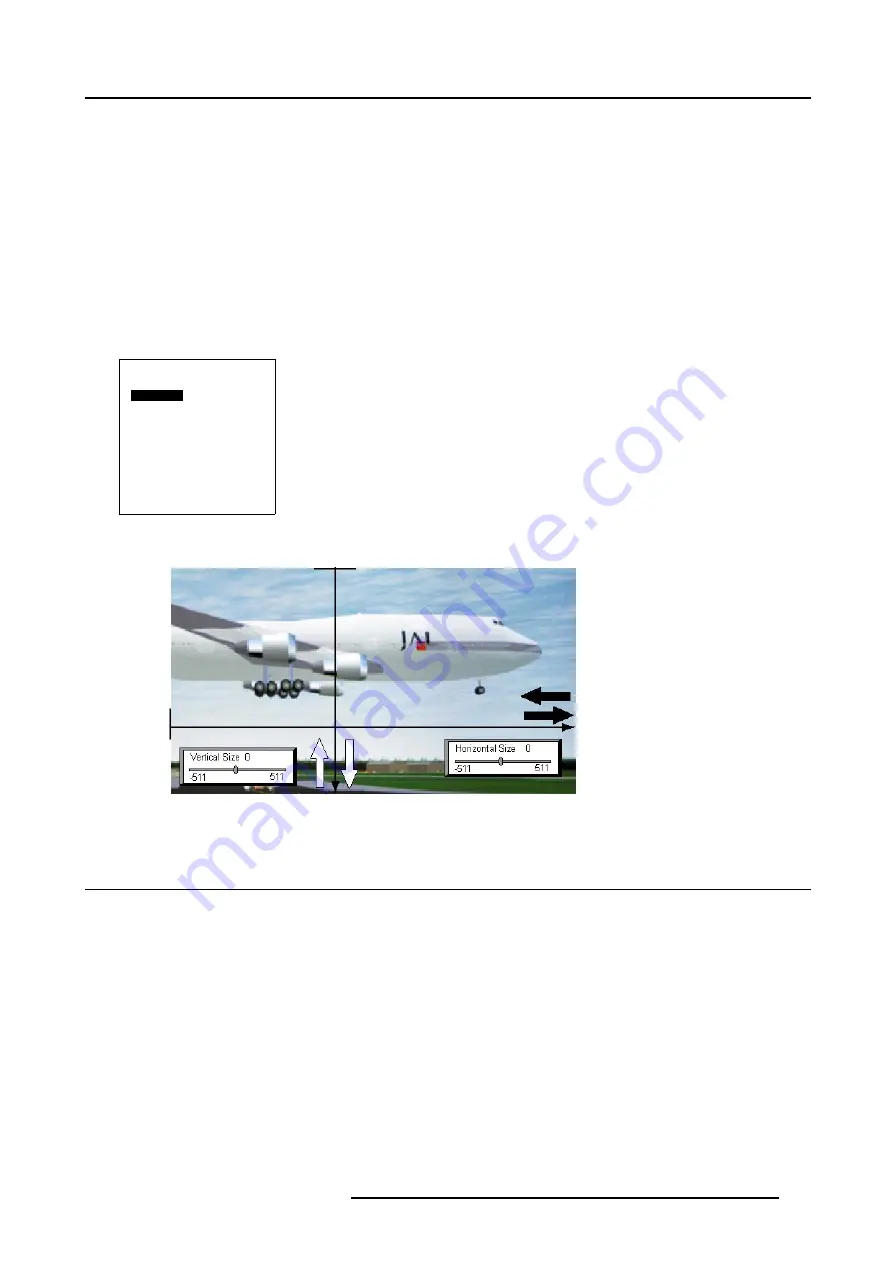
A barscale with zero point appears on-screen and in the graphical display of the Master. (image 17-7)
4.
Adjust the size:
- With the Remote Control: press the
←
or
→
key to adjust the shift level.
- With the selection wheel on the Master: rotate the wheel to the left or to the right.
5. Press
EXIT
on the Remote Control or press the selection wheel on the Master to return.
Position
Horizontal Shift
Horizontal Size
Vertical Shift
Horizontal Size
Back
Menu 17-16
Image 17-7
Picture size adjustment
17.8 Outline the displayed Image (Blanking)
How to outline the displayed image
Undesired information at the borders of the displayed image can be removed with the blanking adjustment. Follow next steps:
1. Select the ADVANCED SETTINGS menu (menu 17-8).
2. Select item BLANKING by rotating the jog dial on the Master or the up/down arrow keys on the Remote Control.
3. Press the jog dial on the Master or the key
ENTER
on the Remote Control to confirm.
The sub menu BLANKING appears on-screen and in the graphical display. This menu contains the items Top/Bottom and
Left/Right blanking. (menu 17-17)
4. Select the side of the image you desire to apply blanking by rotating the jog dial on the Master or the up/down arrow keys on the
Remote Control.
5. Press the jog dial on the Master or the key
ENTER
on the Remote Control to confirm.
The corresponding bar scale appears on-screen and in the graphical display of the Master. (image 17-8)
R5976468 CINE VERSUM SYSTEM 03112003
113
Summary of Contents for R9841020 Cine VERSUM Master
Page 4: ......
Page 8: ...Table of contents 4 R5976468 CINE VERSUM SYSTEM 03112003...
Page 14: ...1 Safety Instructions 10 R5976468 CINE VERSUM SYSTEM 03112003...
Page 30: ...4 Dimensions 26 R5976468 CINE VERSUM SYSTEM 03112003...
Page 36: ...5 Location of Controls 32 R5976468 CINE VERSUM SYSTEM 03112003...
Page 48: ...6 Installation Guidelines 44 R5976468 CINE VERSUM SYSTEM 03112003...
Page 63: ...7 Connections Image 7 27 Image 7 28 Image 7 29 R5976468 CINE VERSUM SYSTEM 03112003 59...
Page 64: ...7 Connections 60 R5976468 CINE VERSUM SYSTEM 03112003...
Page 68: ...8 Operating the Remote Control 64 R5976468 CINE VERSUM SYSTEM 03112003...
Page 80: ...10 Overview GUI Menu Screens 76 R5976468 CINE VERSUM SYSTEM 03112003...
Page 84: ...11 Powering on off the Cine VERSUM System 80 R5976468 CINE VERSUM SYSTEM 03112003...
Page 88: ...12 Image Projection after Powering Up 84 R5976468 CINE VERSUM SYSTEM 03112003...
Page 92: ...13 Projection Stop Standby or Economic Standby mode 88 R5976468 CINE VERSUM SYSTEM 03112003...
Page 96: ...14 Switching linked displays To and Out Standby 92 R5976468 CINE VERSUM SYSTEM 03112003...
Page 138: ...18 Additional settings Cine VERSUM Master 134 R5976468 CINE VERSUM SYSTEM 03112003...
Page 142: ...19 Picture in Picture PIP 138 R5976468 CINE VERSUM SYSTEM 03112003...
Page 156: ...21 Maintenance Indicators 152 R5976468 CINE VERSUM SYSTEM 03112003...
Page 160: ...Index 156 R5976468 CINE VERSUM SYSTEM 03112003...


