3. Mounting the cable basket
3. MOUNTING THE CABLE BASKET
3.1
Overview
Why mount the cable basket?
After making all the necessary connections to the projector, you have to mount the cable basket to the projector. This procedure is
necessary as this will avoid stray light from projecting out.
3.2
Fixing the cable basket to the projector
How to
fi
x the cable basket to the projector?
1. Make all the necessary connections to the projector
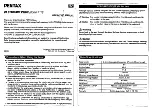
2. Look for four holders E, F, G, and H inside the cable basket
Image 3-1
Cable basket: top holders (E), (F) and bottom holders (G), (H)
3. Place the bottom holders G and H in correct position to the bottom slots G and H found in the front side of the projector, so that
they
fi
t in properly
R59770400 LENS KIT FOR SIM 5W NIGHT VISION 03/04/2009
11
Summary of Contents for QCLD (1.1 - 1.3:1) IRIS
Page 4: ......
Page 6: ...Table of contents 2 R59770400 LENS KIT FOR SIM 5W NIGHT VISION 03 04 2009...
Page 8: ...1 Lens kit for SIM 5W Night Vision 4 R59770400 LENS KIT FOR SIM 5W NIGHT VISION 03 04 2009...
Page 14: ...2 Lens installation 10 R59770400 LENS KIT FOR SIM 5W NIGHT VISION 03 04 2009...
Page 18: ...4 Lens maintenance 14 R59770400 LENS KIT FOR SIM 5W NIGHT VISION 03 04 2009...
Page 20: ...Index 16 R59770400 LENS KIT FOR SIM 5W NIGHT VISION 03 04 2009...
Page 22: ...List of images 18 R59770400 LENS KIT FOR SIM 5W NIGHT VISION 03 04 2009...