


8. Getting started
8. GETTING STARTED
Overview
•
Starting up the MCU, eRACU and Auto Alignment Head
•
•
•
•
•
•
8.1
Starting up the MCU, eRACU and Auto Alignment Head
Overview
Follow the startup sequence mentioned below.
•
MCU
•
eRACU
•
Auto Alignment Head
It is assumed that all hardware connection related to MCU, eRACU and Auto Alignment Head has been completed.
8.1.1
Starting up the MCU
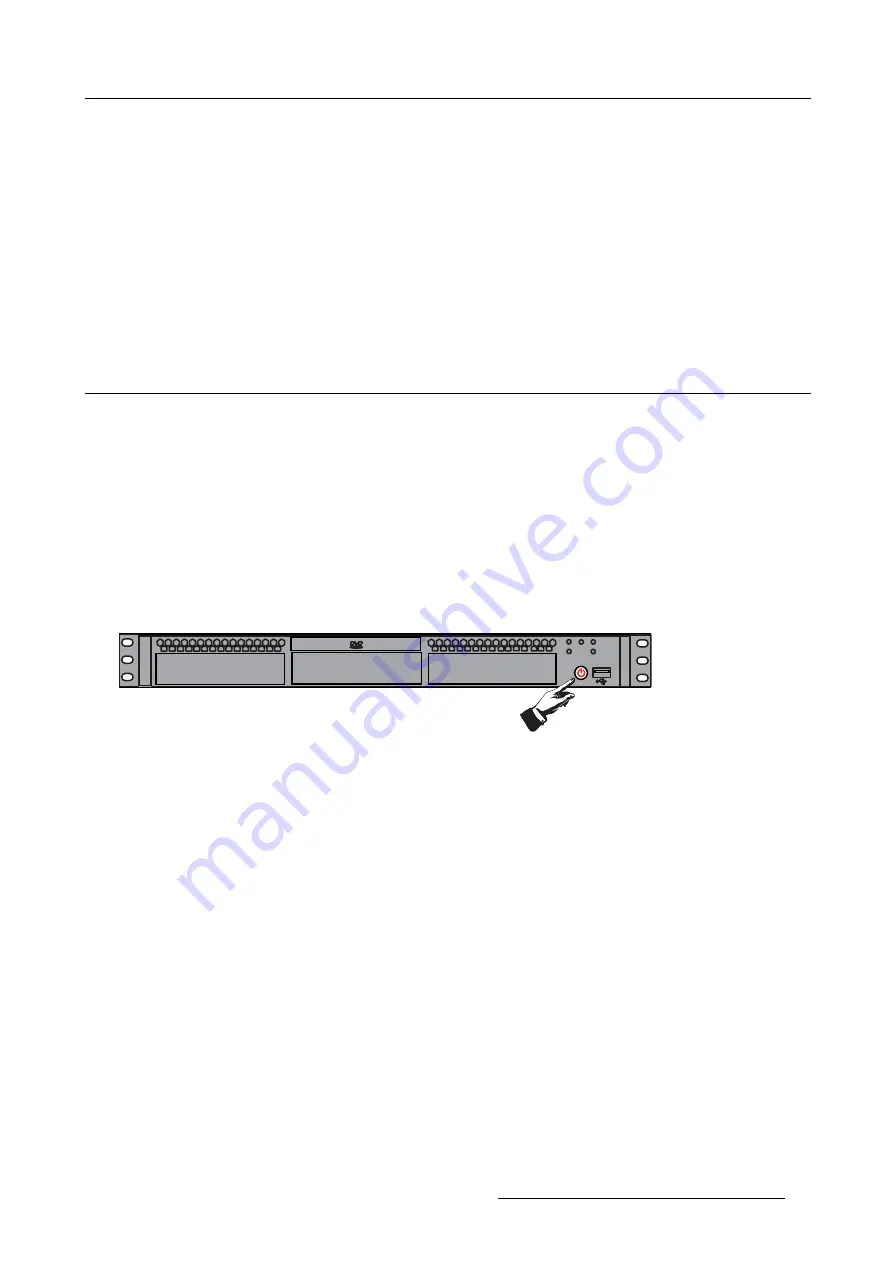
How to start up the MCU?
1. Switch on the power switch.
Image 8-1
Starting up the MCU
2. Wait for the MCU to be fully booted.
Note:
It is not required to log in on Windows on the MCU in order for the eRACU to connect to the XDS RACU server.
Caution:
In order to use the camera functionality in AutoAlignment, one should boot the MCU and stay logged out of Windows
or permanently stay logged in on Windows during usage of AutoAlignment. A limitation of the camera driver makes
it inaccessible after a Windows logoff event. One should reboot or re-login to be able to use the camera functionality
again after a Windows logoff.
8.1.2
Starting up the eRACU
How to start up the eRACU?
1. Switch on the eRACU by pressing the power button for 2 seconds.
R59770509 MES ACURAS HEAD - AUTO ALIGNMENT HEAD 24/11/2010
39
Summary of Contents for MES ACURAS HEAD
Page 8: ......
Page 20: ...2 Safety 12 R59770509 MES ACURAS HEAD AUTO ALIGNMENT HEAD 24 11 2010...
Page 22: ...3 Compliancy 14 R59770509 MES ACURAS HEAD AUTO ALIGNMENT HEAD 24 11 2010...
Page 28: ...4 Packaging 20 R59770509 MES ACURAS HEAD AUTO ALIGNMENT HEAD 24 11 2010...
Page 112: ...10 Operating AutoGeometry 104 R59770509 MES ACURAS HEAD AUTO ALIGNMENT HEAD 24 11 2010...
Page 126: ...Index 118 R59770509 MES ACURAS HEAD AUTO ALIGNMENT HEAD 24 11 2010...
Page 128: ...List of tables 120 R59770509 MES ACURAS HEAD AUTO ALIGNMENT HEAD 24 11 2010...


