


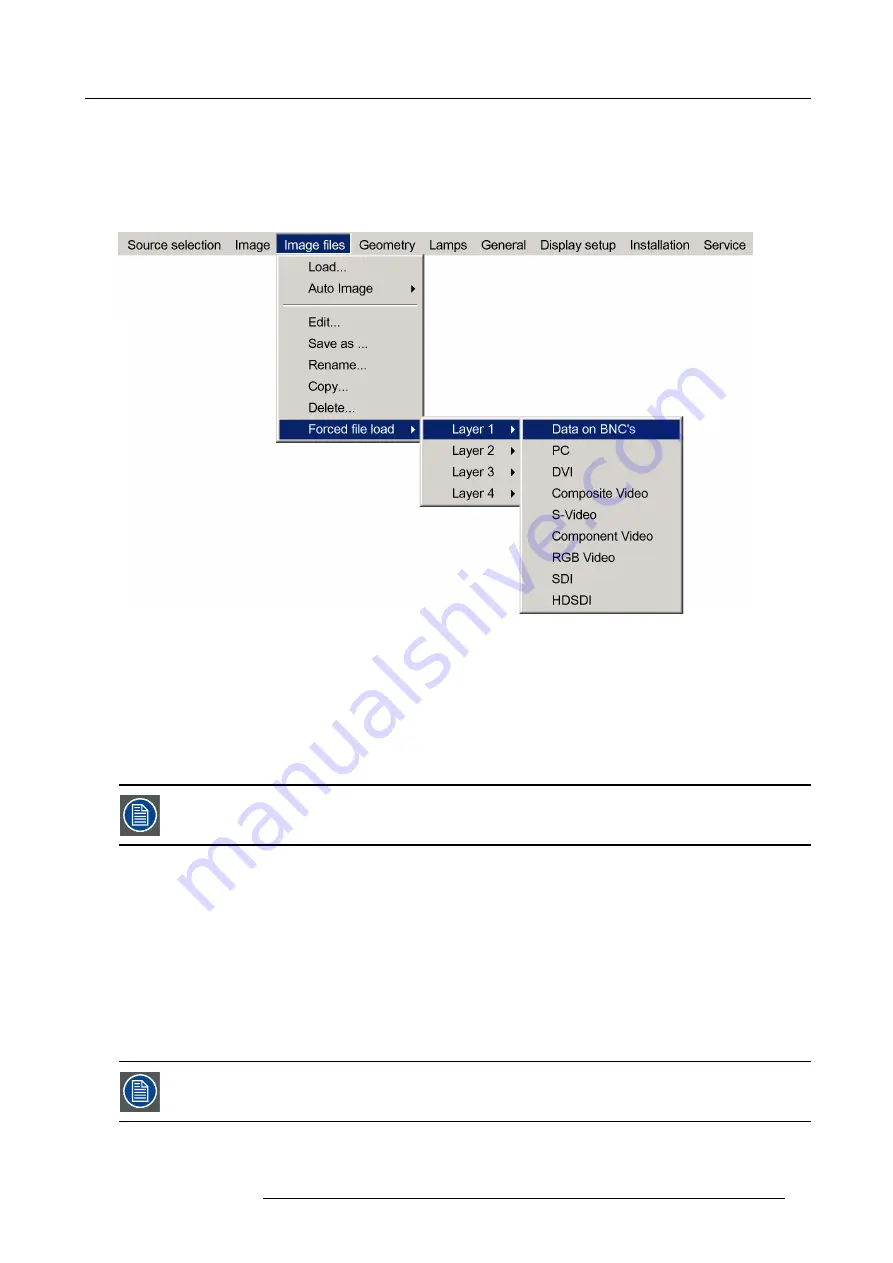
7. Advanced
4. Use
↑
or
↓
to select
Forced
fi
le load
5. Press
→
to open the menu
6. Use
↑
or
↓
to select the desired layer (for example Layer 1)
7. Press
→
to open the menu
8. Use
↑
or
↓
to select the desired input
Image 7-40
Note:
Inputs that are not hardware compatible with this layer are greyed out.
Note:
if a
fi
le is already forced for that input it will be shown on the right.
9. Press
ENTER
The
Load
dialog box is displayed
10.Use
↑
or
↓
to select the desired
fi
le (for example
/Standard/[email protected]
)
11.Press
ENTER
The
fi
le is selected and will be loaded in the future.
To delete the forced
fi
le, go to the desired input and press ENTER.
7.5.4
Auto Image
What can be done ?
Auto Image creates the best suited image
fi
le for the connected source.
It calculates/measures several source parameters :
•
Total pixels per line
•
Start pixel
•
Phase
•
Contrast/Brightness levels
Auto Image only works for data images.
The measure of the total number of pixels per line can be done through 2 methods
R59770121 NH-12 04/05/2011
73
Summary of Contents for Galaxy NH-12
Page 1: ...NH 12 User Guide R9010610 R59770121 06 04 05 2011...
Page 8: ...Table of contents 4 R59770121 NH 12 04 05 2011...
Page 10: ...1 Introduction 6 R59770121 NH 12 04 05 2011...
Page 16: ...3 Installation guidelines 12 R59770121 NH 12 04 05 2011...
Page 54: ...5 Setup 50 R59770121 NH 12 04 05 2011...
Page 56: ...6 Getting started 52 R59770121 NH 12 04 05 2011...
Page 93: ...7 Advanced Image 7 68 Image 7 69 Image 7 70 R59770121 NH 12 04 05 2011 89...
Page 139: ...7 Advanced Image 7 147 Image 7 148 Image 7 149 Image 7 150 R59770121 NH 12 04 05 2011 135...
Page 162: ...7 Advanced 158 R59770121 NH 12 04 05 2011...
Page 174: ...8 Maintenance Image 8 24 Installing the rear cover step 5 170 R59770121 NH 12 04 05 2011...
Page 184: ...9 Troubleshooting 180 R59770121 NH 12 04 05 2011...
Page 188: ...Glossary 184 R59770121 NH 12 04 05 2011...


