


200
FSN Series • User’s Guide
5. Menu Orientation
System Menu
`~éíìêÉ=~åÇ=mêçÅÉëë=m~åÉä
On the
Input Setup Menu
for universal inputs, press
{Capture and Process}
to display
the
Capture and Process Panel
.
The panel is divided into two sections:
•
•
`~éíìêÉ=~åÇ=qáãáåÖ=pÉÅíáçå
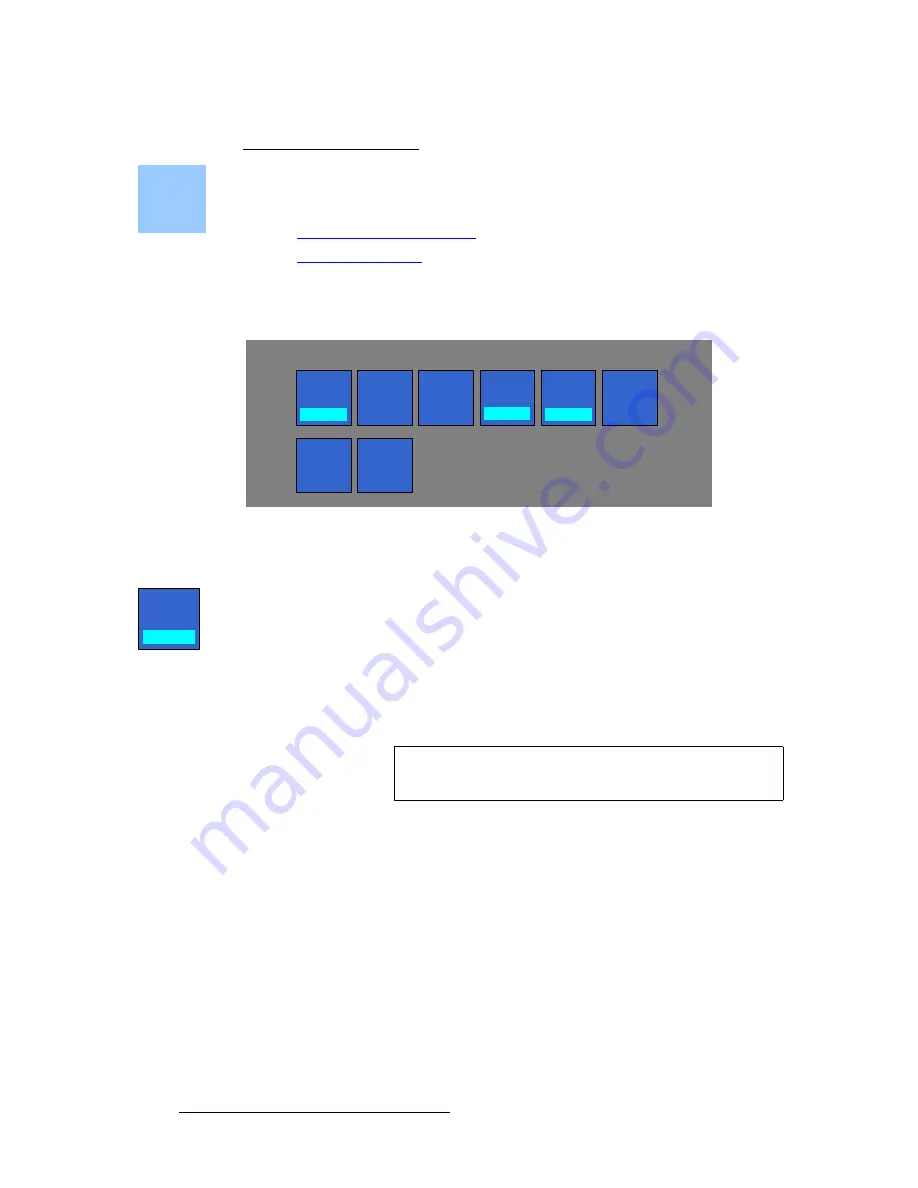
The figure below illustrates the
Capture and Timing Section
for universal inputs:
Figure 5-91.
Capture and Timing Section, Universal Inputs
The following adjustments are provided:
•
Press
{Auto Acquire}
to toggle the
Auto Acquire
mode
On
or
Off
. This function
is per connector on the
UIC
, and not per input.
~
When
Off
, you can manually set the resolution of the incoming source
using the
{Input Format}
button.
~
When
On
, the system attempts to detect the input resolution. As the
system auto-acquires, it compares the incoming signal to the formats
stored in the
Input Format Table
. When an exact match is found, the
format is applied and the
Format
field in the table is updated.
Please note the following important points regarding
Auto Acquire
:
~
Once the system acquires a new input format, it automatically scales the
input up (or down) to the current native resolution.
~
The input’s aspect ratio is fully maintained in this process, and no
masking will be applied. For example:
•
If a 1024 x 768 input is scaled up to 1920 x 1080 (HD/1080i),
the system fills vertically, leaving black “pillars” on either side of
the input.
•
If a 1920 x 1080 input is scaled down to 1280 x 720 (HD/720p),
the system fills horizontally, leaving black “bars” on the top and
bottom edges of the input.
~
After the input has been acquired, you can manually change the method
by which the system fills the screen, and you can also mask any edge
Capture
And
Process
Input
Format
Auto
Acquire
Off
1:1
Sampling
On
Sample
Phase
Capture and Timing
Adjust
H
Timing
Color
Space
SMPTE
EDID
Format
Adjust
V
Timing
Auto
Acquire
Off
Note
If an exact match cannot be found, you may need to use
{Input Format}
button to set the format manually.


