


8. Installation menu
Top offset
Top height
Left offset
Left width
Right offset
Right width
Bottom height
Bottom offset
0
0
0
0
0
0
0
0
Enable
Show lines
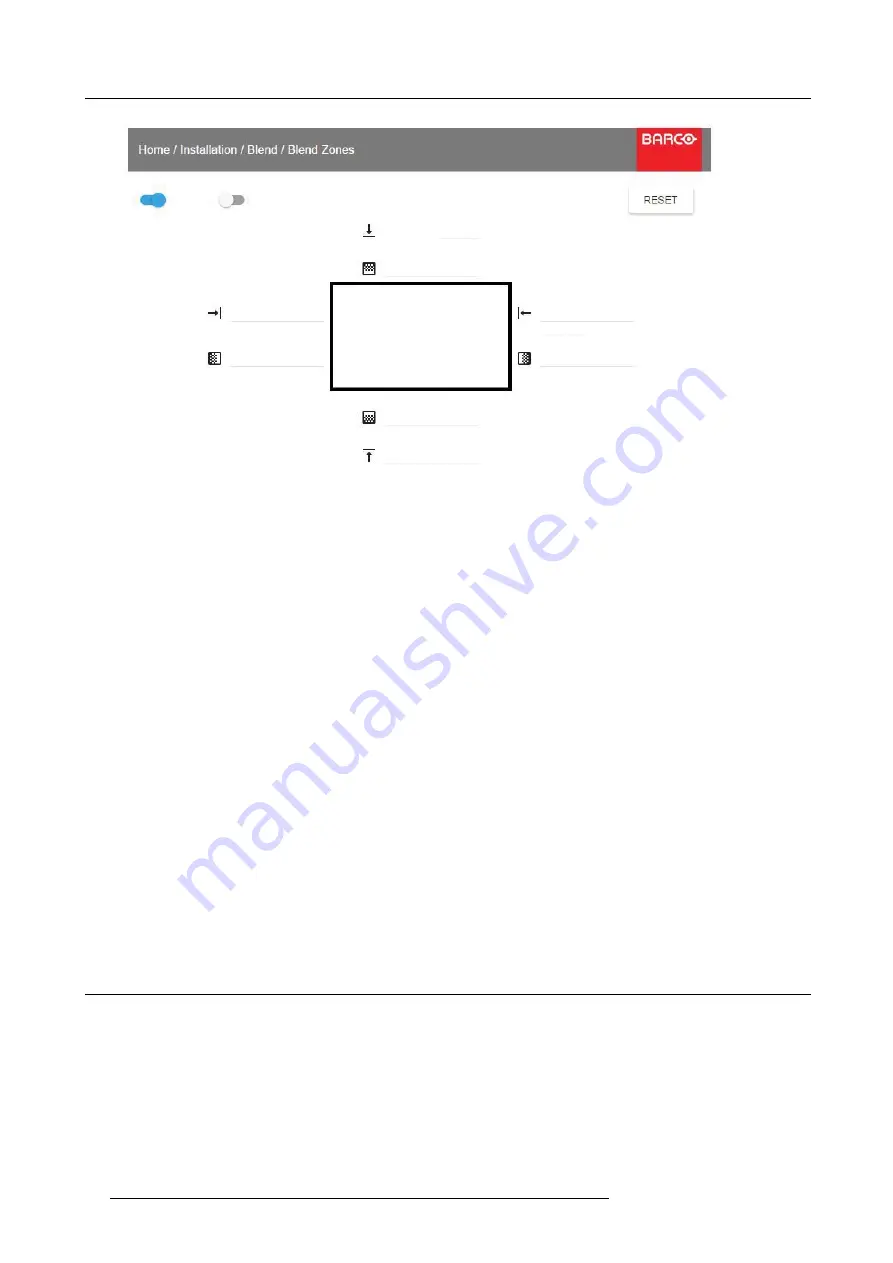
Image 8-9
How to calibrate the Blend Zone with pictures side by side.
Use the up/down/left/right arrow key on the remote control or key pad to navigate in the menu.
For Blend adjustment in side by side con
fi
guration, the steps are as follows, starting with the left picture:
•
By the arrow keys, place the display cursor on respectively the “Enable” zone and the “Show Lines” zone and activate them by
pressing enter.
•
Using the arrow keys, place the cursor on the “Right Width” zone, press enter.
•
Adjust the width value by using the arrow keys up (or down), one step at a time. By pressing the key arrow constantly, the blend
value will increase rapidly. The numeric value of the width is shown on the screen next to the alignment line.
The number
entered represent the movement expressed in number of pixels.
Con
fi
rm position by pressing enter.
•
Exit the menu by using the exit button on the remote control.
For the right picture, repeat the procedure, but adjust the Left Width instead of the right width.
When the projectors are correctly adjusted, the cursor lines shall be above the outer frame of the opposite screen.
For Blend adjustments in over / under con
fi
guration, the procedure is the same, but use the Top and Bottom height instead, and
perform a similar procedure.
Instead of adjusting the lines by the arrow keys, the value can also be typed directly using the numeric keys on the remote control.
To remove or undo the entered numbers, use the * key on the remote control.
The Offset adjustments.
The offset adjustments are used to cut the image on each side (Masking). Normally used to hide parts of the picture that shall not
be shown on the screen. An example can be: If the source is a pc, you may want to hide the menu bar at the bottom of the screen.
8.6
Illumination
About
Home/Installation /Illumination/Power
Review light source status and adjust (dim) laser power from 0 to 100%.See also "IR / Night vision functionality", page 49
Default: 100%
58
601–426 F70 SERIES 16/06/2017
Summary of Contents for F70 - W6
Page 1: ...F70 Series User Manual 601 426 00 16 06 2017...
Page 56: ...7 Image menu 52 601 426 F70 SERIES 16 06 2017...
Page 64: ...9 Settings menu 60 601 426 F70 SERIES 16 06 2017...
Page 66: ...10 Status menu Lists the projector IP address 62 601 426 F70 SERIES 16 06 2017...
Page 68: ...11 Reset Menu 64 601 426 F70 SERIES 16 06 2017...
Page 70: ...12 User Maintenance 66 601 426 F70 SERIES 16 06 2017...
Page 72: ...13 Cleaning the projector 68 601 426 F70 SERIES 16 06 2017...


