For detailed installation
instructions, refer to the
Event Master devices
User’s Guide.
Event Master Series Controller Operation
LEDs
Event Master Series EC-50
Quick Start Guide
– Operation
Visibly yours
Operation overview
7
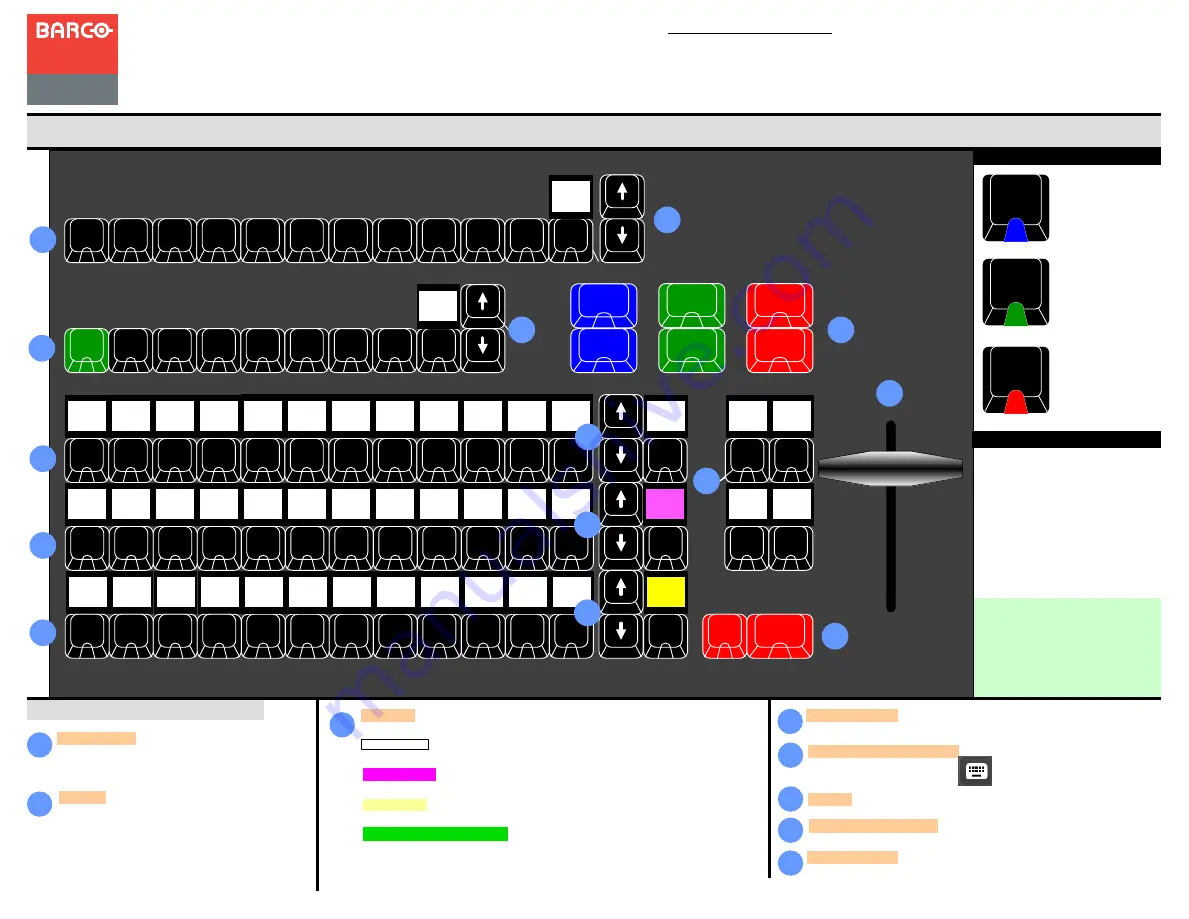
Layers
— These buttons give direct selection of the
layers in the selected Destinations. In normal mode
the button selects and/or adds a layer in the Preview
of the selected Destination. A green LED indicates
selected.
In LIVE mode (unlocked Program) the Layer is
selected in the Program of the selected Destination.
Destinations
— These buttons give direct selection
of the assigned Destination configurations. Buttons
toggle on and off the selection. A blue LED indicates
selected
Assign
— These buttons give direct selection of the assigned resources. There are
several that can be mapped.
PRESETS
— The Presets created in EMTS can be mapped onto a bus that is
selected to PRESETS, like the top row in the picture.
USERKEYS
— The UserKeys created in EMTS can be mapped onto a bus that is
selected to USERKEYS, like the mid row in the picture.
SOURCES
— The Source Files, (not the Inputs) created in EMTS can be mapped
onto a bus that is selected to SOURCES, like the bottom row in the picture.
BACKGROUND SOURCES
— The Backgrounds created in EMTS can be mapped
onto a bus that is selected to BackGround Source, this is not shown in the picture.
Once a Button is assigned with a resource, the backlight of the display will turn to the
corresponding color.
Arrow buttons
— These buttons choose the next page of its button bus.
Contextual Display Buttons
— These provide mapping of a variety of
functions from the EMTS.
Mapping of them is done in the menu.
8
9
10
11
14
15
Layerfunction Buttons
— These buttons provide indicated function to
selected layer(s).
Cut & All Trans
— These buttons executes the transition setup in the
GUI.
12
T-Bar
— Manually transitions Preview to Program.
BG
1
-
9
2
-
10
3
-
11
4
-
12
5
-
13
6
-
14
7
-
15
8
-
16
CUT
Auto
Trans
Freeze
PVW
Freeze
PGM
Layer
Cut
Layer
Trans
Match
PGM
Arm FX
Page
1
Page
1
User
Key
1
Source
1
Preset
1
Destination
Layer
Assign
7
8
9
10
11
9
9
10
10
10
10
12
14
15
Barco Technical Support:
USA
: +1 (866) 374-7878
EMEA :
+32 (56) 36 8019
CHINA :
40088 22726
www.barco.com/support/eSupport.aspx
Blue indicate
selected or active in
all its buttons
Green indicate
selected in Preview
Red indicate
selected in Program
or
Transitioning
Backlight
Once a Button is assigned with a
resource, the backlight of the
display will turn to the
corresponding color.
- White for Presets
- Magenta for UserKeys
- Yellow for Sourcfiles
- Green for Background sources


