


37
R5900120 /01
CX-50 Gen2
4.
Optionally the Base Unit’s WiFi can be set to Access Point or can be set to Off. For more info, see
settings, Wireless Client”, page 84
Setup via XMS
1.
Log in to XMS and go to the
Base Units
tab.
2.
In the device list select the Unit(s) for deploying network integration mode.
3.
Open the
Configure
dropdown list and choose
Network integration
.
4.
Select one of the authentication modes for network integration mode and fill out the details.
5.
Re-pair the ClickShare Buttons with the updated Base Unit(s) to apply the new configuration
For more detailed information on how to use XMS, consult the XMS user guide.
4.10 Display connection to the Base Unit
Ways to connect a display to the Base Unit
Way 1: Connect your display via a HDMI cable to the Base Unit.
Way 2: For displays who support video via USB, connect your display via an USB cable to the USB Type C
port of the Base Unit.
Way 3: For dual display, connect one display with the HDMI output of the Base Unit and connect the second
display to the USB Type C port of the Base Unit.
Connection via HDMI
1.
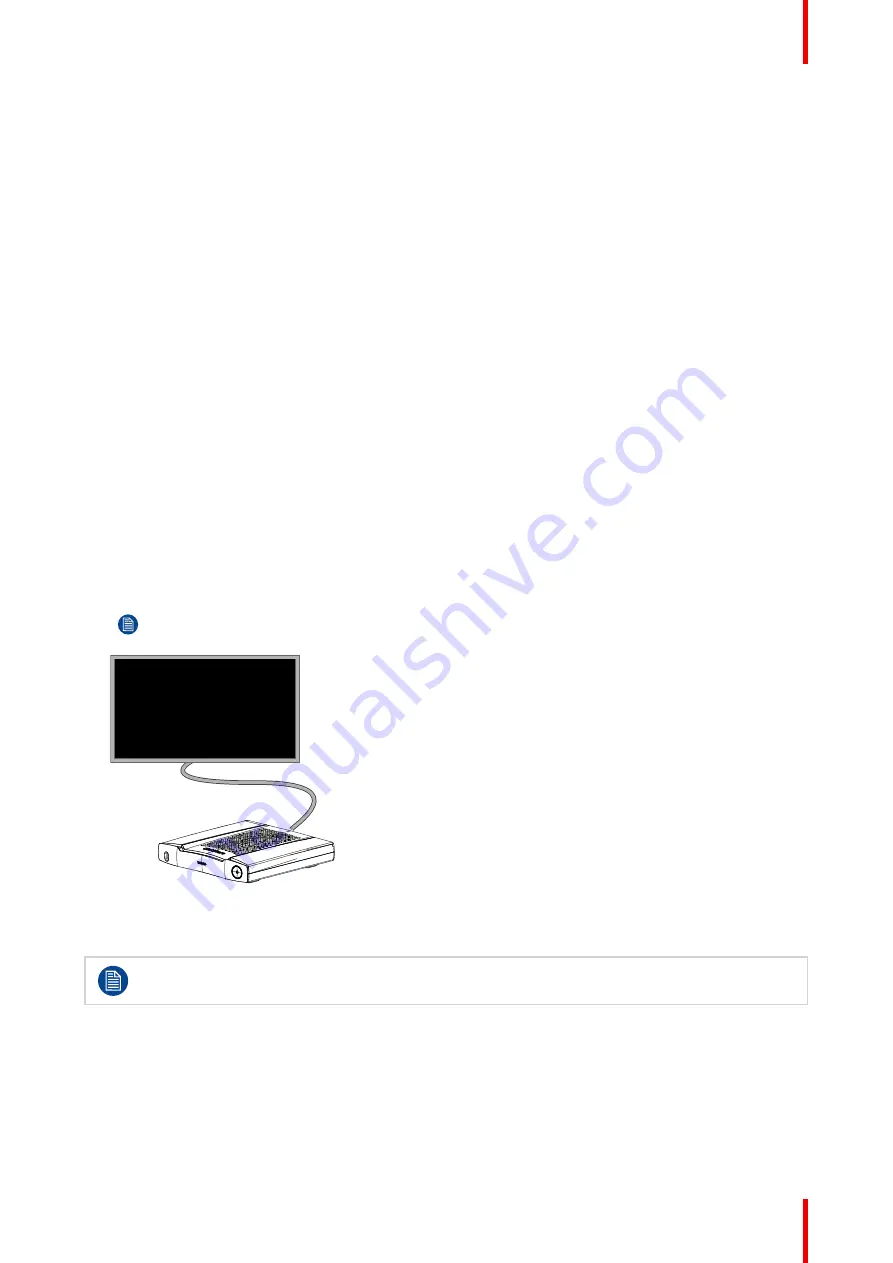
Connect the Base Unit to the display using a HDMI cable.
Note:
No display cables are included in the ClickShare box at purchase.
HDMI OUT
Image 4–6
When setting up a display configuration, connect the HDMI cable to the display. When necessary, use an
adapter piece to connect to a display port or a DVI port on the display side.
To guarantee picture quality, 4K capabilities and limit EMC exposure 360-degree bond shielding
HDMI cables supporting the HDMI 2.0 specification should be used.
Connection via USB
1.
Connect the USB Type-C port at the backside of the Base Unit to the USB input of the display (only for
displays supporting video via USB).
Check Barco’s website for the full list of supported/adviced cables.
Summary of Contents for CX-50 Gen2
Page 1: ...ENABLING BRIGHT OUTCOMES Installation manual CX 50 Gen2...
Page 2: ......
Page 10: ......
Page 14: ...R5900120 01 CX 50 Gen2 14...
Page 15: ...15 R5900120 01 CX 50 Gen2 Introduction 1...
Page 28: ...R5900120 01 CX 50 Gen2 28 Getting started...
Page 58: ...R5900120 01 CX 50 Gen2 58 CX 50 Gen2 Installation...
Page 119: ...119 R5900120 01 CX 50 Gen2 Firmware updates 7...
Page 121: ...121 R5900120 01 CX 50 Gen2 Troubleshooting 8...
Page 143: ......


