background image

9. Service Mode

If no such a block is available, the projector cannot run CRT Run In Cycle and leaves the adjustment mode. If you still want to run
CRT run in cycle, create first a memory block on an internal # pattern and restart CRT Run In Cycle .

What is done?

A flashing white image (5sec. on, 5 sec. off) is generated for 5 min. on the first internal block. In the next 5 min., the next internal
block available will be used to generate the flashing white image.

The image will also be shifted in a vertical way to prevent a CRT burn in.

How to select CRT Run In Cycle?

1. Push the cursor key

or

to highlight

CRT Run In Cycle

and press

ENTER

to select. (menu 9-37)

The

CRT Run In Cycle

menu will be displayed. (menu 9-38)

2. Press

EXIT

to quit the CRT Run In Cycle.

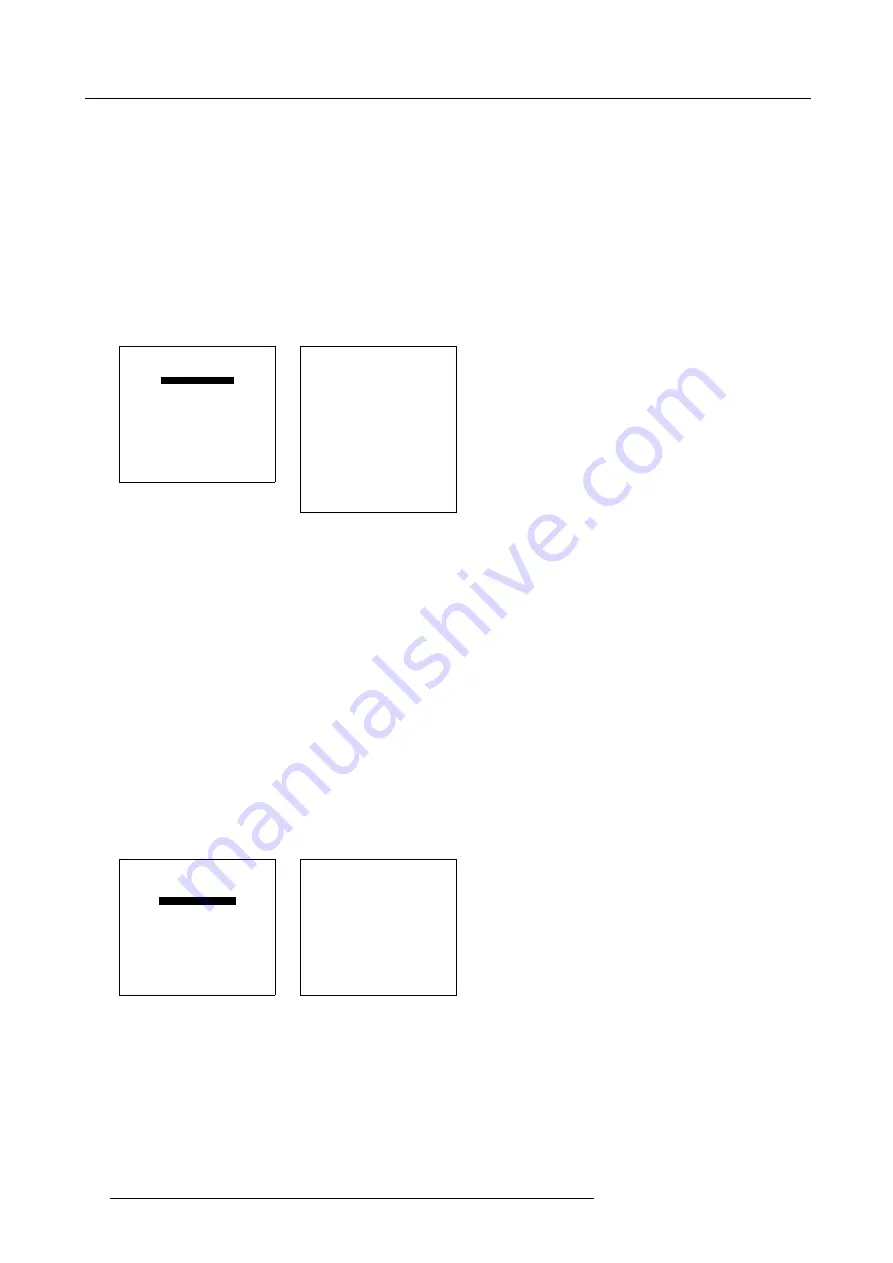
COMMON SETTINGS

G2 ADJUSTMENT

CRT RUN IN CYCLE

PROJECTOR WARM UP

MEMORY BANKS

Select with

or

then <ENTER>

<EXIT> to return

Menu 9-37

CRT RUN IN CYCLE

A flashing white pattern will

be

generated until <EXIT> is

pressed.

The projector only uses memory
blocks adjusted on an internal

# pattern:

if no such block

is

available, the projector can’t

run

the procedure and leaves the

adjustment mode.

<ENTER> to continue

<EXIT> to cancel

Menu 9-38

9.5.4

Projector Warm Up

What can be done?

When in the ON position (and the CRT run in cycle is OFF), the projector can start up with a warm up period of 20 minutes. During
the start up a warm up menu will be displayed. This menu offers the possibility to skip the warm up period anyway by pressing the
EXIT key and offers the possibility to adjust the horizontal and vertical amplitude of this white image with the control disc. During this
warm up period, a full white image is shifted on the CRT faceplate to avoid a burn in. Every 30 seconds a text box will be displayed
on another place on the screen with the remaining time to go. When EXIT is pressed during this warm up period, the warm up menu
will be redisplayed with the remaining time indication. Press another time EXIT to interrupt the warm up cycle. When the warm up
option is OFF, when switching on the projector, it starts immediately with the projection of the selected source.

How to select

1. Push the cursor key

or

to highlight

Projector Warm Up

. (menu 9-39)

2. Press

ENTER

to select.

The projector warm up menu will be displayed. (menu 9-40)

3. Press

ENTER

to toggle the ON/OFF option.

COMMON SETTINGS

G2 ADJUSTMENT

CRT RUN IN CYCLE

PROJECTOR WARM UP

MEMORY BANKS

Select with

or

then <ENTER>

<EXIT> to return

Menu 9-39

PROJECTOR WARM UP

OPTION : ON

A FULL WHITE PATTERN

WILL BE GENERATED FOR

20 MINUTES AT POWER UP

AFTER THIS PROCEDURE

THE PROJECTOR IS READY

TO PERFORM IN OPTIMUM

CONDITIONS

TOGGLE OPTION ON OR OFF

with <ENTER>

<EXIT> to return

Menu 9-40

9.5.5

Memory Banks

What can be done?

The user has the possibility to create 8 different memory banks (formats) for each source. But, the maximum allowed quantity of
memory banks for all sources together is 32. The option to create different memory banks for the same source can be switched ON
or OFF.

96

R5976584 BARCO CINE7 26022003

Summary of Contents for CINE7 R9010040

Page 1: ...HOME CINEMA BARCO CINE7 R9010040 R9010050 OWNERS MANUAL 26022003 R5976584 00...

Page 2: ...Barco nv Home Cinema Noordlaan 5 B 8520 Kuurne Phone 32 56 36 84 30 Fax 32 56 36 88 62 E mail salesassistantht bci barco com Visit us at the web www homecinema barco com Printed in Belgium...

Page 3: ...ically made to the information in this publication these changes are incorporated in new editions of this publication Copyright All rights reserved No part of this document may be copied reproduced or...

Page 4: ......

Page 5: ...trolling the projector 28 4 7 1 Input selection 28 4 7 2 Picture controls 28 5 Start up of the adjustment mode 31 5 1 How to start up the adjustment mode 31 5 2 How to adjust an analog control 32 6 Ma...

Page 6: ...67 8 6 Geometry Adjustments 68 8 6 1 Starting Up Geometry 68 8 6 2 Horizontal Phase Adjustment 68 8 6 3 Raster Shift Adjustment 69 8 6 4 Left Right East West Adjustment 70 8 6 5 Top Bottom Nord South...

Page 7: ...ssages Warnings and Failures 101 11 1Messages 101 11 2Warnings 101 11 3Failures 102 A Source Numbers 81 86 and 91 96 103 A 1 Projector without any 800 peripheral connected 103 A 2 Projector with a 800...

Page 8: ...Table of contents 4 R5976584 BARCO CINE7 26022003...

Page 9: ...read this manual thoroughly and retain it for future reference Installation and preliminary adjustments should be performed by qualified BARCO personnel or by authorized BARCO service dealers Owner s...

Page 10: ...e personnel before resuming operations Lightning For added protection for this video product during a lightning storm or when it is left unattended and unused for long periods of time unplug it from t...

Page 11: ...ment parts which have the same characteristics as the BARCO original part Unauthorized substitutions may result in degraded performance and reliability fire electric shock or other hazards Unauthorize...

Page 12: ...1 Safety Instructions 8 R5976584 BARCO CINE7 26022003...

Page 13: ...g the female power connector into the male connector at the front side of the electronic block image 2 1 Image 2 1 Power connection 2 2 AC Power Voltage What is the AC Power Voltage The power input vo...

Page 14: ...mode image displayed or in the stand by mode depending on the software setup Stand by indication lamp no light up projector in operational mode red projector is in stand by Leds on the front plate of...

Page 15: ...mage 3 1 This table gives an overview of the relation between Input Port Source Type and Selection Keys on the RCU Input Port Source Type Selection Keys on the RCU 1 Composit Video 1 2 S Video1 2 3 RG...

Page 16: ...aced image improved image stability To enable or to disable this function enter the adjustment mode and change the position of the ON OFF toggle switch see chapter Random access adjustment mode Image...

Page 17: ...ition of this line multiplier soft option is ON active The video input signal will be displayed as a non interlaced image improved image stability To enable or to disable this function enter the adjus...

Page 18: ...l be displayed menu 3 2 4 Press ENTER to continue if you are qualified or EXIT if not When ENTER is pressed the Adjustment main menu will be displayed menu 3 3 5 Select Random Access 6 Press ENTER to...

Page 19: ...T Select with or then ENTER EXIT to return Menu 3 5 PICTURE TUNING COLOR BALANCE SYNC FAST DECODING EBU PORT2 VIDEO LINE MULTIPLIER ON Select with or then ENTER EXIT to return Menu 3 6 3 4 Connecting...

Page 20: ...ls The projector detects automati cally where the sync signal is located Image 3 8 RGB3S or RG3sB connection RGB3S or RG3sB selection via the RCU 1 Press digit button 4 RGB3S or RG3sB selection via th...

Page 21: ...k Interface R9828120 when a computer and local monitor have to be connected to the projector as the signal cable coming from the computer is limited to 60 cm due to interfer ences Image 3 10 Component...

Page 22: ...een BNC terminals The projector detects automatically where the sync signal is located Image 3 12 Component input selection via the RCU 1 Press digit button 6 Component input selection via the local k...

Page 23: ...mputer Easy adjustment of the projector via a computer Allow storage of multiple projector configurations and set ups Wide range of control possibilities Address range from 0 to 255 Sending data to th...

Page 24: ...analog or component Video source to the projector In addition the audio signal proper to the source can be switched to an audio amplifier Order number R9827890 Connecting an IR Remote Receiver to the...

Page 25: ...om of the RCU 2 Lift up the top side of the cover at the same time 3 Insert the batteries as indicated in the RCU 4 Put the battery cover on its place 4 1 2 Battery replacement How to replace the batt...

Page 26: ...d Projector address has to be reprogrammed every time the battery is changed the RCU will always switch to the default address 4 2 RCU Local keypad How controlling the projector The projector can be c...

Page 27: ...ess to all connected sources 4 3 Terminology overview Overview The following table gives an overview of the different functionalities of the keys Image 4 3 RCU function indication 1 Function keys user...

Page 28: ...to adjust the phase of the projected image 13 FREEZ press to freeze the projected image 14 TEXT when adjusting one of the image e g controls during a meeting the displayed bar scale can be removed by...

Page 29: ...to return Menu 4 1 When this warm up cycle message appears on the screen the menu offers the possibility to start with a x minutes taking warm up period press ENTER or to skip this cycle press EXIT Th...

Page 30: ...Hardwired Remote Input 1 Plug one end of the remote cable in the connector on the bottom of the RCU image 4 5 2 Plug the other end in the connector on the rear panel labelled Remote Image 4 5 Directly...

Page 31: ...etween 0 and 255 which can be set in the Service mode When the address is set the projector can be controlled now RCU for addresses between 0 and 9 computer e g IBM PC or compatible Apple MAC etc for...

Page 32: ...2 Highlight the desired source number by pushing the control disc up down to the left or the right Push the control disc up or down to move the cursor up and down push the control disc to the left or...

Page 33: ...ess Freez to freeze the displayed image Overview Sound Controls Only when a sound unit is built in When a sound control is pressed a text box with a bar scale icon and function name of the control e g...

Page 34: ...ss Pause key Press EXIT key Select a source number The Freeze key Only with Line Multiplier When the Freeze key is pressed the image is frozen until this key is pressed again only with built in Line M...

Page 35: ...keypad while in the Adjustment mode press the ADJUST key The next General Access menu will be displayed Possible paths Depending on the projector configuration the following paths are possible with t...

Page 36: ...t the analog control to be adjusted 2 Press ENTER to confirm When the analog control is adjusted the projector returns automatically to the General access menu When you want to return to the Adjustmen...

Page 37: ...or adjust Format select Iris control Iris Touch up Iris auto converge Iris full alignment Sound control Normal stereo Spacial stereo Pseudo stereo Function keys F1 F2 F3 F4 F5 Service menus Iris Guide...

Page 38: ...Video S Video Component Video images on standard line frequency and RGB signals on 15 kHz The setting of the line multiplier will be saved together with the source number Each time this source number...

Page 39: ...interleaved fields Interlace is a form of compression Progressive Short for progressive scanning A system of video scanning whereby lines of a picture are transmitted consecutively such as in the comp...

Page 40: ...whether the source material was originally film or video That prevents the creation of motion artifacts How to toggle Motion Processing On Off 1 Push the cursor key or to select Motion Processing menu...

Page 41: ...tiplier Mode Motion Processing ON Video Equalizing Noise Reduction Contrast Enhancement Select with or then ENTER EXIT to return Menu 6 11 Image 6 1 Video Equalizing menu 6 2 2 5 Noise Reduction What...

Page 42: ...nhancement 3 Press EXIT to return to the Image Processing menu IMAGE PROCESSING Line Multiplier ON Multiplier Mode Motion Processing ON Video Equalizing Noise Reduction Contrast Enhancement Select wit...

Page 43: ...lled Format A Format can be available or free Available when settings are stored in this location Free when no setting are stored in this location This location can be used for storing new adjustment...

Page 44: ...xxxxxxx Edit character 1 Select with or then ENTER EXIT to return Menu 6 19 FORMAT LIST Source 01 Video Format 1 Available xxxxxx Format 2 Free xxxxxx Format 3 Available BARCO Format 4 Free xxxxxx For...

Page 45: ...you discover in the middle of the image a convergence misalignment between red green and blue the static convergence of this currently selected source can be adjusted with the touch up function Start...

Page 46: ...on adjust the geometry of the image coarse geometry alignment This procedure takes about 45 seconds Starting up the IRIS Full Alignment 1 Push the cursor key or to select IRIS Full Alignment menu 6 26...

Page 47: ...following functions are factory pre programmed F1 IRIS Touch up F2 Convergence Red on Green F3 Convergence Blue on Green F4 H V Size F5 Color Balance To get an overview of the programmed keys 1 Push...

Page 48: ...menu 6 33 If not qualified press EXIT MAIN MENU Image control Iris control Sound control Function keys Service menus Select with or then ENTER EXIT to return Menu 6 31 WARNING RISK OF INCORRECT ADJUST...

Page 49: ...change the predefined settings How to enter the Adjustment menus with the RCU 1 Press the ADJUST key The Main menu will be displayed menu 7 1 2 Push the cursor key or to select Service menus 3 Press E...

Page 50: ...e Password via the RCU The Password contains 4 digits when the projector asks to enter your password 1 Enter the digits with the numeric keys on the RCU e g 2319 For each digit entered a X appears on...

Page 51: ...same way for the third and fourth digit COMPOSE PASSWORD 7 8 9 4 5 6 1 2 3 0 Select with or or then ENTER EXIT to return Menu 7 5 When the password is correctly entered all other password protected it...

Page 52: ...7 Entering the service menus 48 R5976584 BARCO CINE7 26022003...

Page 53: ...de The main Adjustment Mode menu will be displayed 2 Push the cursor key or to highlight Random Access and press ENTER to select menu 8 1 ADJUSTMENT MODE Select a path from below IRIS GUIDED RANDOM AC...

Page 54: ...me Base Correction o Luminance Decay o V Sync Ref o Clamp Gating o Limo Options o Coring o LTI o CTI o Factory Preset Geometry H Phase Raster Shift o Coarse Green o Coarse Red Horizontal o Coarse Blue...

Page 55: ...als No external source necessary If no The internal pattern menu will be displayed Choose a setup pattern from below SELECTED SOURCE GENLOCKED PATTERN INTERNAL PATTERN Select with or then ENTER EXIT t...

Page 56: ...IT to return Menu 8 3 The menus in this manual are created for an external source connected to one of the inputs and the Gen locked Pattern is selected 8 4 Random Access mode selection menu Possibilit...

Page 57: ...Balance What can be done The Color Balance function is used to select or adjust the color temperature of a projected white image by the projector The Color Balance can be adjusted on two different way...

Page 58: ...select Red Blue below Custom white Balance menu 8 10 2 Press ENTER to activate the adjustment 3 Push the cursor key or to adjust the red gain 4 Push the cursor key or to adjust the blue gain A bar sca...

Page 59: ...E BALANCE RED BLUE GREEN CUSTOM BLACK BALANCE RED BLUE GREEN Select with arrow keys then ENTER adjust red with or Blue with or EXIT to return Menu 8 11 8 5 3 Sync mode Fast Slow What can be done The S...

Page 60: ...NE MULTIPLIER ON Select with or then ENTER EXIT to return Menu 8 13 8 5 5 Port 2 Video S Video Optional What can be done Port 2 can be used as Video or S Video input How to configure Port 2 1 Push the...

Page 61: ...FF Motion Processing On Off Output Mode Video Equalizing Noise Reduction Contrast Enhancement Split Screen On Off Advanced Settings 8 5 7 1 Starting up Line Multiplier settings What can be done The mu...

Page 62: ...Multiplier OFF When the line multiplier is on all items in the menu are accessible IMAGE PROCESSING LINE MULTIPLIER ON MOTION PROCESSING ON OUTPUT MODE VIDEO EQUALIZING NOISE REDUCTION CONTRAST ENHAN...

Page 63: ...UTPUT MODE 60Hz 525 Lines NI 60Hz 785 Lines NI 120Hz 525 Lines NI 60Hz 1050 Lines NI 120Hz 1050 Lines I Select with or then ENTER EXIT to return Menu 8 23 LINE MULTIPLIER OUTPUT MODE 50Hz 625 Lines NI...

Page 64: ...ction bar scale will be displayed image 8 2 2 Push the cursor key or to adjust the Noise Reduction 3 Press EXIT to return to the Image Processing menu IMAGE PROCESSING LINE MULTIPLIER ON MOTION PROCES...

Page 65: ...nt bar scale 8 5 7 8 Split Screen On Off What can be done When the split screen is on the left half of the image will be displayed without enhancements the right half shows the image with all selected...

Page 66: ...D PERSONNEL Select with or then ENTER EXIT to return Menu 8 30 8 5 7 9 2 Time Base Correction What can be done With the Time Base Correction function it is possible to cleanup low quality videotape no...

Page 67: ...signal sometimes get passed and hence may cause problems in the image Indirect This sync processing throws away any disturbances that are not really sync signals By source switching a rolling effect...

Page 68: ...5 7 10 Limo Pro Options Overview Starting Up Limo Pro Options Coring LTI CTI 8 5 7 10 6 Starting Up Limo Pro Options When available This menu item is only available when the projector is equipped with...

Page 69: ...the Limo Pro Options menu LINE MULTIPLIER CORING LTI CTI WARNING ADVANCED ADJUSTMENT SHOULD BE PERFORMED ONLY BY QUALIFIED PERSONNEL Select with or then ENTER EXIT to return Menu 8 36 Image 8 5 8 5 7...

Page 70: ...Pro Options menu LINE MULTIPLIER CORING LTI CTI WARNING ADVANCED ADJUSTMENT SHOULD BE PERFORMED ONLY BY QUALIFIED PERSONNEL Select with or then ENTER EXIT to return Menu 8 37 Image 8 7 LTI bar scale 8...

Page 71: ...ory Presets What can be done All settings for the Line Multiplier can be set to the Factory Presets These Factory Presets settings are Time Base Correction On Luminance Delay 0 Vertical Sync Reference...

Page 72: ...rizontal Phase The convergence corrections are disabled during geometry corrections The blanking corrections are only enabled during the blanking adjustments How to start up Geometry 1 Push the cursor...

Page 73: ...th the middle of the projected image 3 Press EXIT to return to the Geometry menu GEOMETRY H PHASE RASTER SHIFT LEFT RIGHT E W TOP BOTTOM N S SIZE V LINEARITY BLANKING Select with or then ENTER EXIT to...

Page 74: ...ster Shift until the colors math each other Note Horizontal and Vertical shifts for Red and Blue should end up with a setting close to 50 If these settings are significantly greater or lesser than 50...

Page 75: ...or then ENTER EXIT to return Menu 8 46 Only the green image is displayed while making left right adjustments The red and blue images will automat ically be corrected in the same manner Convergence cor...

Page 76: ...to highlight a function 2 Press ENTER to activate this function 3 Press EXIT to return What can be done with the Seagull correction Use this correction only if after adjusting the vertical lines with...

Page 77: ...jected image The skew the bow the keystone and the seagull deviation can be adjusted Start up 1 Push the cursor key or to highlight LEFT RIGHT menu 8 48 2 Press ENTER to select The Top bottom menu wil...

Page 78: ...ntal centerline bow Horizontal centerline skew Top bow Top keystone Bottom bow Bottom keystone All adjustment are indicated on the screen with the function name a bar scale and a number between 0 and...

Page 79: ...cal centerline Bow B Vertical centerline Skew C Top Bow D Top Keystone E Bottom Bow F Bottom Keystone How to enter an alignment 1 Push the cursor key or to highlight a function 2 Press ENTER to activa...

Page 80: ...is correction is 50 How to adjust the Seagull correction 1 Push the cursor key or to highlight SEAGULL CORRECTION menu 8 50 2 Press ENTER to activate Eliminate the deformation by pushing the cursor ke...

Page 81: ...d How to adjust the Size 1 Push the cursor key or to highlight Size and press ENTER to select menu 8 51 A bar scale and a numeric indicator will help to gauge the size adjustment image 8 17 2 Push the...

Page 82: ...r of the image to the top and bottom of the image Start up 1 Push the cursor key or to highlight V Linearity menu 8 52 2 Press ENTER to activate 3 Adjust the vertical linearity with the cursor keys un...

Page 83: ...image on to the screen and to hide or black out unwanted information The following blanking adjustments are available Top Bottom Left Right Image 8 21 Blanking A Top Blanking B Bottom Blanking C Left...

Page 84: ...ENTER EXIT to return Menu 8 53 BLANKING TOP BOTTOM LEFT RIGHT Select with or then ENTER EXIT to return Menu 8 54 Image 8 22 Blanking Adjustments 8 7 Convergence Adjustment Overview Starting Up Converg...

Page 85: ...n only and continue with red on green and blue on green How to perform a Convergence Adjustment 1 Push the cursor key or to highlight the desired adjustment press ENTER to select 2 Use the cursor keys...

Page 86: ...8 Random Access Adjustment Mode Image 8 24 25 Coarse Convergence Areas 82 R5976584 BARCO CINE7 26022003...

Page 87: ...ENT MODE Select a path from below IRIS GUIDED RANDOM ACCESS INSTALLATION SERVICE Source 01 Select with or then ENTER EXIT to return Menu 9 1 SERVICE MODE PROJECTOR SET UP MEMORY MANAGEMENT COMMON SETT...

Page 88: ...py a Block Delete a Block Deletion All Blocks All Settings to Midposition R B Convergence Mid GR Convergence Mid Common Settings G2 Adjustment CRT Run In Cycle Projector Warm up Memory Banks I2C Diagn...

Page 89: ...service technician to make the appropriate changes Text On Off indicates in operational mode if the bar scale and number indicator will be displayed and if warnings and failures will be displayed ON d...

Page 90: ...the Password 1 Push the cursor key or to highlight Change Password and press ENTER to select menu 9 9 Note If it is the first time you enter a password protected item enter your password and press ENT...

Page 91: ...t Change Projector Password and press ENTER to select menu 9 13 The current Projector Address will be displayed in the Projector Address menu menu 9 14 2 Push the or keys to highlight the digit to be...

Page 92: ...ode or in stand by mode Operating The projector start up and displays image Stand By The projector start up in stand by and waits until the stand by button or a digit key is pressed How to toggle Powe...

Page 93: ...UP IDENTIFICATION TOTAL RUN TIME CHANGE PASSWORD CHANGE LANGUAGE CHANGE PROJECTOR ADDRESS CHANGE BAUDRATE POWER UP MODE operating COMMON ADDRESS 0 BARCO LOGO Select with or then ENTER EXIT to return M...

Page 94: ...background and toggle with ENTER between ON and OFF ON BARCO logo will be displayed on a black background BARCO OFF BARCO logo will be displayed without any background BARCO Orbiting ON OFF Select orb...

Page 95: ...ENTER to select menu 9 23 The Copy Mode menu will be displayed 2 Push the cursor key or to to select a block menu 9 24 3 Press ENTER to copy the settings of the selected block to the active block you...

Page 96: ...RGB3S RT 3 15 6 50 Intern FC 4 2 31 5 50 RGB3S FC 5 33 7 60 Intern FC 6 7 8 Active block no 1 Select with or then ENTER EXIT to return Menu 9 26 9 4 4 Delete All Blocks What can be done This will del...

Page 97: ...to highlight Undo All Settings to Midpos menu 9 29 2 Press ENTER to reset the All settings to the previous settings MEMORY MANAGEMENT COPY A BLOCK DELETE A BLOCK DELETE ALL BLOCKS UNDO ALL SETTINGS T...

Page 98: ...tion 1 Push the cursor key or to highlight GR Convergence Mid menu 9 32 2 Press ENTER to select A confirmation screen will be displayed 3 Press ENTER to confirm press EXIT to cancel the reset MEMORY M...

Page 99: ...5 2 G2 Adjustment G2 adjustment should be performed by BARCO personnel or BARCO authorized dealers How to start up G2 adjustment 1 Push the cursor key or to highlight G2 Adjustment and press ENTER to...

Page 100: ...ers the possibility to skip the warm up period anyway by pressing the EXIT key and offers the possibility to adjust the horizontal and vertical amplitude of this white image with the control disc Duri...

Page 101: ...requency change with the same bank number 4 How to recall a specific memory bank for the actual source When the memory bank option is ON and a source is selected this source will be displayed with the...

Page 102: ...9 Service Mode 98 R5976584 BARCO CINE7 26022003...

Page 103: ...yed menu 10 2 4 If qualified press ENTER otherwise press EXIT and call for technical assistance 5 Select Random Access by pushing the cursor keys or 6 Press ENTER to display the Random Access mode men...

Page 104: ...hift Red Vertical Coarse Shift Vertical Centerline Bow Vertical Centerline Skew Right Bow Right Keystone Left Bow Left Keystone L R Seagull Correction Horizontal Centerline Bow Horizontal Centerline S...

Page 105: ...alog control in the operational mode all warnings and failures will not be displayed PROJECTOR ADDRESS 003 Indication of the projector address when activating the ADDRESS button on the RCU with a penc...

Page 106: ...ailure Call a qualified service technician for repair FAILURE RCVDS communication error Serial communication error between the RCVDS and the projector FAILURE invalid input Input not valid FAILURE PC...

Page 107: ...eate a second source Follow the steps below to create a second or a third file for sources 1 to 6 1 Select the source between 1 and 6 2 Select the corresponding source number between 81 and 86 or 91 a...

Page 108: ...86 of a RCVDS05 The source numbers 81 86 correspond to the physical inputs 1 6 of the projector e g When slot 1 of the projector has to be selected key in source number 81 The relationship between the...

Page 109: ...e odd and even numbered lines of a picture are transmitted consecutively as two separate interleaved fields Interlace is a form of compression LTI Luminance transient improvement Luminance The compone...

Page 110: ...Glossary 106 R5976584 BARCO CINE7 26022003...

Page 111: ...djustment 81 Start up 80 Coring 64 CRT Run In Cycle 95 CTI 66 D Decoding 55 F Factory Preset Frequencies 51 Factory presets 67 Failures 101 102 FCC Statement 5 Fire Hazard 6 Format Select 39 40 Add na...

Page 112: ...Via RCU 28 Picture tuning 55 57 Decoding 55 Line Multiplier 57 Peaking 56 Port 2 Video S Video 56 Sync mode 55 Picture Tuning 52 55 Color Balance 53 55 Custom black balance 55 Custom white balance 54...

Page 113: ...Source numbers 103 104 with 800 peripheral 103 104 source numbers 81 86 104 source numbers 91 96 103 without 800 peripheral 103 Split Screen 61 On Off 61 Stand By Mode 25 Start up 25 Stationary Image...

Page 114: ...Index 110 R5976584 BARCO CINE7 26022003...

Page 115: ...ordlaan 5 B 8520 Kuurne Phone 32 56 36 84 30 Fax 32 56 36 88 62 E mail antoon dejaegher barco com Web www homecinema barco com From Date Please correct the following points in this documentation R5976...

Reviews: