


127
R5911705 /02
Bragi
8.4.4 Warp
–
4 Corners adjustment
About 4 Corners adjustment
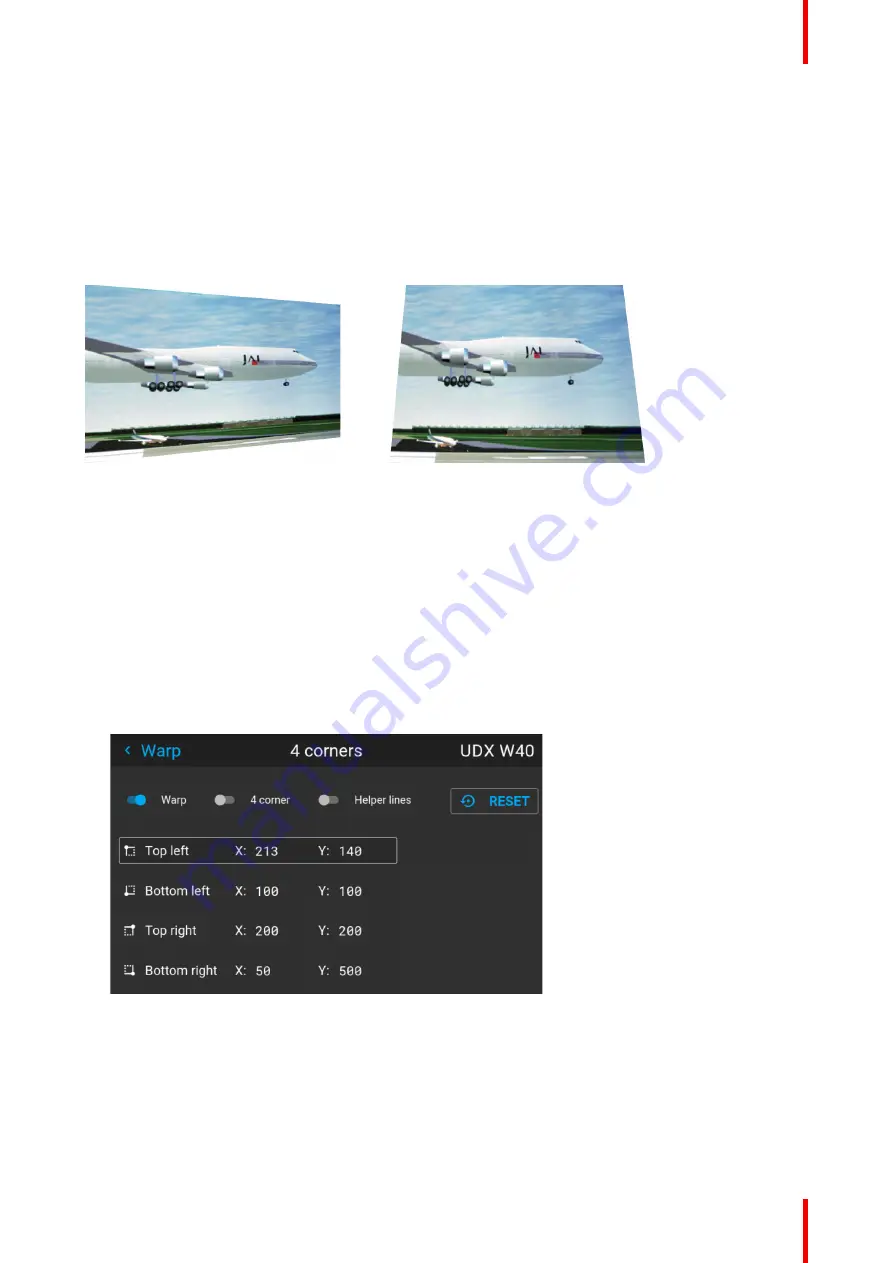
Basically, this type of warping adjusts each of the four image corners in the X and Y direction, if you have a
typical trapezoid picture of the screen as shown below.
To have a successful Warp correction, the size of the screen must be entered. See
“
,
Some examples of pictures when the projector axis is not perpendicular to the screen.:
Image 8
–
20
How to adjust the image.
1.
From the warp menu, select the menu
Installation/Warp/4 Corners
.
2.
Select and enter the Helper lines slider. A yellow frame will be visible.
3.
To enable the 4 Corners Warping, Set the Warp slider to the right position. (Select and enter).
4.
Enable the corner that must be warped (Select and enter). If need for warping several corners, select and
adjust the corners one by one.
5.
Adjust the value by the arrow keys. The X value is adjusted by the left/right arrows on the remote control,
and the Y vale is adjusted by the up/down arrow in the remote control. The value represent the movement
of the X and Y coordinates for each corner. When the warping is complete, exit the menu by using the
“
Back
”
button.
Image 8
–
21
6.
If the picture still has a trapezoid shape, warp is not enabled. Select the
Installation / Warp
menu, and
press enter. The slider moves to the right, and the warp status changes to
“
On
”
.
Summary of Contents for Bragi
Page 1: ...ENABLING BRIGHT OUTCOMES Installation Guide Bragi ...
Page 34: ...R5911705 02 Bragi 34 250mm 250mm Image 3 1 Physical installation ...
Page 48: ...R5911705 02 Bragi 48 Physical installation ...
Page 52: ...R5911705 02 Bragi 52 4 1 2 Connector Specifications Getting the projector started ...
Page 63: ...63 R5911705 02 Bragi 4 4 Power mode transitions Getting the projector started ...
Page 73: ...73 R5911705 02 Bragi 4 7 User interface Getting the projector started ...
Page 79: ...79 R5911705 02 Bragi Note You cannot change the EDID for SDI connectors Source menu ...
Page 88: ...R5911705 02 Bragi 88 6 6 Gamma Types Image menu ...
Page 93: ...93 R5911705 02 Bragi 6 8 Advanced image adjustments Image menu ...
Page 104: ...R5911705 02 Bragi 104 Image menu ...
Page 105: ...105 R5911705 02 Bragi Advanced picture adjustments 7 ...
Page 112: ...R5911705 02 Bragi 112 Advanced picture adjustments ...
Page 114: ...R5911705 02 Bragi 114 8 1 Lens Installation menu ...
Page 121: ...121 R5911705 02 Bragi Image 8 11 Installation menu ...
Page 122: ...R5911705 02 Bragi 122 8 4 Warping Installation menu ...
Page 128: ...R5911705 02 Bragi 128 Image 8 22 Installation menu ...
Page 137: ...137 R5911705 02 Bragi 8 5 Blending Installation menu ...
Page 154: ...R5911705 02 Bragi 154 Installation menu ...
Page 162: ...R5911705 02 Bragi 162 GUI Profiles ...
Page 165: ...165 R5911705 02 Bragi 10 2 IR control System settings menu ...
Page 180: ...R5911705 02 Bragi 180 System settings menu ...
Page 184: ...R5911705 02 Bragi 184 GUI Status menu ...
Page 186: ...R5911705 02 Bragi 186 3D ...
Page 190: ...R5911705 02 Bragi 190 Index ...
Page 191: ......


