125
R5911705 /02
Bragi
8.4.3 Warping
–
Screen size
About (Warp) Screen Size adjustment
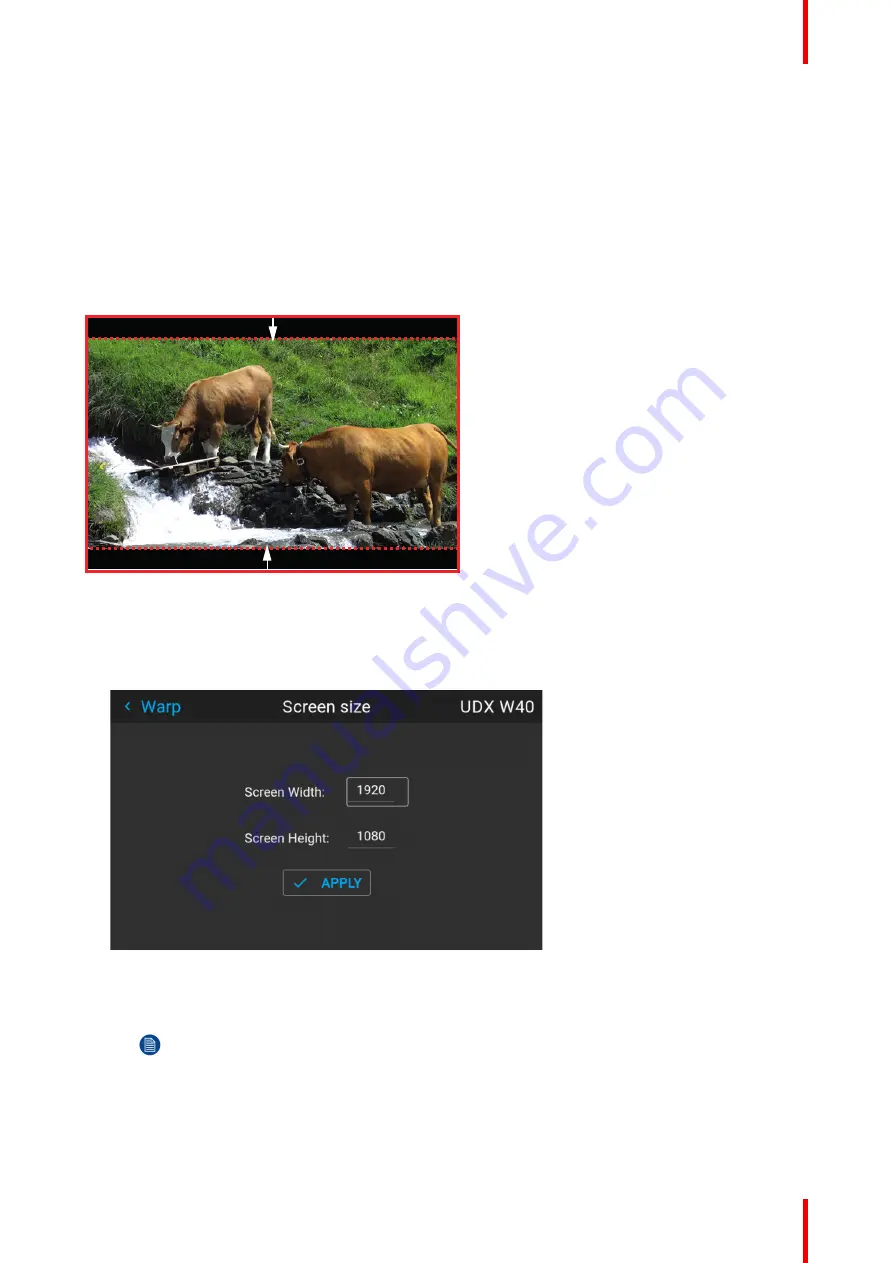
If the used screen aspect ratio is different than the projector aspect ratio, e.g. source is 16:9 and projector is
16:10, then black bars will be projected. In the example case a black bar on top and bottom of the image will
be projected. The warp area contains not only the image information but also the black bars. If we want to
position e.g. the active left top corner exactly on the screen using 4 corner warp, then it is very hard to do that
as we are moving the black left top corner and we do not have control over the exact position of image left top
corner. By moving the outline of the warp screen size to the active image information, the corner points of the
warp area are now exactly on the corner points of the active image information and makes warping much
easier.
Image 8
–
17 Warp outline example
How to adjust the image?
1.
In the main menu, select
Installation/Warp/Screensize
.
The Screen Size menu is displayed.
Image 8
–
18
2.
Select either
Screen width
or
Screen height
.
3.
Set the screen size width and height to match the measurement of the screen.
Note:
It is only the ratio between the width and height that is used, so the values may be entered as
the screen aspect ratio or actual measurement in cm, inches or any other unit.
Summary of Contents for Bragi
Page 1: ...ENABLING BRIGHT OUTCOMES Installation Guide Bragi ...
Page 34: ...R5911705 02 Bragi 34 250mm 250mm Image 3 1 Physical installation ...
Page 48: ...R5911705 02 Bragi 48 Physical installation ...
Page 52: ...R5911705 02 Bragi 52 4 1 2 Connector Specifications Getting the projector started ...
Page 63: ...63 R5911705 02 Bragi 4 4 Power mode transitions Getting the projector started ...
Page 73: ...73 R5911705 02 Bragi 4 7 User interface Getting the projector started ...
Page 79: ...79 R5911705 02 Bragi Note You cannot change the EDID for SDI connectors Source menu ...
Page 88: ...R5911705 02 Bragi 88 6 6 Gamma Types Image menu ...
Page 93: ...93 R5911705 02 Bragi 6 8 Advanced image adjustments Image menu ...
Page 104: ...R5911705 02 Bragi 104 Image menu ...
Page 105: ...105 R5911705 02 Bragi Advanced picture adjustments 7 ...
Page 112: ...R5911705 02 Bragi 112 Advanced picture adjustments ...
Page 114: ...R5911705 02 Bragi 114 8 1 Lens Installation menu ...
Page 121: ...121 R5911705 02 Bragi Image 8 11 Installation menu ...
Page 122: ...R5911705 02 Bragi 122 8 4 Warping Installation menu ...
Page 128: ...R5911705 02 Bragi 128 Image 8 22 Installation menu ...
Page 137: ...137 R5911705 02 Bragi 8 5 Blending Installation menu ...
Page 154: ...R5911705 02 Bragi 154 Installation menu ...
Page 162: ...R5911705 02 Bragi 162 GUI Profiles ...
Page 165: ...165 R5911705 02 Bragi 10 2 IR control System settings menu ...
Page 180: ...R5911705 02 Bragi 180 System settings menu ...
Page 184: ...R5911705 02 Bragi 184 GUI Status menu ...
Page 186: ...R5911705 02 Bragi 186 3D ...
Page 190: ...R5911705 02 Bragi 190 Index ...
Page 191: ......


