Page 31
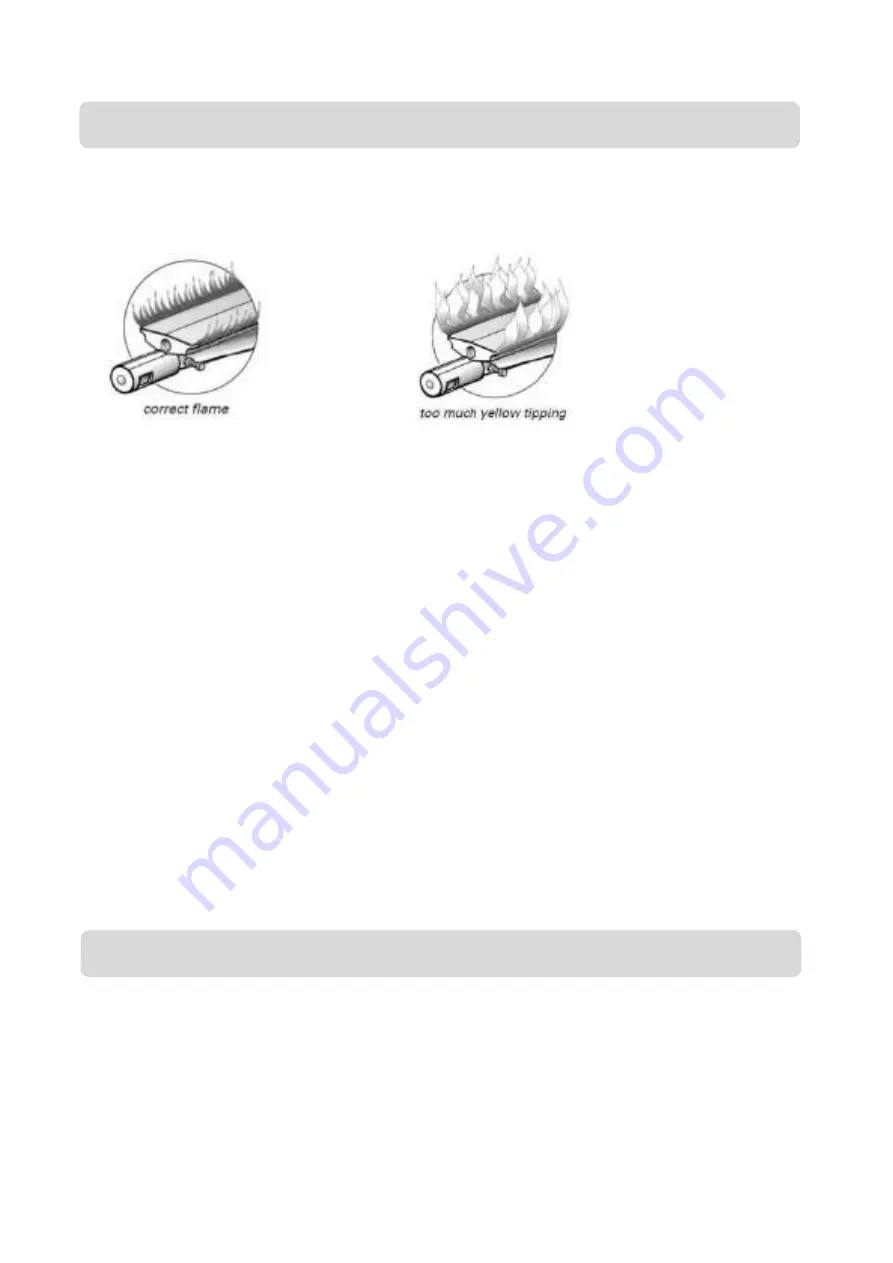
Look underneath the barbeque so that you can see the flames.
They should be a soft blue color with yellow tips. If the flames are too yellow, there is too
much gas and not enough air. The flame will be inefficient and will give off too much smoke.
If the flame is too pale, there is too much air and not enough gas.
If either of these situations occurs, then you will need to adjust the burners. Wait for the
burners to cool down, and then remove them from the barbeque (details in Care &
Maintenance section). You will see a screw on the right side of each burner. Screw it in to
increase the yellow tipping, and screw it out to reduce the yellowness of the flame. You may
need to loosen the lock nut that keeps the screw in position. Be sure to retighten the lock
nut when you have finished.
If you are unable to set the flame correctly, you should consult your retailer before further
use.
Turning OFF
When you’ve finished cooking, leave the burner controls on HI for a maximum of 5 minutes
to burn off excess grease from the burner and other surfaces. To turn the barbeque off, it is
best to turn OFF the cylinder first, and allow all the gas left in the hose to burn off. This will
only take a few seconds. Then go back and turn OFF all burner controls. It is okay to leave
the cylinder connected to your barbeque while it’s not in use, but it is much safer to turn the
gas cylinder OFF when it is not in use.
If your barbeque is connected to Natural Gas or piped LPG, you can simply turn the burner
controls OFF. If you have a hose connection with a shut off valve, it is much safer to turn
the gas supply OFF when the barbeque is not in use.
Note carefully: Failure to follow these shutdown procedures correctly can lead to a
hazardous condition.
The primary cooking surfaces: (hotplates and grills) are cast iron with a fused on matt
vitreous enamel finish. No “curing “is required, but you should give these and the warming
rack a thorough wash and rinse with regular dish washing detergent and fresh water before
first use.
For ongoing protection of the cooking surfaces, follow the procedures in the Cleaning,
Storage and Maintenance sections.
Checking and adjusting the flames (for Cast Iron main burners only):
First time use
Summary of Contents for BEEFMASTER V Series
Page 39: ...Page 39 Cooking times...
Page 62: ...Page 62 All dimensions in mm 625 519 284 303 605 607 618 647 548 558 599 Technical details...
Page 64: ...Page 64 519 1163 570 619 607 284 1177 519 284 1163 607 720 570 Technical details continued...
Page 65: ...Page 65 839 284 1163 634 646 839 1546 284 1163 720 634 Technical details continued...
Page 66: ...Page 66 1159 1163 284 634 646 1159 1865 284 1163 634 720 Technical details continued...


