background image

NL

Montage procedure

Step 7

7. Insert all small toy parts into corresponding holes. Put the electronic play tray into its housing in front 

of the walker's seat. Listen for two click to confirm the play tray is safely locked in place.

8. Completely assembled.

Step 8

7. Steek alle kleine speelgoedonderdelen in de bijbehorende gaten. Plaats de elektronische speel-

plaat in de behuizing voor het zitje van de rollator. Luister naar twee klikken om te bevestigen dat 

de speelplaat veilig is vergrendeld.

8. Volledig gemonteerd.

Stap 7

Stap 8

8

Summary of Contents for LUNA BNBW012

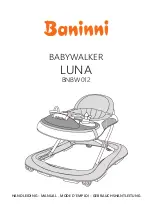
Page 1: ...HANDLEIDING MANUAL MODE D EMPLOI GEBRAUCHSHANTLEITUNG BABYWALKER LUNA BNBW012 ...

Page 2: ...ANDACHTIG DOOR OM DE VEILIGHEID VAN UW KIND NIET OP HET SPEL TE ZETTEN BEWAAR ZE OM ZE OOK IN DE TOEKOMST TE KUNNEN RAADPLEGEN HET KIND KAN ZICH BEZEREN ALS U ZICH NIET AAN DEZE INSTRUCTIES HOUDT LET OP VERWIJDER VOOR HET GEBRUIK EVENTUELE PLASTIC ZAKKEN EN ALLE ANDERE VERPAKKINGSONDERDELEN EN GOOI ZE WEG OF HOUD ZE IN IEDER GEVAL BUITEN HET BEREIK VAN KINDEREN Blokkeer trappen open haarden oneven...

Page 3: ...NL Onderdelenlijst 2 wielen 2 achterste vaste wielen 6 veiligheids rubbers grote spoiler Elektronische speeltafel Gevuld blad Baby looprek 3 ...

Page 4: ... van ongeveer 6 maanden Het product is niet geschikt voor kinderen die goed kunnen lopen of die zwaarder zijn dan 12 kg LET OP gebruik geen onderdelen reserveonderdelen of accessoires die niet door de fabrikant of de leverancier zijn goedgekeurd LET OP voor het gebruik verzekert u zich ervan dat alle veiligheidsmechanismen correct zijn aangebracht LET OP houd het kind bij de afstelwerkzaamheden ui...

Page 5: ...erijvakje breng de nieuwe batterijen aan en let er hierbij op dat u de polariteit in acht neemt zoals in het vakje aangeduid staat Plaats het klepje terug en draai de schroef stevig aan LET OP Houd de batterijen of eventueel gereedschap buiten het bereik van kinderen LET OP laat het product niet in de regen staan Waterinfiltraties beschadigen het elektronische circuit LET OP Verwijder de lege batt...

Page 6: ...he way into the housing on the down base of the walker Front Side Back Side Step 2 Step 3 Step 1 1 Draai het baby looprekje ondersteboven Bevestig de wielen in de daarvoor bestemde behuizingen Zorg ervoor dat de wielen stevig in de behuizing aan de onderkant van de loopwagen worden geschoven 2 Bevestig de achterste bevestigingswielen in de daarvoor bestemde behuizingen Zorg ervoor dat de wielen st...

Page 7: ...se do not lift up baby walker with large spoiler It is dangerous do in this way 4 Open het babyloopframe in de gebruikspositie en zorg ervoor dat alle wielen de vloer raken Til het plateau langzaam op door het in opwaartse richting te tillen totdat een klik aangeeft dat het frame correct is vergrendeld in een van de drie posities 5 Steek de plastieke ringen van de beklede zitting in de gleuven die...

Page 8: ...n for two click to confirm the play tray is safely locked in place 8 Completely assembled Step 8 7 Steek alle kleine speelgoedonderdelen in de bijbehorende gaten Plaats de elektronische speel plaat in de behuizing voor het zitje van de rollator Luister naar twee klikken om te bevestigen dat de speelplaat veilig is vergrendeld 8 Volledig gemonteerd Stap 7 Stap 8 8 ...

Page 9: ...l tray table and rotate it to 90 degrees keep the safe button pressed then raise or lower the small table until the desired position is reached then pull up the safe button and rotate it to 90 degrees again to lock the small table If it is a automatic secondary lock please make sure the lock rotated to 90 degrees The front press 90 degree rotation 90 degrees rotation 9 Om het zitje in hoogte te ve...

Page 10: ...ely How to Fold the Walker Step 10 Step 11 Thewalkerincludesoneelectronicplaytraythatattachestothewalkerframeas showninstep7 Thefunctionanduseoftheplaytrayareshownhere Using Electronic Play Toy Tray A B C D E F G H I Lights up when lower button is pushed Petal shaped windmill rotating toy Turn dial to hear rattle Press button to hear born Turn wheel to steer Press button to hear music Move beads b...

Page 11: ...n wij eventuele gebreken aan het apparaat als gevolg van materiaal of fabricagefouten elimineren hetzij door het complete product te repareren of te vervangen Deze garantie dekt niet schade als gevolg van onjuist gebruik normale slijtage of gebruik alsmede gebreken die een verwaarloosbaar effect hebben op de waarde of werking van het product Schade als gevolg van overbelasting of verkeerd gebruik ...

Page 12: ...IRST USE REMOVE AND DISPOSE OF ALL PLASTIC BAGS AND PACKAGING MATERIALS AND KEEP THEM OUT OF REACH OF CHILDREN Block stairs fireplaces uneven surfaces safely before using the baby walker Part list 13 Warning 14 Assembling procedures 16 How to adjust the height 19 of baby walker frame How to fold the walker 20 Using electronic play toy tray 20 Care and maintenance 21 WARNING 12 ...

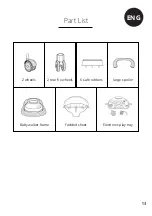
Page 13: ...ENG Part List 2 wheels 2 rear fix wheels 6 safe rubbers large spoiler Electronic play tray Fadded sheet Baby walker frame 13 ...

Page 14: ...ved by the manufacturer or distributor WARNING Before use ensure that all the safety devices are fitted and working correctly WARNING Keep your child away from all moving parts whilst you adjust the baby walker WARNING Do not use the baby walker for children who are over 85 cm in height WARNING To avoid all risks of strangulation never give children objects with cords or strings attached or leave ...

Page 15: ...een fitted in the correct polarity as shown inside the battery compartment Replace the battery cover and tighten the screw WARNING Always keep batteries and tools out of reach of children WARNING Do not leave the product out in the rain water infiltrations will damage the electronic circuit WARNING Always remove spent batteries from the toy to avoid the danger of possible leakage from the battery ...

Page 16: ...re that the wheels are firmly pushed all the way into the housing on the down base of the walker Front Side Back Side Step 2 Step 3 Step 1 1 Turn the baby walker frame upside down Fix the wheels in the appropriate housings Ensure that the wheels are firmly pushed all the way into the housing on the down base of the walker 2 Fix the rear fix wheels in the appropriate housings Ensure that the wheels ...

Page 17: ...ted in the correct position Please do not lift up baby walker with large spoiler It is dangerous do in this way 4 Open the baby walker frame in the in use position ensuring that all wheels touch the floor Slowly raise the tray by polling it in an upward direction until a click indicates that the frame has been locked correctly in one of the three positions 5 Insert the plastic rings of the padded ...

Page 18: ...the walker s seat Listen for two click to confirm the play tray is safely locked in place 8 Completely assembled Step 8 7 Insert all small toy parts into corresponding holes Put the electronic play tray into its housing in front of the walker s seat Listen for two click to confirm the play tray is safely locked in place 8 Completely assembled 18 ...

Page 19: ...tray table and rotate it to 90 degrees keep the safe button pressed then raise or lower the small table until the desired position is reached then pull up the safe button and rotate it to 90 degrees again to lock the small table If it is a automatic secondary lock please make sure the lock rotated to 90 degrees The front press 90 degree rotation 90 degrees rotation 9 To adjust the seat s height re...

Page 20: ...top base till the end The frame folds up completely How to Fold the Walker Step 10 Step 11 Thewalkerincludesoneelectronicplaytraythatattachestothewalkerframeas showninstep7 Thefunctionanduseoftheplaytrayareshownhere Using Electronic Play Toy Tray A B C D E F G H I Lights up when lower button is pushed Petal shaped windmill rotating toy Turn dial to hear rattle Press button to hear born Turn wheel ...

Page 21: ...purchase Within the guarantee period we will eliminate any defects in the appliance resulting from faults in materials or workmanship ei ther by repairing or replacing the complete product This guarantee does not cover damage due to improper use normal wear or use as well as defects that have a negligible effect on the value or operation of the product Damages caused by overloading or wrong use ar...

Page 22: ...E NOTICE D UTILISATION POUR NE PAS COMPROMETTRE LA SECURITE DE VOTRE ENFANT LA CONSERVER POUR TOUTE CONSULTATION FUTURE L ENFANT POURRAIT SE FAIRE MAL SI CES INSTRUCTIONS NE SONT PAS SUIVIES AVERTISSEMENT AVANT LA PREMIERE UTILISATION OTER ET ELIMINER TOUS LES SACHETS EN PLASTIQUE EVENTUELS ET TOUS LES ELEMENTS FAISANT PARTIE DE L EMBALLAGE DU PRODUIT ET LES TENIR HORS DE PORTEE DES ENFANTS Empêch...

Page 23: ...FR Liste des parties 2 roues 2 roues arrière fixes 6 caoutchoucs sûrs grand spoiler Plateau de jeu électronique Feuille volante Cadre de marcheur pour bébé 23 ...

Page 24: ...s enfants capables de se tenir assis seuls à partir de 6 mois environ Le produit n est pas adapté à des enfants capables de marcher correctement ou pesant plus de 12 kg AVERTISSEMENT Ne pas utiliser d éléments pièces de rechange ou accessoires n ayant pas été approuvés par le fabricant ou le distributeur AVERTISSEMENT Avant d utiliser le produit vérifier que tous les mécanismes de sécurité sont co...

Page 25: ...uves en veillant à respecter la polarité comme indiqué à l intérieur du boîtier Remettre le couvercle en place et revisser à fond AVERTISSEMENT Ne pas laisser les piles ou des outils éventuels à la portée des enfants AVERTISSEMENT Ne pas laisser le produit sous la pluie les infiltrations d eau endommagent le circuit électronique AVERTISSEMENT Toujours retirer les piles usagées pour éviter que d év...

Page 26: ...way into the housing on the down base of the walker Front Side Back Side Step 2 Step 3 Step 1 1 Retournez le cadre du trotteur Fixez les roues dans les boîtiers appropriés Assurez vous que les roues sont bien enfoncées jusqu au bout dans le boîtier sur la base du marcheur 2 Fixez les roues arrière fixes dans les logements appropriés Assurez vous que les roues sont bien enfoncées jusqu au bout dans...

Page 27: ...er It is dangerous do in this way 4 Ouvrez le cadre du trotteur en position d utilisation en vous assurant que toutes les roues touchent le sol Soulevez lentement le plateau en l interrogeant vers le haut jusqu à ce qu un clic indique que le cadre a été correctement verrouillé dans l une des trois positions 5 Insérez les anneaux en plastique du siège rembourré dans les fentes situées le long du bo...

Page 28: ...o click to confirm the play tray is safely locked in place 8 Completely assembled Step 8 7 Insérez toutes les petites pièces du jouet dans les trous correspondants Placez le plateau de jeu électronique dans son logement devant le siège du déambulateur Écoutez deux clics pour confir mer que le plateau de jeu est bien verrouillé en place 8 Entièrement assemblé Étape 8 Étape 7 28 ...

Page 29: ... and rotate it to 90 degrees keep the safe button pressed then raise or lower the small table until the desired position is reached then pull up the safe button and rotate it to 90 degrees again to lock the small table If it is a automatic secondary lock please make sure the lock rotated to 90 degrees The front press 90 degree rotation 90 degrees rotation 9 Pour régler la hauteur du siège retirez ...

Page 30: ...eelectronicplaytraythatattachestothewalkerframeas showninstep7 Thefunctionanduseoftheplaytrayareshownhere Using Electronic Play Toy Tray A B C D E F G H I Lights up when lower button is pushed Petal shaped windmill rotating toy Turn dial to hear rattle Press button to hear born Turn wheel to steer Press button to hear music Move beads back and forth Switch Push roller forward and pull backward B C...

Page 31: ...e de garantie nous éliminerons tout défaut de l appareil dû à un vice de matériau ou de fabrication soit en réparant soit en remplaçant le produit complet Cette garantie ne couvre pas les dommages résultant d une mauvaise utilisation de l usure normale ou de l utilisation ainsi que les défauts qui ont un effect négligeable sur la valeur ou le fonctionnement du produit Les dommages résultant d une ...

Page 32: ...R DEM GEBRAUCH EVENTUELLE PLASTIKTÜTEN UND ALLE VERPACKUNGSTEILE DES PRODUKTS ABNEHMEN UND ENTSORGEN ODER JEDENFALLS FÜR KINDER UNZUGÄNGLICH AUFBEWAHREN Blockieren Sie sicher Treppen Kamine unebene Oberflächen bevor Sie die Lauflernhilfe benutzen Teilie Liste 33 Warnung 34 Verfahren zur Montage 36 So stellen Sie die Höhe 39 von Lauflernhilfe Rahmen Wie faltet man die Gehhilfe zusammen 40 Elektroni...

Page 33: ...D Teile Liste 2 Räder 2 hintere festste hende Räder 6 sichere Beläge großer Spoiler Elektronisches Ablagefach Gefaltetes Blatt Lauflernhilfe Rahmen 33 ...

Page 34: ... als 12 kg haben WARNUNG Montieren Sie keine Zubehörteile Ersatzteile oder Komponenten die nicht vom Hersteller oder Händler genehmigt sind WARNUNG Vergewissern Sie sich vor dem Gebrauch dass alle Sicherheitsmechanismen korrekt eingerastet sind WARNUNG Werden Einstellungen vorgenommen muss das Kind von den beweglichen Teilen des Laufgeräts fern gehalten werden WARNUNG Das Kind darf nicht größer al...

Page 35: ... Batteriefach nehmen die neuen Batterien einsetzen dabei die Einsetzrichtung beachten wie im Innern des Fachs angegeben die Abdeckung wieder aufsetzen und die Schraube gut festziehen WARNUNG Die Batterien oder das Werkzeug für Kinder unzugänglich aufbewahren WARNUNG Lassen Sie das Produkt nicht unbedachterweise im Regen liegen das Eindringen von Wasser beschädigt die Elektronik WARNUNG Die leeren ...

Page 36: ...n base of the walker Front Side Back Side Step 2 Step 3 Step 1 1 Drehen Sie den Lauflernhilfe Rahmen auf den Kopf Befestigen Sie die Räder in den entsprechenden Gehäusen Achten Sie darauf dass die Räder fest bis zum Anschlag in das Gehäuse an der Unterseite der Lauflernhilfe eingeschoben sind 2 Befestigen Sie die hinteren Fixierräder in den entsprechenden Gehäusen Achten Sie darauf dass die Räder ...

Page 37: ... this way 4 Öffnen Sie den Lauflernhilfe Rahmen in der Gebrauchsposition und stellen Sie sicher dass alle Räder den Boden berühren Heben Sie die Schale langsam an indem Sie sie nach oben klappen bis ein Klicken anzeigt dass der Rahmen in einer der drei Positionen korrekt verriegelt ist 5 Führen Sie die Kunststoffringe des gepolsterten Sitzes in die Schlitze ein die sich entlang der oberen Kante de...

Page 38: ...ck to confirm the play tray is safely locked in place 8 Completely assembled Step 8 7 Setzen Sie alle kleinen Spielzeugteile in die entsprechenden Löcher ein Stecken Sie das elektroni sche Spielgerät in sein Gehäuse vor dem Sitz des Spaziergängers Achten Sie auf zwei Klicks um zu bestätigen dass das Spieltablett sicher verriegelt ist 8 Vollständig montiert Schritt 8 Schritt 7 38 ...

Page 39: ...0 degrees keep the safe button pressed then raise or lower the small table until the desired position is reached then pull up the safe button and rotate it to 90 degrees again to lock the small table If it is a automatic secondary lock please make sure the lock rotated to 90 degrees The front press 90 degree rotation 90 degrees rotation 9 Um die Höhe des Sitzes einzustellen nehmen Sie das Kind aus...

Page 40: ...rincludesoneelectronicplaytraythatattachestothewalkerframeas showninstep7 Thefunctionanduseoftheplaytrayareshownhere Using Electronic Play Toy Tray A B C D E F G H I Lights up when lower button is pushed Petal shaped windmill rotating toy Turn dial to hear rattle Press button to hear born Turn wheel to steer Press button to hear music Move beads back and forth Switch Push roller forward and pull b...

Page 41: ...el am Gerät die auf Material oder Verarbeitungsfehler zurückzuführen sind entweder durch Reparatur oder Austausch des kompletten Produkts Diese Garantie erstreckt sich nicht auf Schäden die durch unsachgemäßen Gebrauch normale Abnutzung oder normalen Verschleiß oder Gebrauch entstehen sowie auf Mängel die den Wert oder den Betrieb des Produkts nur unwesentlich beeinflussen Schäden die durch Überla...

Page 42: ...IMPORTED BY BANINNI BELGIUM ...

Reviews: