1586-006 en/2022-08
Instructions for use
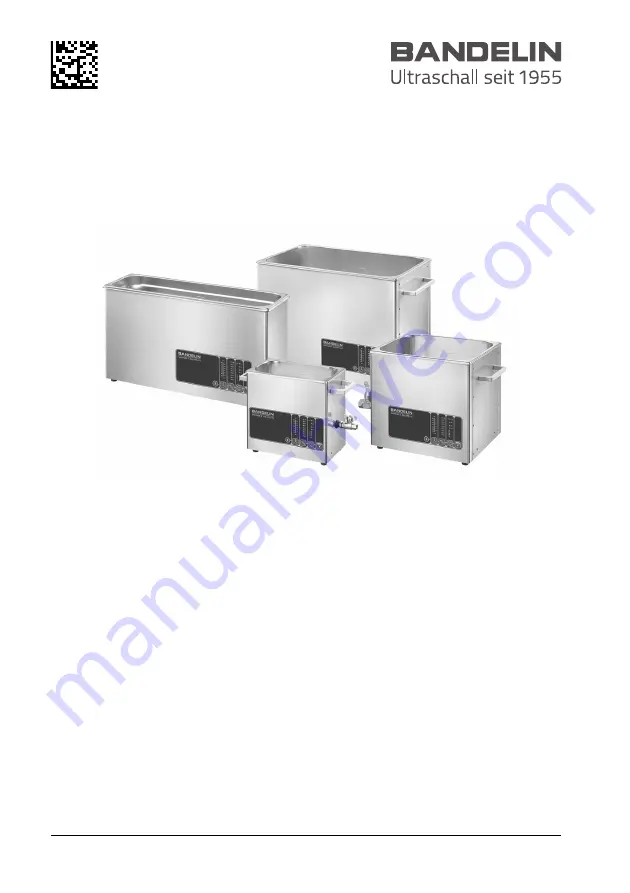
SONOREX DIGIPLUS
High-performance ultrasonic baths
Valid for:
DL 102 HDL 156 BHDL 255 HDL 510 HDL 512 HDL 514 BHDL 1028 H
Dokument: 1586-006
Sprache: en
Version: 2022-08
Page 1: ...006 en 2022 08 Instructions for use SONOREX DIGIPLUS High performance ultrasonic baths Valid for DL 102 H DL 156 BH DL 255 H DL 510 H DL 512 H DL 514 BH DL 1028 H Dokument 1586 006 Sprache en Version 2022 08 ...
Page 2: ...2 46 1586 006 en 2022 08 2022 1 2 GmbH Co KG Heinrichstr 3 4 12207 Berlin Germany Phone 49 30 76880 0 Fax 49 30 7734699 info bandelin com Certified in accordance with ISO 9001 and ISO 13485 ...
Page 3: ...ns used 9 2 8 Disposing of sonication fluid 9 2 9 Erosion of the oscillating tank 10 2 10 Preventing damage to the ultrasound bath 10 2 11 Disturbance of wireless communication 11 2 12 Safety stickers on the ultrasound bath 11 3 Design and function 12 3 1 Structure 12 3 2 Control panel 13 3 3 Function 13 4 Preparation for operation 14 4 1 Installation site requirements 14 4 2 Fitting ball valve 14...
Page 4: ...uid DEGAS 23 5 10 Adding goods to be treated 24 5 11 Remove treated objects 24 5 12 Empty the oscillating tank 25 5 13 Enabling and blocking continuous operation 26 5 14 Troubleshooting a malfunction 27 6 Maintenance 28 6 1 Cleaning and maintaining the ultrasound bath 28 6 2 Tests 28 6 3 Performing the foil test 30 6 4 Repair 33 7 Disposal 34 8 Device information 35 8 1 Technical data 35 8 2 Ambie...
Page 5: ...hese instructions for use before using the ultrasound bath Pay special attention to chapter 2 Safety If you pass this ultrasound bath on to others please enclose these instructions for use Contact your specialist dealer or BANDELIN if any of your ques tions are not answered in these instructions for use Information on service can be found in chapter 6 4 Repair Illustrations are provided as example...
Page 6: ...ormation on the sonication fluid can be found in chapter 5 2 Sonication fluid Objects to be treated may not be placed on the bottom of the oscil lating tank They must be placed in the sonication fluid in an insert basket or another suitable container An overview of suitable accessories can be found in chapter 10 Accessories In the case of stains discolouration rust etc a deep cleaning can be perfo...
Page 7: ... Only connect the ultrasound bath to a power outlet with a grounded socket If you notice a defect in the ultrasound bath disconnect the mains plug immediately Do not connect a defective ultrasound bath to the mains Repairs should only be carried out by the manufacturer See chapter 6 4 Repair Position the ultrasound bath so that it is easy to unplug the mains connection at any time and without diff...
Page 8: ...g tank which can be very hot After operation allow the ultrasound bath to cool down before lifting it for emp tying Non aqueous fluids can heat up many times faster than water A possible flashpoint can be reached or exceeded after a very short sonication time In the case of high boiling liquids the bath tem perature can rise to over 120 C due to the energy input of the ultrasound This can lead to ...
Page 9: ...ce Observe the information on the label and in the safety data sheet of the preparation Keep the preparations away from children and untrained per sons 2 8 Disposing of sonication fluid Dispose of the sonication fluid according to the information pro vided by the manufacturer of the ultrasound agents used The rec ommended ultrasound agents from the TICKOPUR TICKOMED and STAMMOPUR product ranges fr...
Page 10: ...dishwashing detergents Chloride ions will corrode stainless steel Only use the ultrasound bath with accessories that are suitable for the device and the objects to be treated e g a basket Do not place any objects to be treated directly on the bottom of the oscillating tank An overview of suitable accessories can be found in chapter 10 Accessories 2 10 Preventing damage to the ultrasound bath Only ...
Page 11: ...erence occurs with the operation of a wireless device move it further away from the ultrasound bath The ultrasound bath meets the requirements for class B devices according to EN 55011 2 12 Safety stickers on the ultrasound bath Observe all safety labels on the ultrasound bath Keep the safety stickers in legible condition Do not remove them Replace them if they are no longer legible To do so pleas...
Page 12: ... 2022 08 3 Design and function 3 1 Structure Fig 1 Overview of the device 1 Handles depending on model 2 Oscillating tank 3 Control panel 4 Filling level mark 5 Drain with ball valve depending on model 6 Housing 7 Device feet 2 1 1 4 3 5 6 7 ...
Page 13: ...s in the sonication liquid Cavitation bubbles are formed at the pressure minima At higher ambient pressure around the bubbles they collapse very quickly This results in strong local microcurrents on the surfaces of the objects being treated This removes dirt from the surface of the objects Dirt particles are removed and fresh sonication liquid flows in The device uses SweepTec a technology in whic...
Page 14: ...n fluid For weight and work content see chapter 8 1 Technical data Adequate ventilation must be ensured The air supply under the bottom of the unit may not be obstructed If a sound proof box is used it must also ensure sufficient ventilation A water connection should be available nearby to fill the ultra sound bath A basin must be available to drain or pour out the sonication fluid 4 2 Fitting bal...
Page 15: ... off the ultrasound Result A noticeable noise can be heard when the ultrasound is switched on Contact our service department if you cannot hear any noise A foil test should be performed before the first use This is used to document the effectiveness of the ultrasound See chapter 6 3 Per forming the foil test 4 4 Rinsing out the oscillating tank Thoroughly rinse the ultrasound bath s oscillating ta...
Page 16: ... sonicated are introduced in the contact liquid in an inset beaker for transfer of the ultrasound in the oscil lating tank The contact liquid in the oscillating tank must contain a surfactant preparation For suitable accessories for direct and indirect sonication see chap ter 10 Accessories 5 2 Sonication fluid A solution made from water and a special ultrasound agent is used as the sonication flu...
Page 17: ...eated Excessively long sonication can damage the surface of the goods to be treated Select a short sonication time where possible The ideal sonication time depends on several factors Type and concentration of agent Working temperature of sonication fluid Type of soiling Type of goods to be treated in particular materials Note the information on the recommended sonication time from the agent manufa...
Page 18: ...idity condensation forms inside the device if you fill it with cold water Do not pour cold water into the ultrasonic oscillating tank when humidity is high NOTICE If you use an agent in powder form do not pour it directly into the ultrasonic oscillating tank Mix agents in powder form in another container before you pour them into the ultrasonic oscillating tank Only pour the agent into the ultraso...
Page 19: ... with a drain The device must be switched off Procedure 1 Fill the ultrasonic oscillating tank with water up to 1 3 2 Pour the correct quantity of agent into the ultrasonic oscillating tank See chapter 9 Dosing table 3 Fill the tank with water up to the filling level mark while avoiding foam formation When using indirect sonication take the dis placement caused by inset vessels into consideration ...
Page 20: ...nd switches off automatically as soon as the set sonication time has elapsed Then only the LED with the most recently set sonication time will light up In continuous opera tion the green LED next to the symbol lights up continuously The ultrasound does not switch off automatically You can extend shorten or switch off the sonication at any time If you do not press a button for more than 12 hours th...
Page 21: ... oscillat ing tank with the lid if available Information The heater is equipped with overtemperature protection If there is no heating function disconnect the device from the mains and allow it to cool down to below 50 C before putting it back into operation Requirements The ultrasonic oscillating tank has been filled The mains plug has been connected to an earthed mains socket Device is switched ...
Page 22: ...ure scale lights up Procedure 1 Press the power setting button repeatedly until the desired LED is displayed between 20 and 100 Information The current power is indicated by an illuminated yellow LED The last selected power setting is saved when the unit is switched off and used again when the unit is switched back on The power should be set to 100 for foil tests and for degas sing the sonication ...
Page 23: ...again from 60 C 5 9 Degassing the sonication fluid DEGAS Sonication fluid that has been freshly filled or left in the ultrasonic oscillating tank for a long period must be degassed before use Degassing the sonication fluid increases the effect of the ultra sound You can use the DEGAS function to perform rapid degassing of the sonication fluid 1 Press the start stop button for at least 2 seconds Th...
Page 24: ...ltrasound must be switched off while objects are being inserted Check the filling level The goods to be treated must be com pletely submerged in the fluid Inset beakers for indirect sonica tion need to be submerged at least 2 cm in the sonication fluid Remove air bubbles from cavities Rotate the objects accord ingly Remove air bubbles under inset beakers The ultrasound only works where the fluid i...
Page 25: ...g CAUTION Hot sonication fluid and oscillating tank There is a risk of burns when lifting the ultrasound bath to empty it Allow the ultrasound bath to cool down before lifting it Contamination on the bottom of the oscillating tank reduces the ultrasonic output Empty and clean the oscillating tank if the soni cation fluid is visibly contaminated Also observe the specifications of the manufacturer o...
Page 26: ...o prevent accidental activation of con tinuous operation Requirement The mains plug is disconnected Procedure Press and hold down the button for setting the sonication time At the same time insert the mains plug into an earthed mains socket The yellow 1 min LED lights up Information You can enable continuous operation again in the same way The green LED next to the symbol lights up to confirm this...
Page 27: ... of objects to be treated Uneven noises wobbling Inadequate fill level in the oscillating tank Slightly change the fill level of the sonication fluid in the oscillating tank In doing so observe the minimum fill level and correct dosing of the preparation Reposition the objects to be treated Heating is not work ing The heater has switched off due to overtemperature The heating is defective Disconne...
Page 28: ...tions Rinse the oscillating tank thoroughly with water after each use Wipe dry with a soft cloth Clean edges and remove residues with a stainless steel care product without abrasive additives Do not use steel wool scrapers or shavers to clean the oscillat ing tank Metal parts and rust particles in the oscillating tank cause corro sion Therefore do not leave any metal parts in the oscillating tank ...
Page 29: ... the ultrasound and the heating The output can be checked with a wattmeter between the device mains plug and the socket Procedure 1 Fill the ultrasonic oscillating tank with water 2 Set the power to 100 3 Switch on the ultrasound and if fitted the heating one after the other Read the output Switch the heating and the ultrasound off again 4 Compare the readings with the technical data See chapter 8...
Page 30: ... the filling level mark Temperature of the sonication fluid Degassing time Frame positioning Foil type brand thickness Sonication time Type and concentration of the ultrasound preparation Fluid for the foil test In order to obtain a sufficiently strong cavitation effect the foil test also requires the surface tension of the water used to be reduced using surfactant preparations We recommend the fo...
Page 31: ...pecified by the manufacturer 2 Degas the sonication fluid See chapter 5 9 Degassing the sonication fluid DEGAS 3 Stretch aluminium foil house hold foil 10 μm to 25 μm thick over the foil test frame Depending on the tank size it is possible that the frame will pro trude outside the tank Covering the part of the foil test frame that is covered by the sonication fluid will be enough 4 Place the cover...
Page 32: ...document template can also be completed and archived 9 Rinse the oscillating tank thoroughly to remove any detached foil particles Suitable foil test frames can be ordered from BANDELIN electronic GmbH Co KG The foil test frames are designed for a wide range of tank dimensions Aluminium foil is also required to conduct the test but it is not included in the scope of delivery Type Order No for FT 4...
Page 33: ...ns Before sending the device back to us for inspection repair the device and accessories must be cleaned pursuant to current laws and regulations and if necessary must also be disinfected with a surface disinfection agent listed by the VAH Alliance for Applied Hygiene Please understand that we cannot start work until this Certificate is completed in full and submitted Download the Certificate of D...
Page 34: ...rly as elec tronic waste if it can no longer be used Do not dis pose of the ultrasonic bath with household waste Observe the locally applicable regulations for the disposal of electronic waste The vibrating elements contain sintered ceramics made of lead titanium zirconium oxide EC No 235 727 4 CAS No 12626 81 2 This use is authorised in accordance with RoHS Directive 2011 65 EU Annex III exceptio...
Page 35: ... class I Degree of protection IP 33 Ultrasonic frequency 35 kHz Type Ultrasonic peak power ultra sonic nominal output Heating out put Power con sumption 230 V Power con sumption 115 V W W A A DL 102 H 480 120 140 1 2 2 3 DL 156 BH 860 215 600 3 6 7 1 DL 255 H 640 160 280 2 0 3 9 DL 510 H 640 160 400 2 5 DL 512 H 860 215 400 2 7 5 4 DL 514 BH 860 215 600 3 6 7 1 DL 1028 H 1200 300 1300 7 0 14 0 ...
Page 36: ...BH 500 140 150 6 0 G 7 2 DL 255 H 300 150 150 3 8 G 4 8 DL 510 H 300 240 150 6 6 G 7 4 DL 512 H 300 240 200 8 7 G 8 2 DL 514 BH 325 300 200 12 5 G 9 8 DL 1028 H 500 300 200 19 0 G 14 6 Overvoltage category II Degree of contamination 2 Permissible ambient temperature 5 40 C Permissible relative humidity up to 31 C 80 non condensing Permissible relative humidity up to 40 C 50 non condensing Altitude...
Page 37: ... l 1 2 3 5 10 DL 102 H 2 0 1 9 l 20 ml 1 9 l 40 ml 1 9 l 60 ml 1 9 l 100 ml 1 8 l 200 ml DL 156 BH 6 0 5 9 l 60 ml 5 8 l 120 ml 5 8 l 180 ml 5 7 l 300 ml 5 4 l 600 ml DL 255 H 3 8 3 7 l 40 ml 3 7 l 80 ml 3 6 l 120 ml 3 6 l 190 ml 3 4 l 380 ml DL 510 H 6 6 6 5 l 70 ml 6 4l 140 ml 6 4 l 200 ml 6 2 l 330 ml 5 9 l 660 ml DL 512 H 8 7 8 6 l 90 ml 8 5 l 180 ml 8 4 l 270 ml 8 2 l 440 ml 7 8 l 870 ml DL 5...
Page 38: ...rom exterior contamination Condensation water is dis charged in the oscillating tank Sound reducing Inset basket K EM made of stainless steel An alternative to DIN sieve trays in the medical field KT basket holder required Basket holder KT made of stainless steel For inset baskets K EM or DIN sieve trays in the medical field Lid D T made of stainless steel For use with inset baskets without bracke...
Page 39: ... ket Basket holder Lid D T Insert tub DL 102 H K 3 C GH 1 D 100 D 3 T KW 3 DL 156 BH K 6 BL D 156 DL 255 H K 5 C D 255 D 5 T KW 5 DL 510 H K 10 GH 10 D 510 D 10 T KW 10 0 DL 512 H K 10 B D 510 D 10 T DL 514 BH K 14 B D 514 D 14 T KW 14 B DL 1028 H K 28 GH 28 D 1028 K 29 EM KT 30 D 28 T KW 28 0 ...
Page 40: ...r optimum utilisation of ultra sonic energy Beaker holder ES made of stainless steel For holding 4 inset beakers in larger ultrasonic baths Positioning for optimum utilisation of ultrasonic energy Impression tray holder LT 102 made of stainless steel For cleaning impression trays Insert basket PK C and K P made of plastic perforated For gentle cleaning of sensitive surfaces e g on instruments like...
Page 41: ... H KD 0 PD 04 SD 06 SD 09 PD 06 EB 05 DE 100 LT 102 PK 2 C ED 9 DL 156 BH KD 0 PD 04 SD 06 SD 09 PD 06 EB 05 DE 156 DL 255 H KD 0 PD 04 SD 06 SD 09 PD 06 EB 05 DE 255 K 5 P DL 510 H KD 0 PD 04 SD 06 SD 09 PD 06 EB 05 DE 510 ED 9 DL 512 H KD 0 PD 04 SD 06 SD 09 PD 06 EB 05 DE 510 DL 514 BH KD 0 PD 04 SD 06 SD 09 PD 06 EB 05 DE 514 ED 14 DL 1028 H KD 0 PD 04 SD 06 SD 09 PD 06 EB 05 2 ES 4 ...
Page 42: ...mm and 8 test tubes of up to Ø 16 mm May also be used as a test tube stand The test tube contents remain visible Sieve holder SH 7 made of stainless steel For individual sieve cleaning Sieve holder SH 28 C made of stainless steel For the gentle and simultaneous cleaning of up to 5 analysis sieves Ø 200 mm Silicone knob mat SM For the contact free positioning of highly sensitive instruments Fas ten...
Page 43: ... 102 H EK 10 EK 25 EK 50 EK 100 EK 250 GV 3 RG 2 SM 3 DL 156 BH EK 10 EK 25 EK 50 EK 100 EK 250 GV 3 SM 6 FE 12 DL 255 H EK 10 EK 25 EK 50 EK 100 EK 250 GV 3 SM 5 FE 12 DL 510 H EK 10 EK 25 EK 50 EK 100 EK 250 GV 10 DL 512 H EK 10 EK 25 EK 50 EK 100 EK 250 GV 10 DL 514 BH EK 10 EK 25 EK 50 EK 100 EK 250 GV 10 DL 1028 H EK 10 EK 25 EK 50 EK 100 EK 250 GV 10 SM 29 FE 12 ...
Page 44: ...10 Accessories 44 46 1586 006 en 2022 08 ...
Page 45: ...1586 006 en 2022 08 45 46 ...
Page 46: ...1586 006 en 2022 08 1 2 GmbH Co KG Heinrichstr 3 4 12207 Berlin Germany Phone 49 30 76880 0 Fax 49 30 7734699 info bandelin com www bandelin com ...